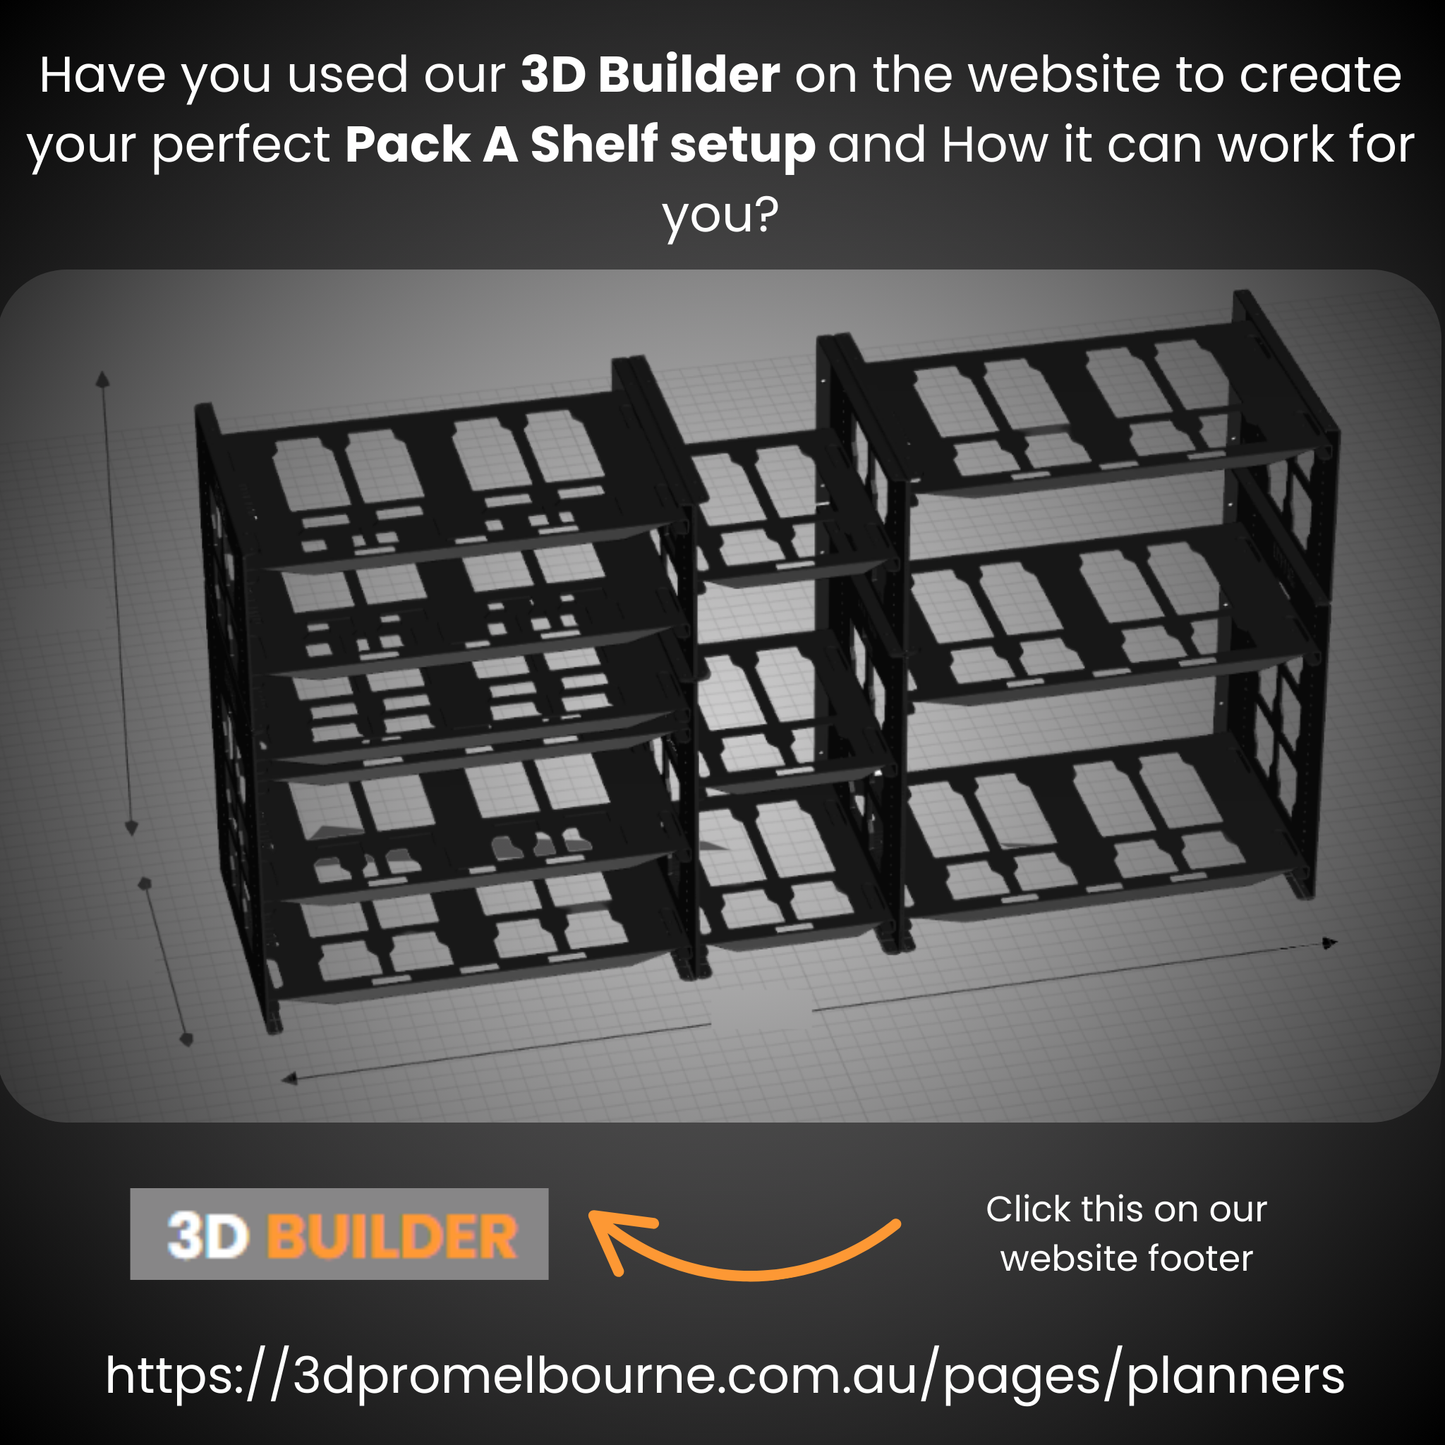
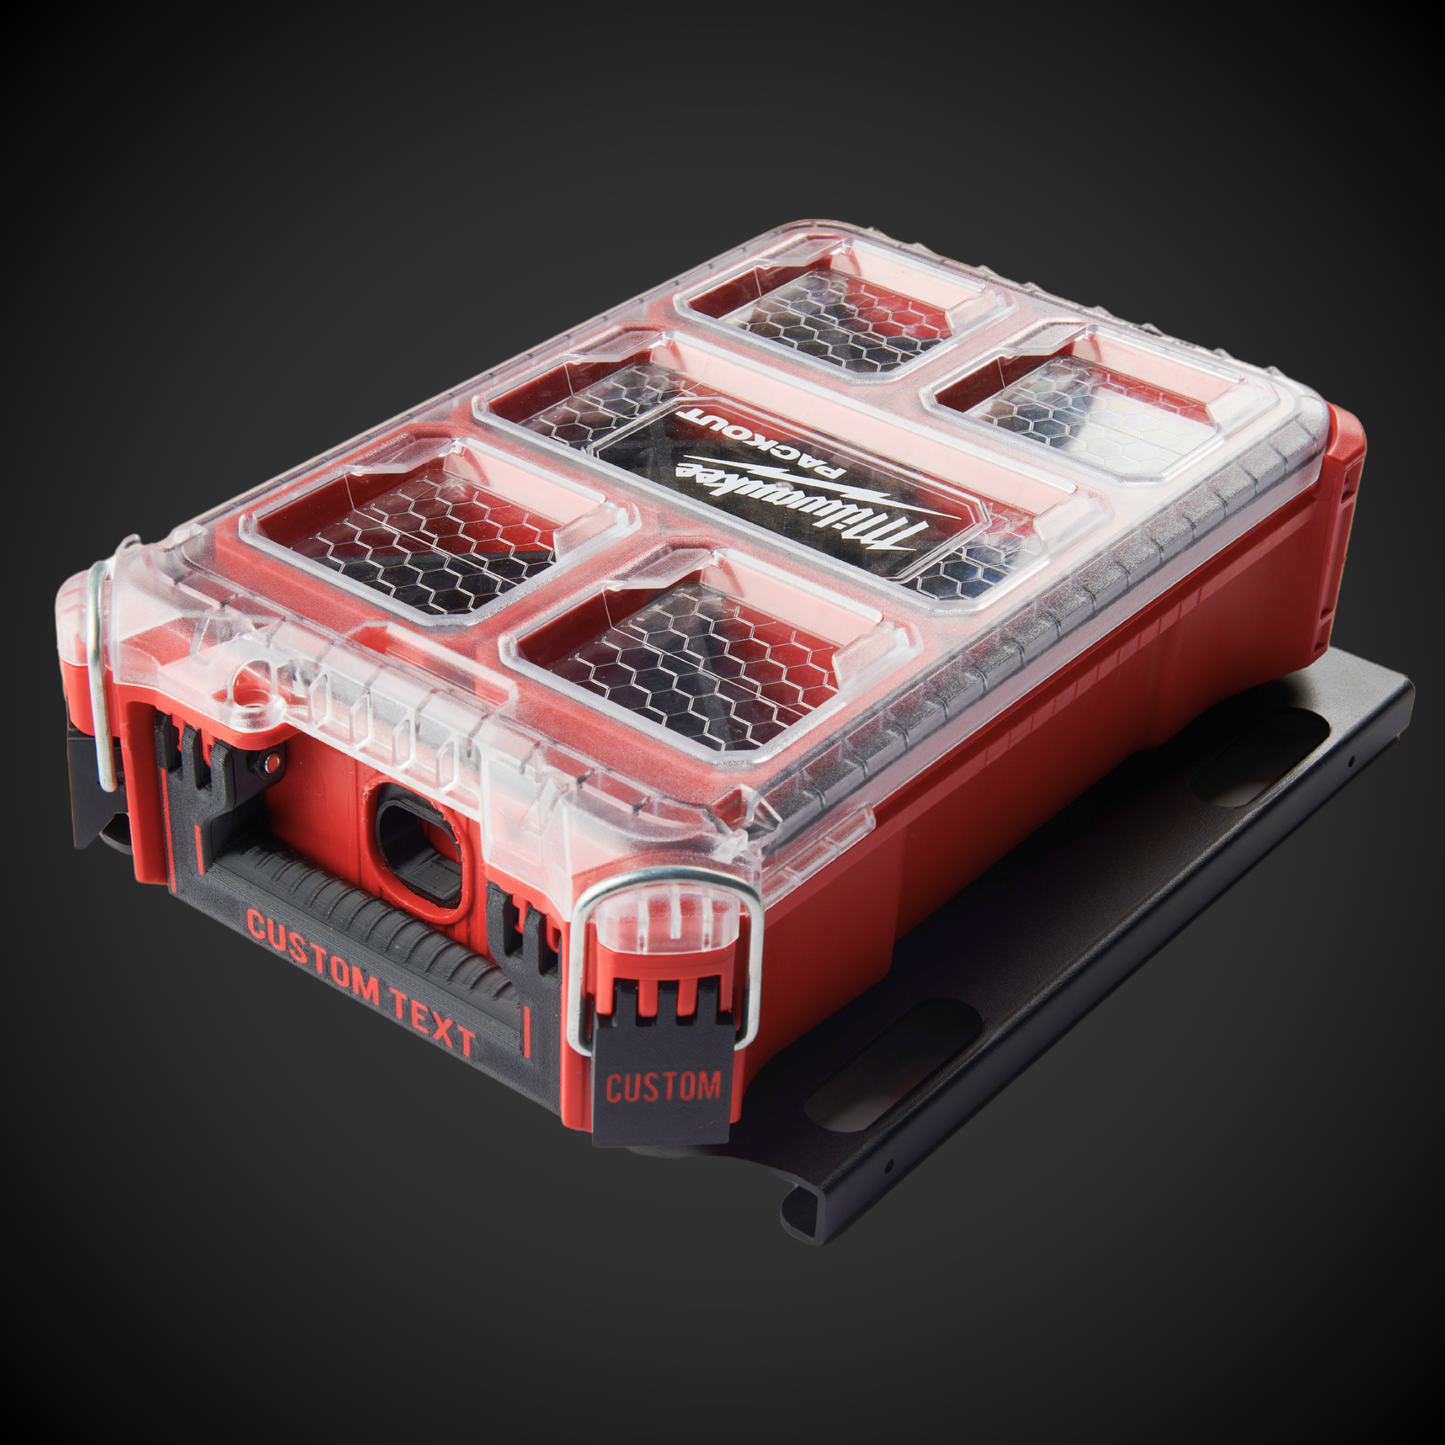
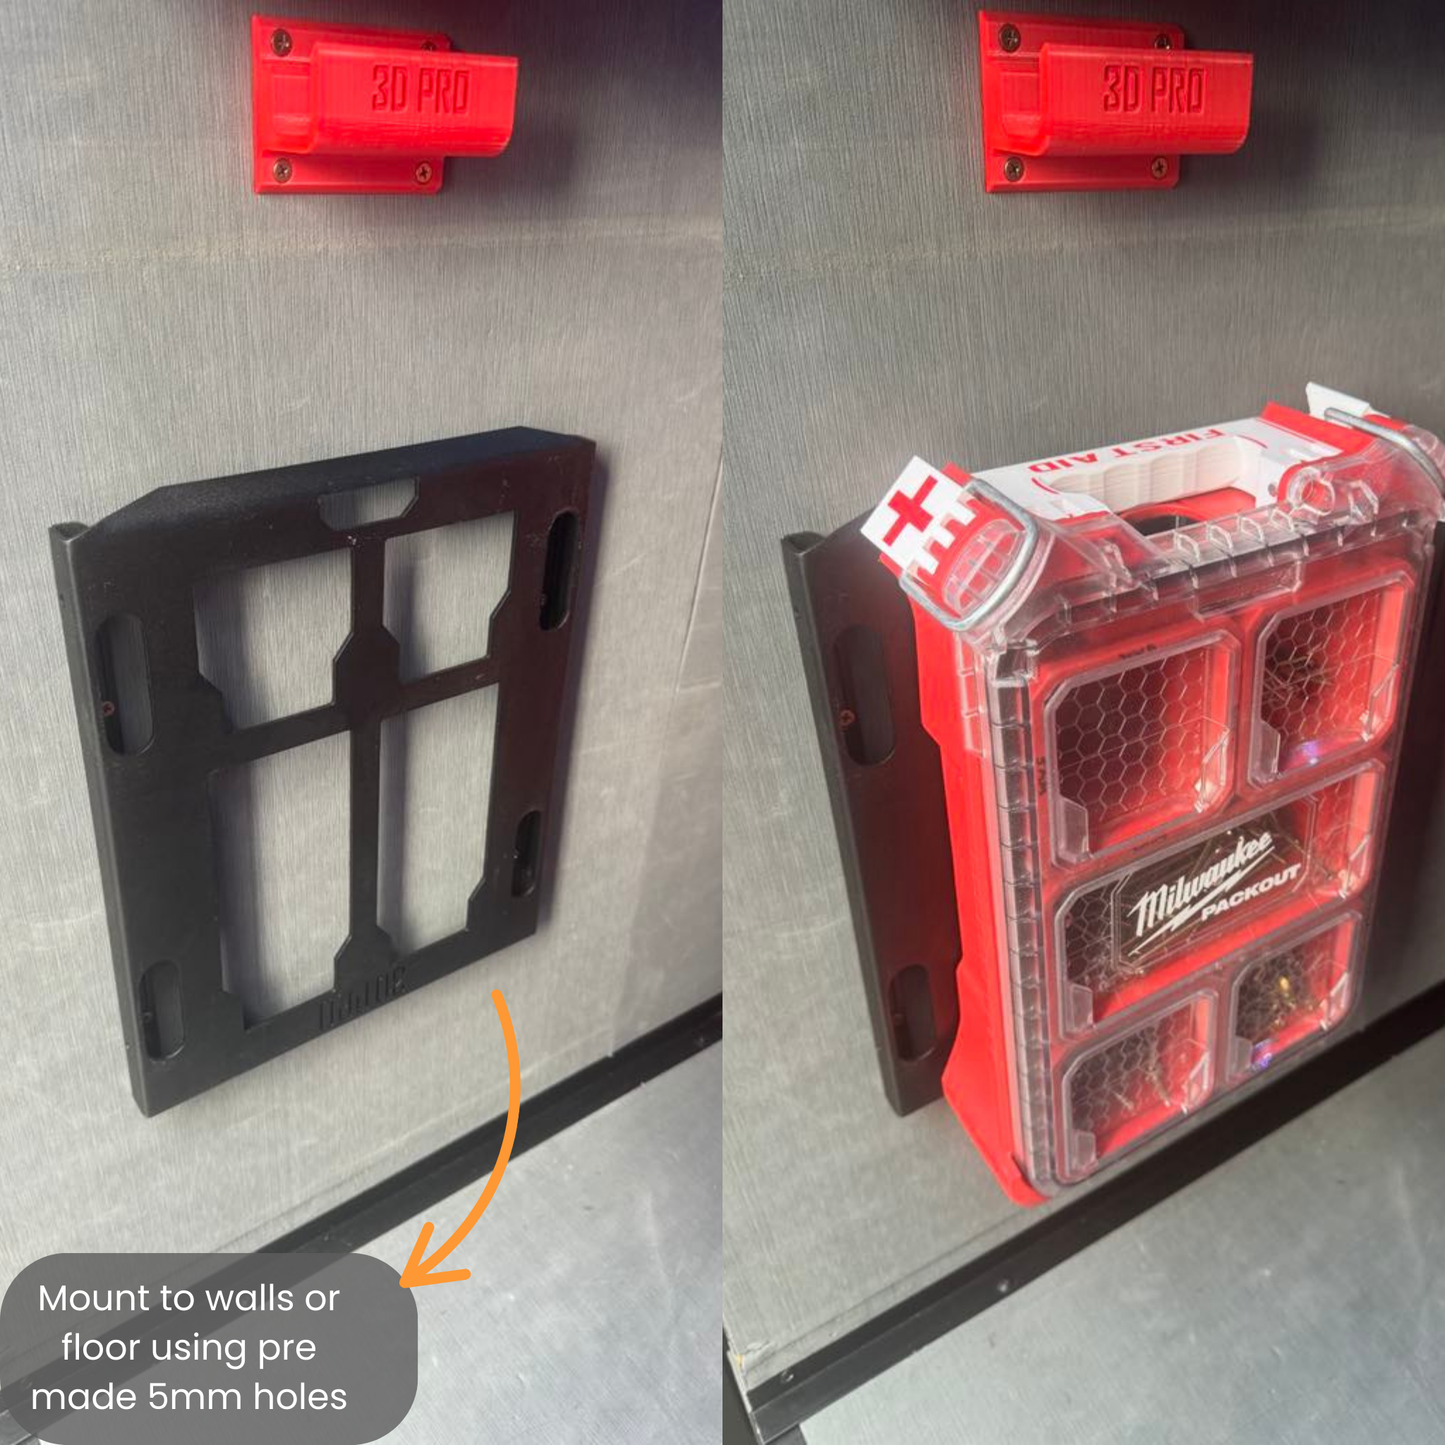
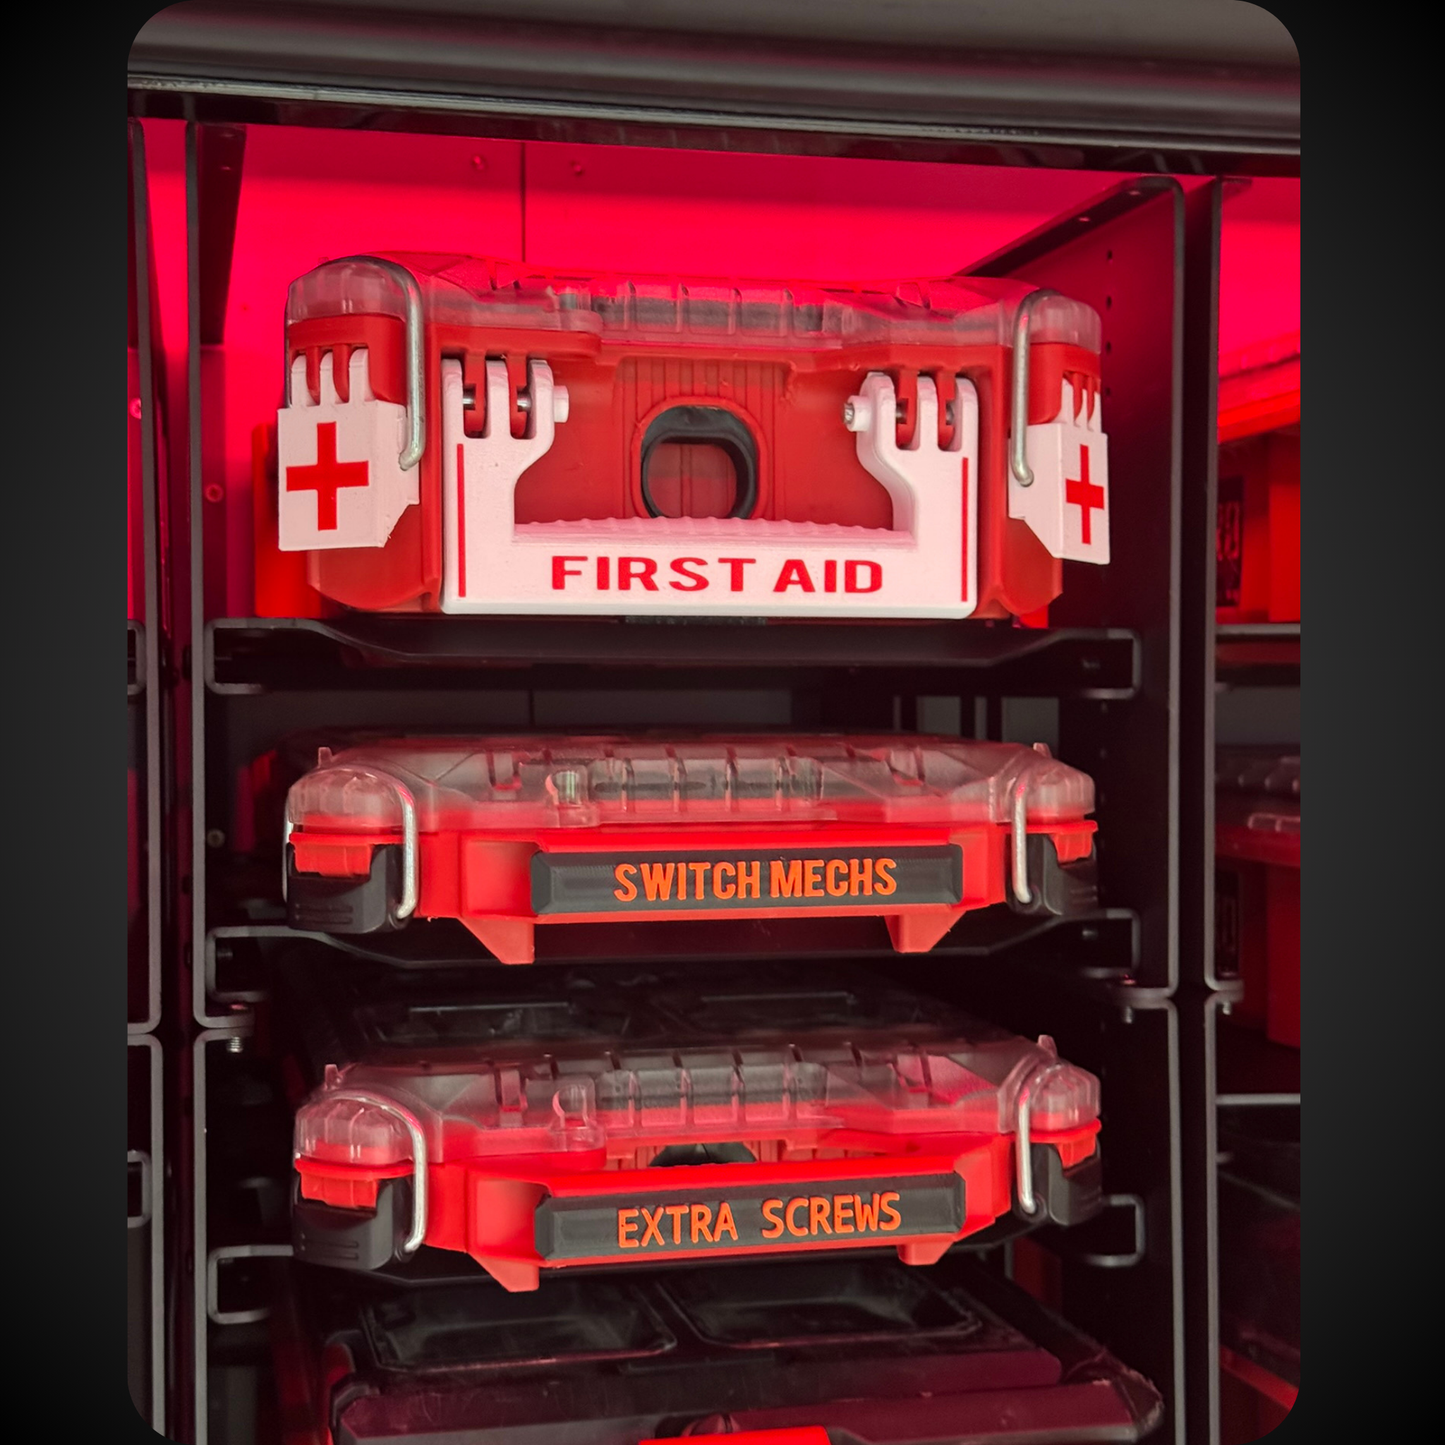
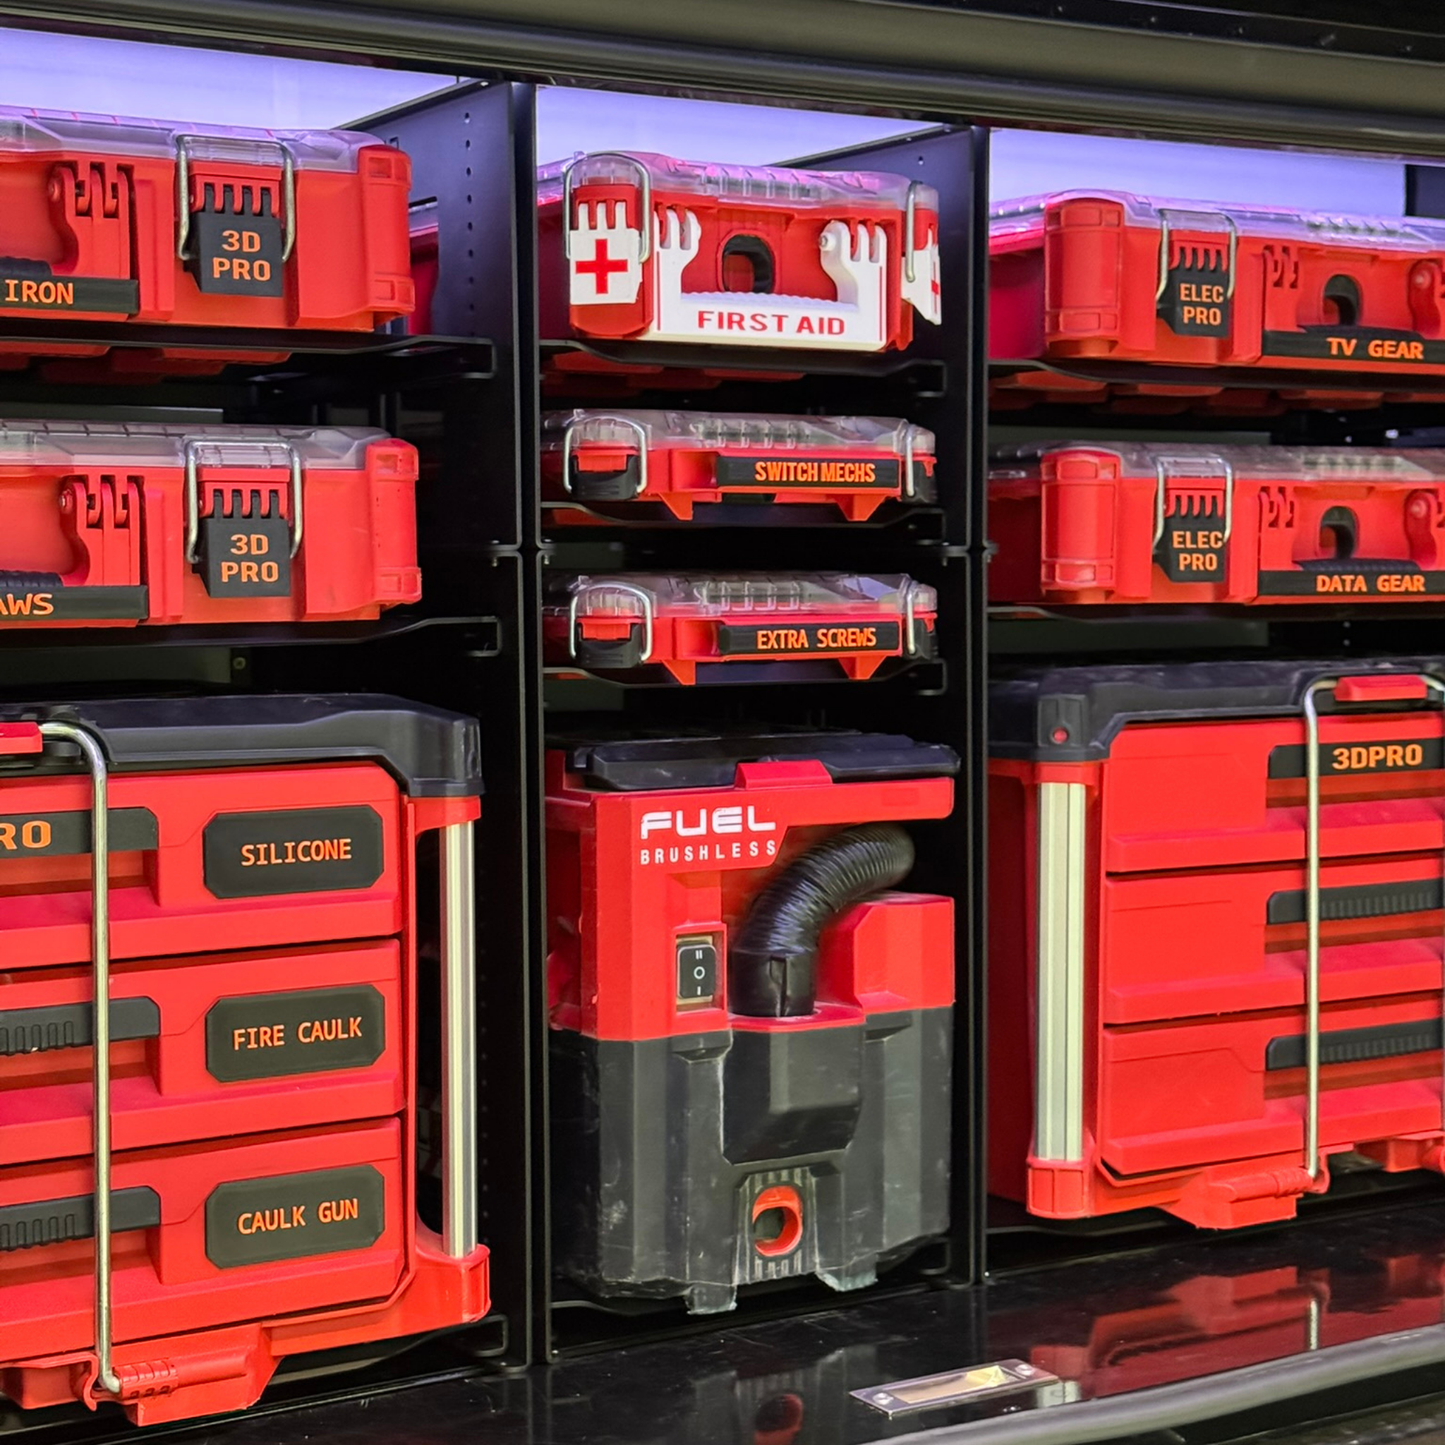
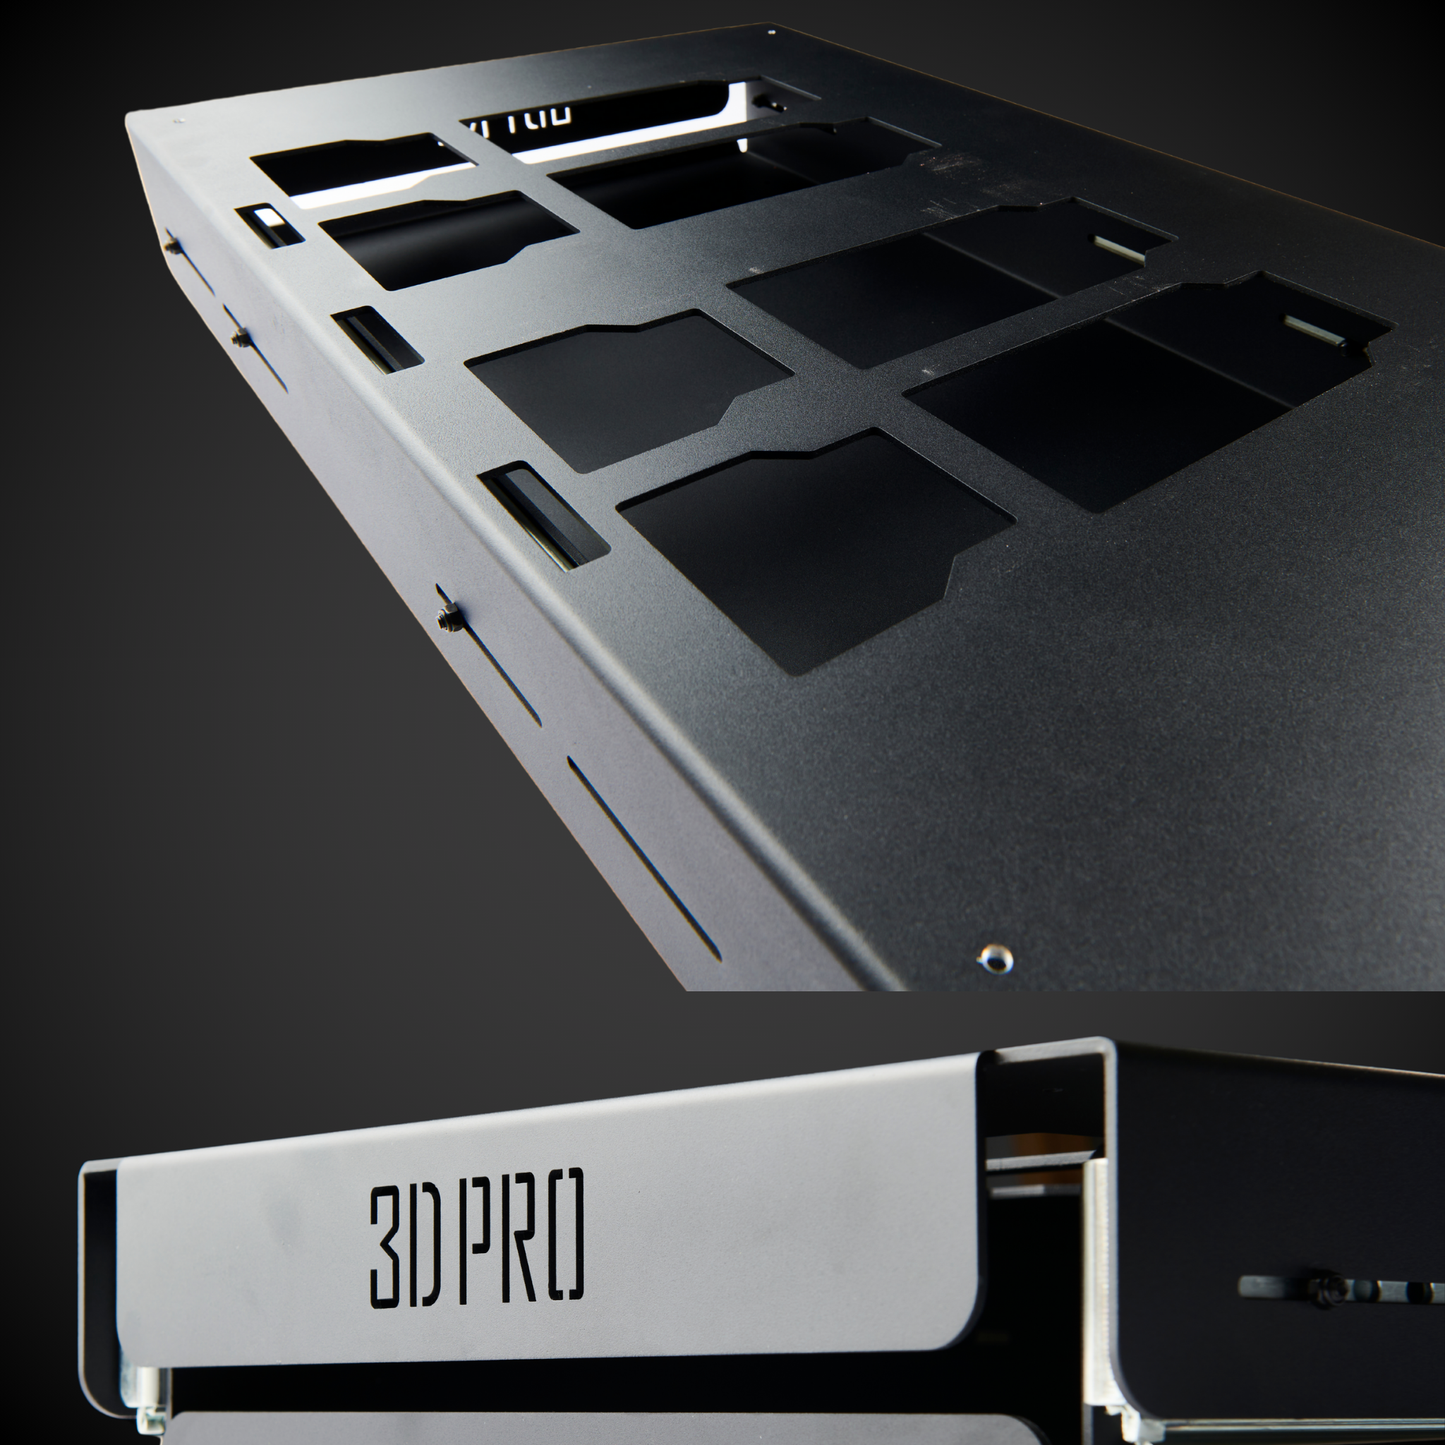
pack a shelf


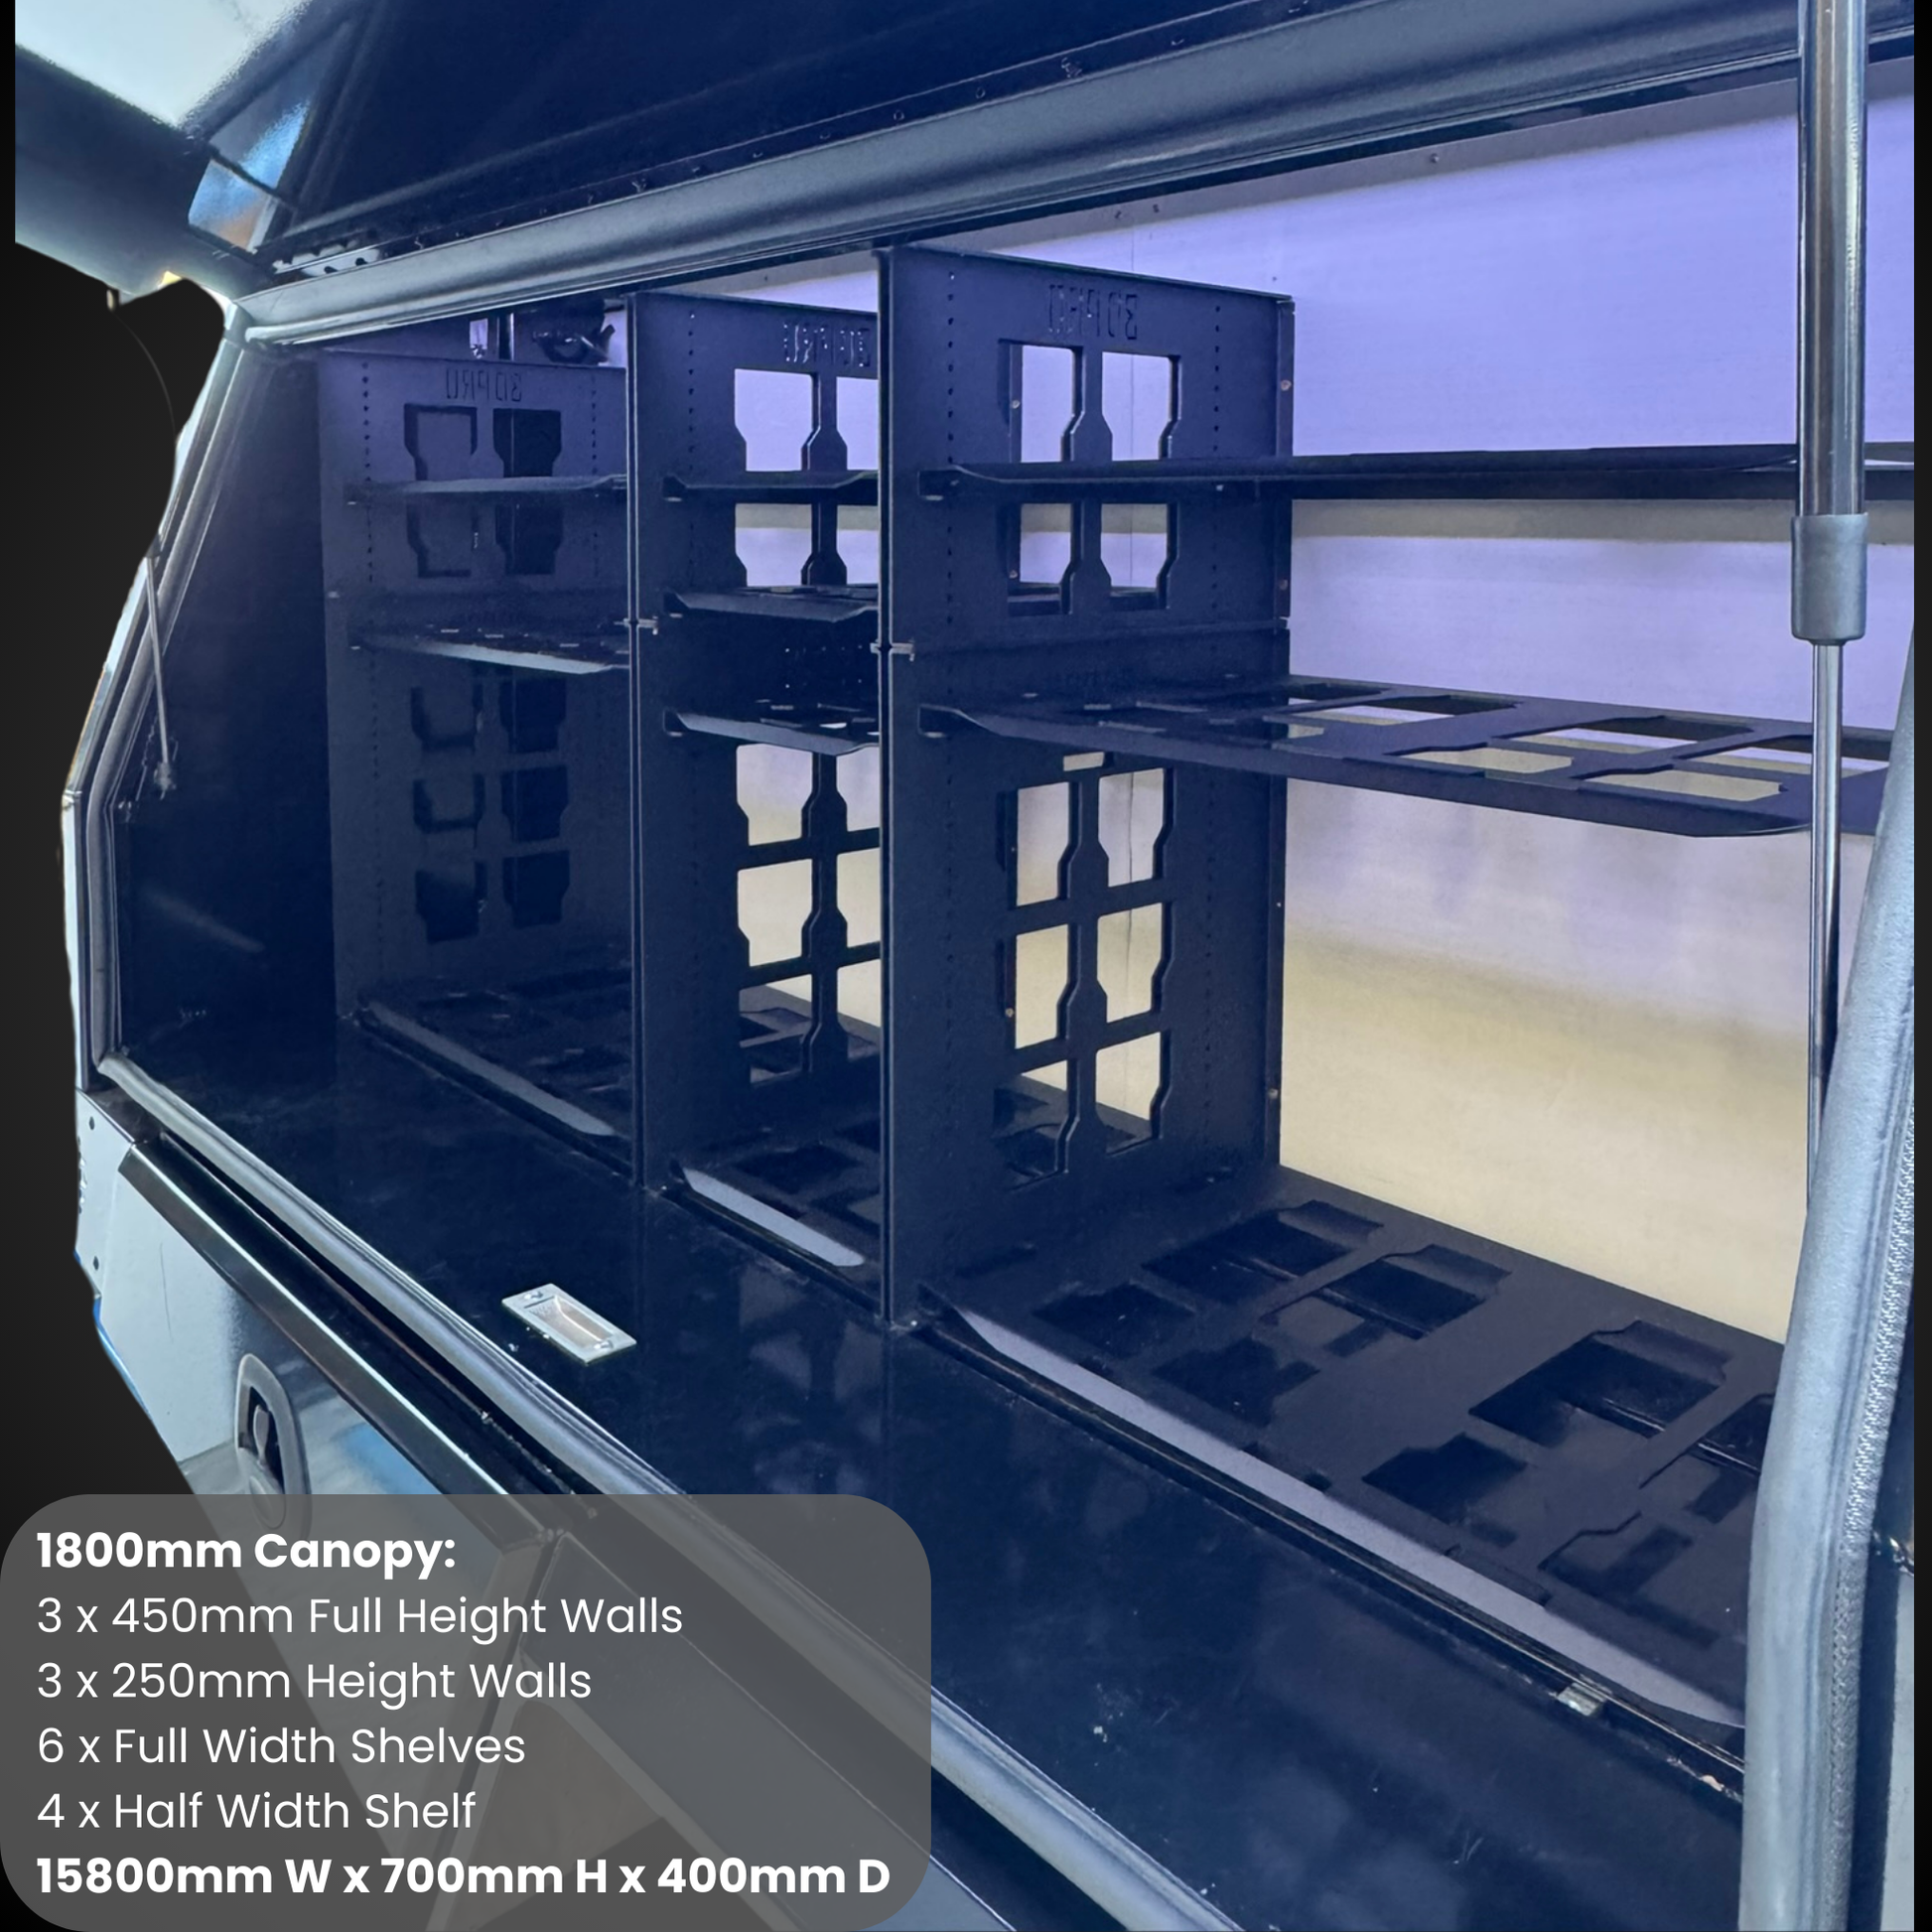

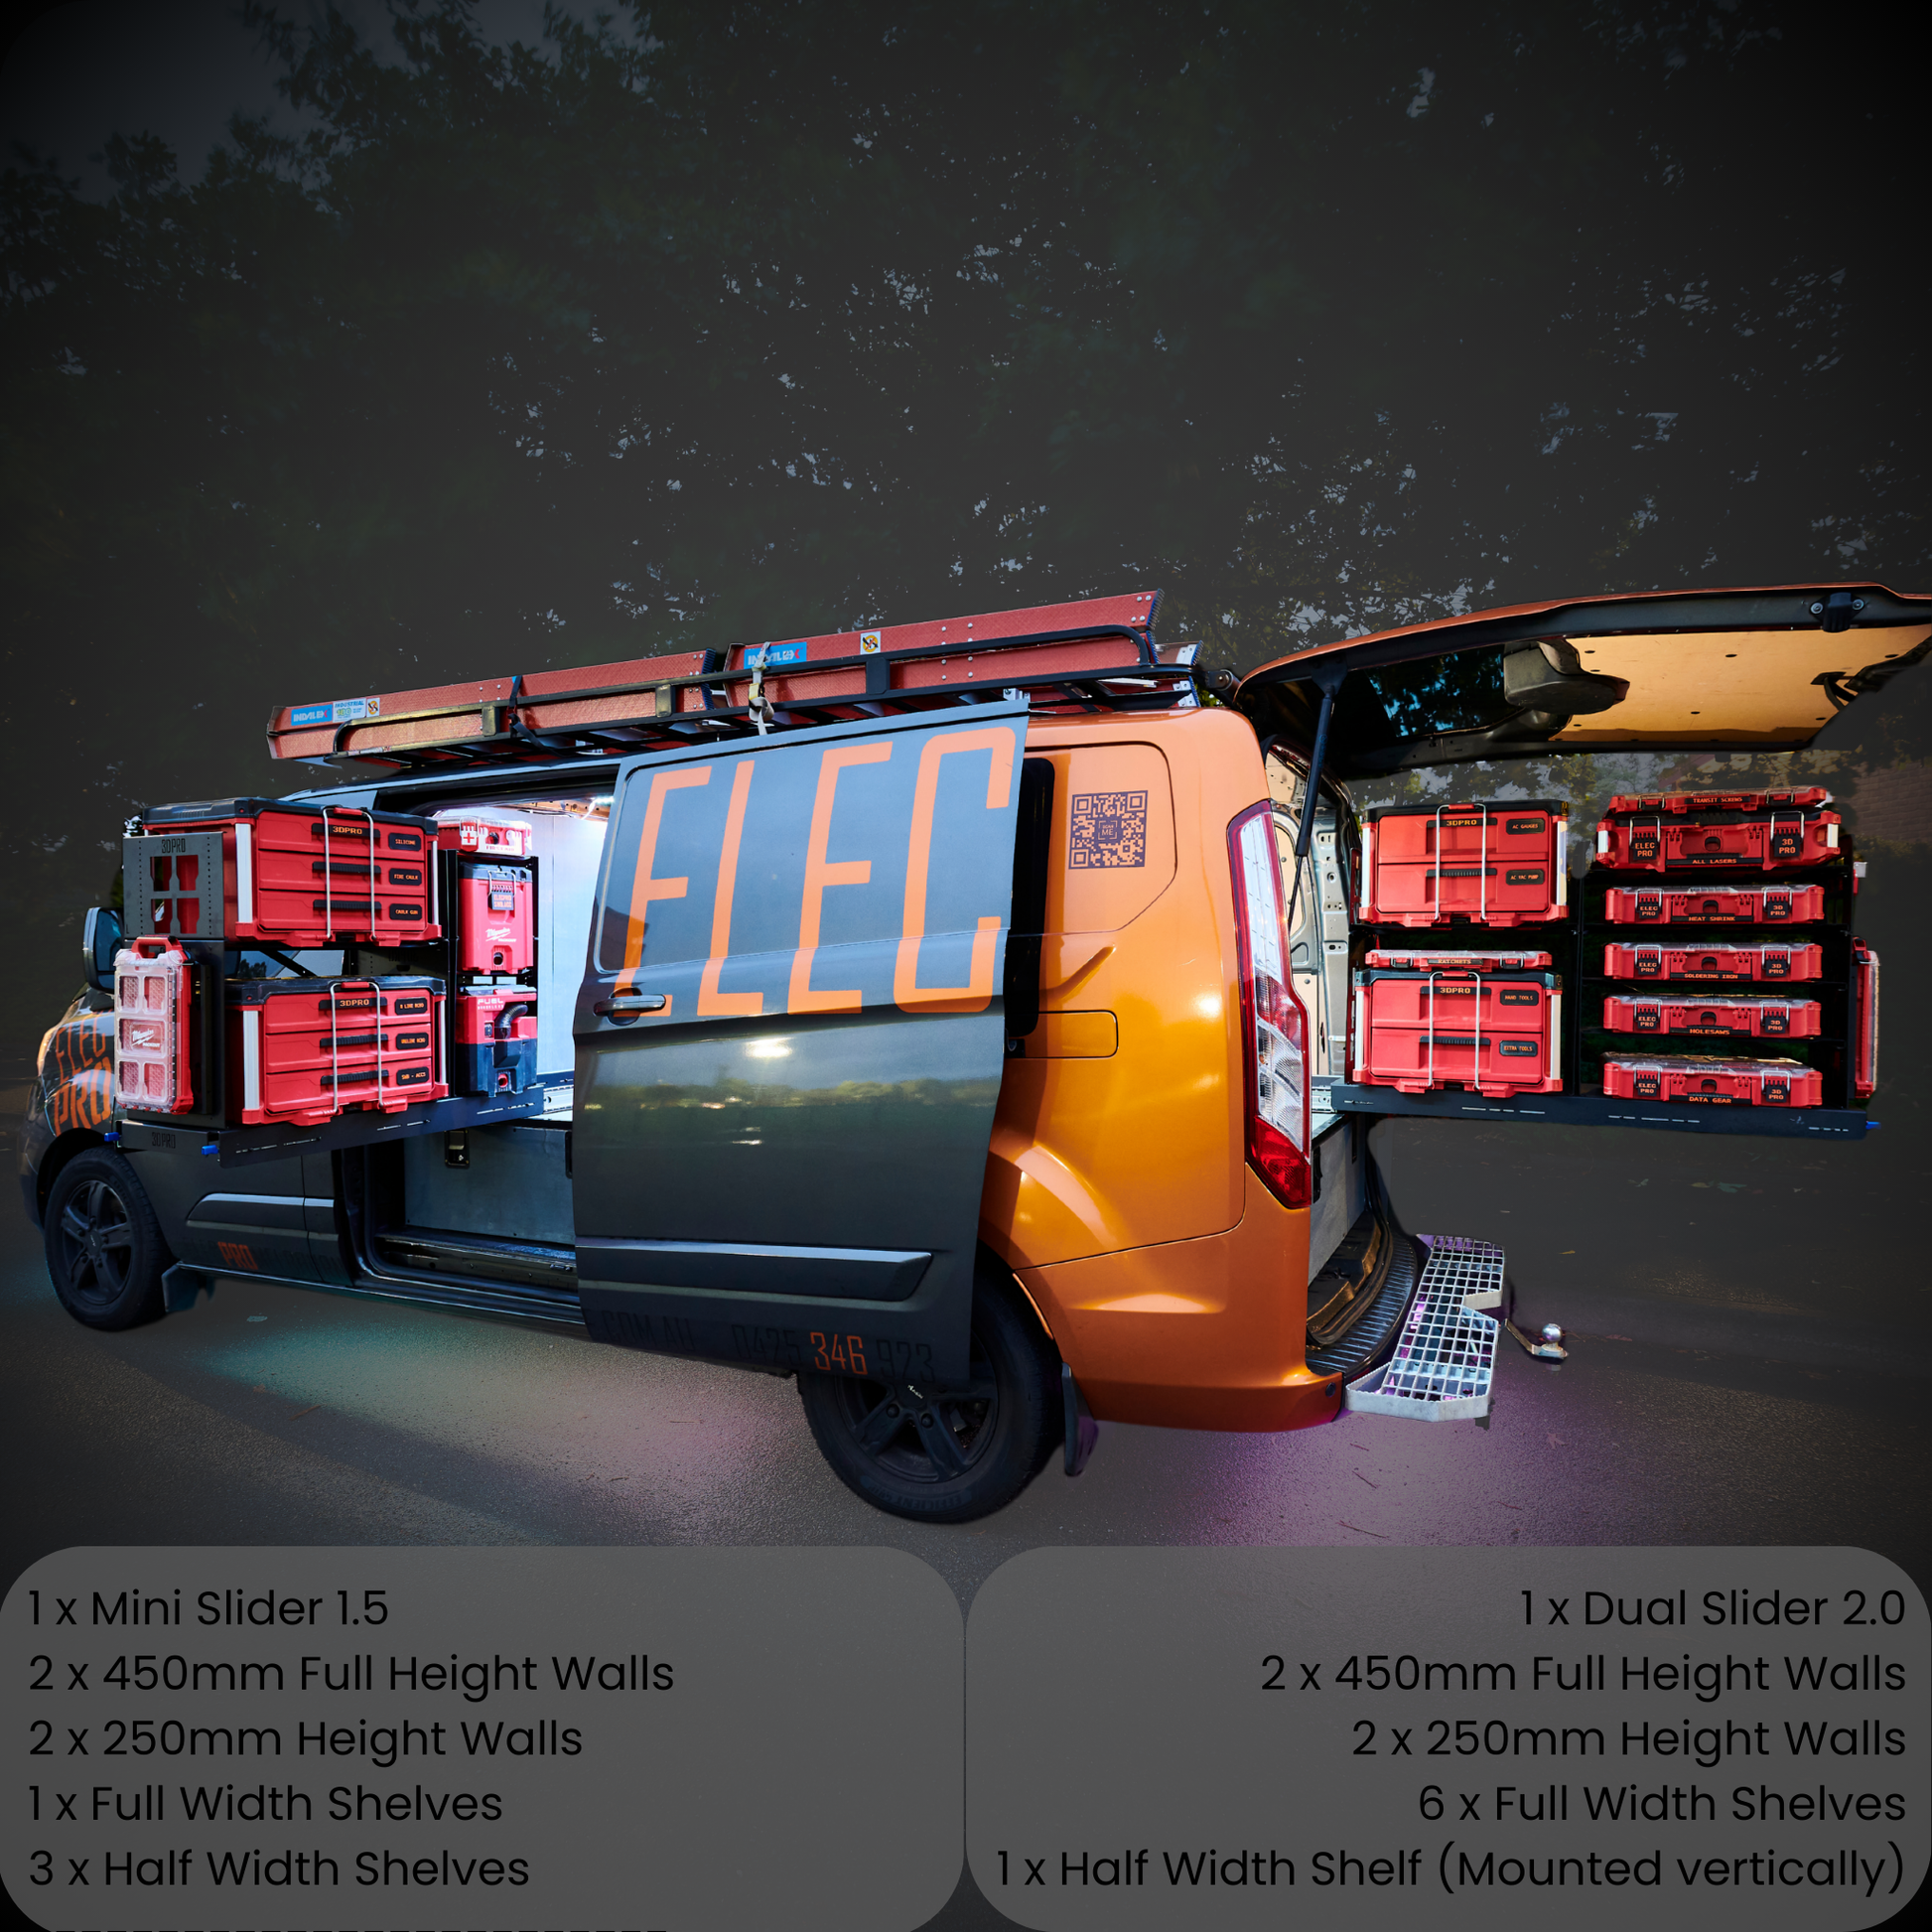
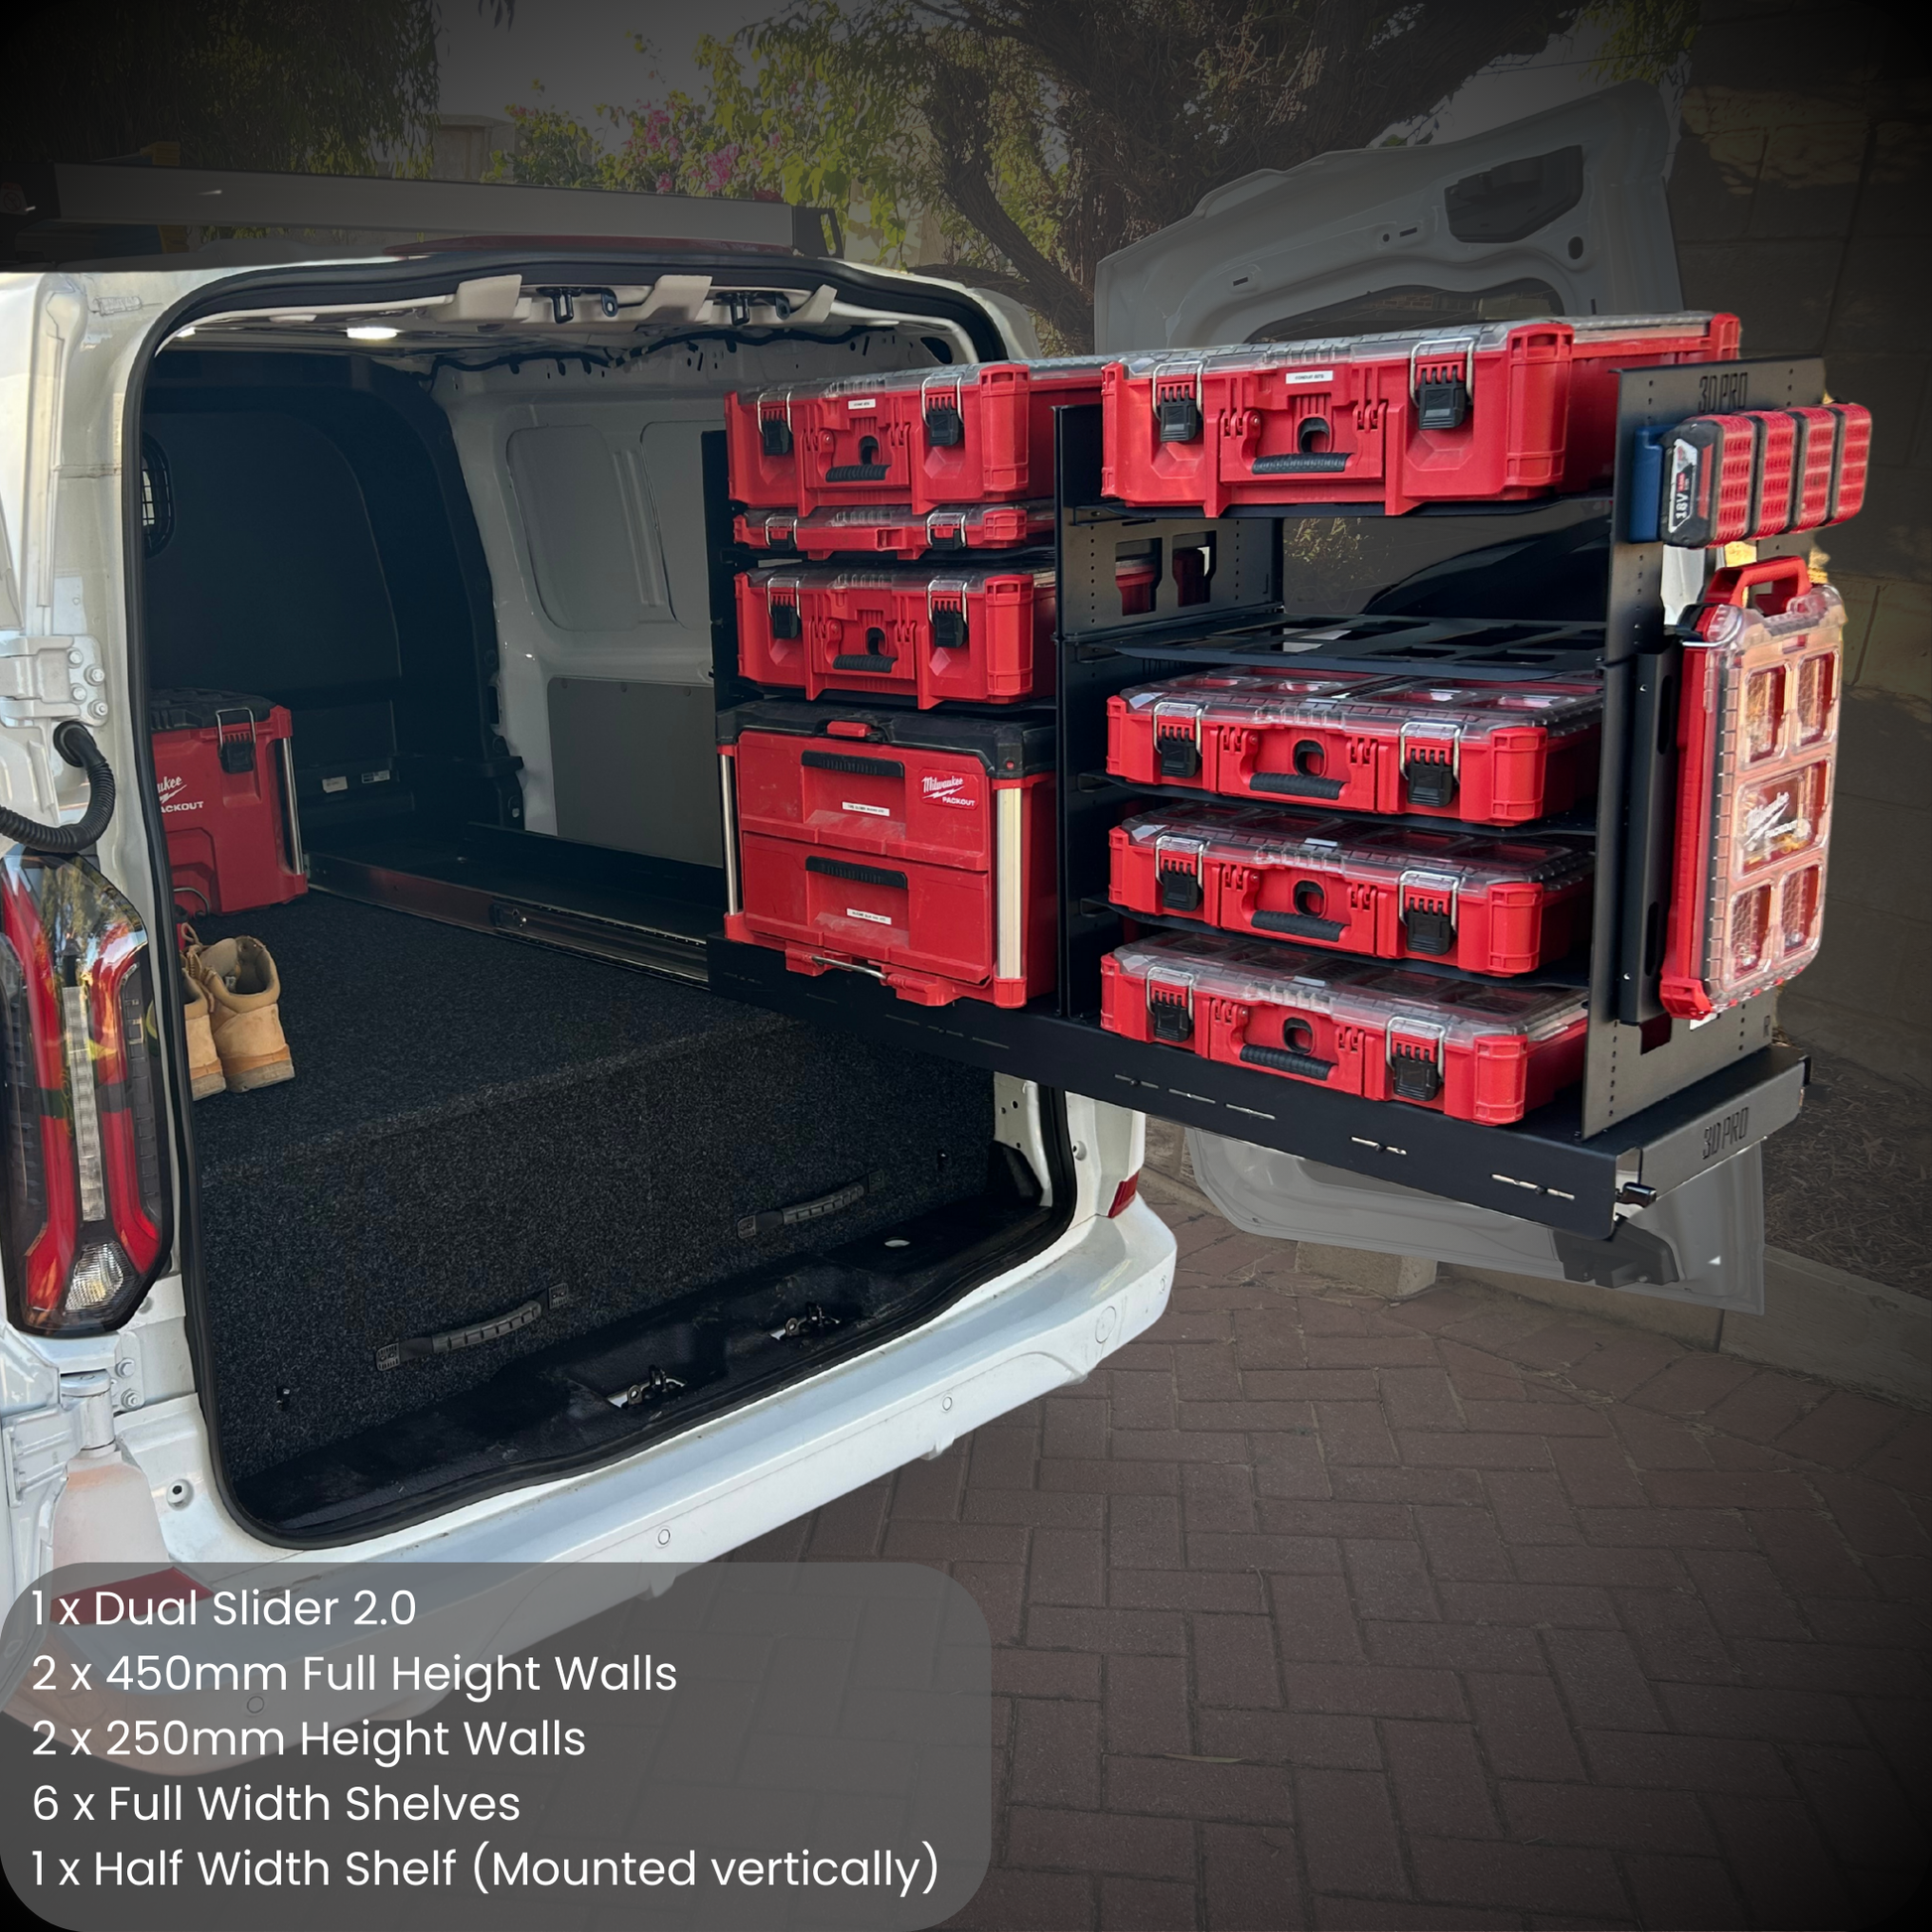
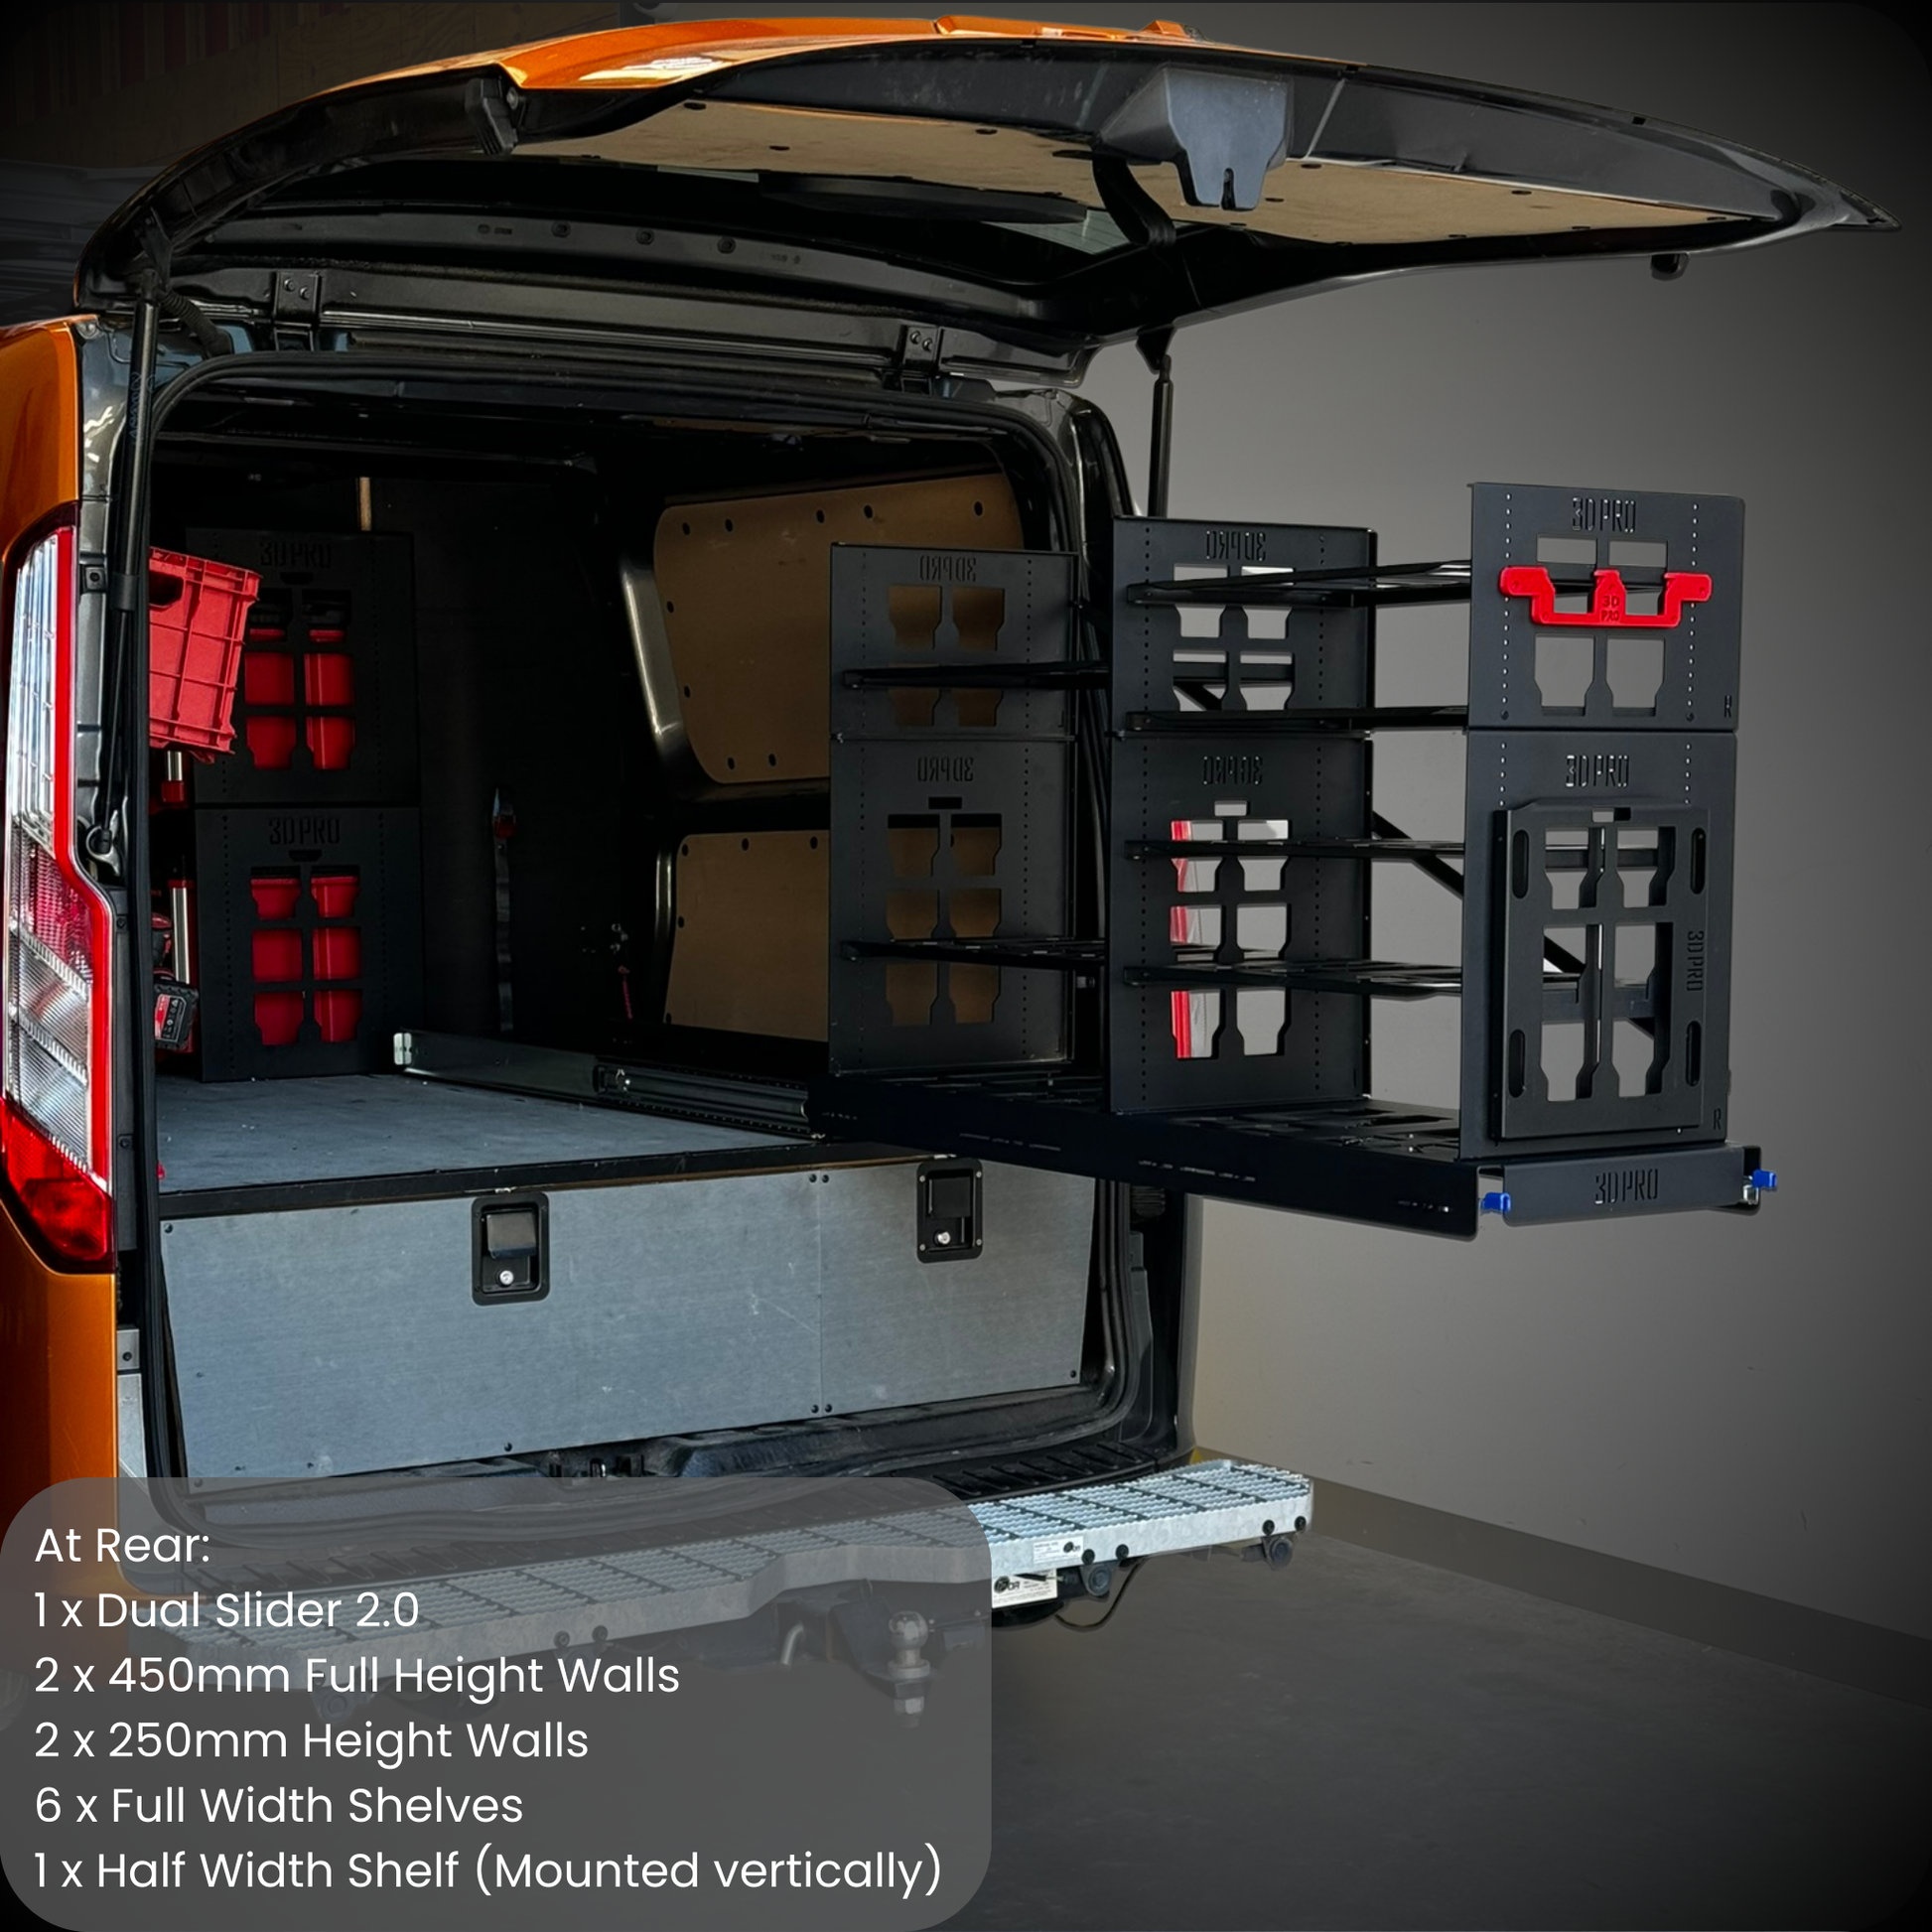

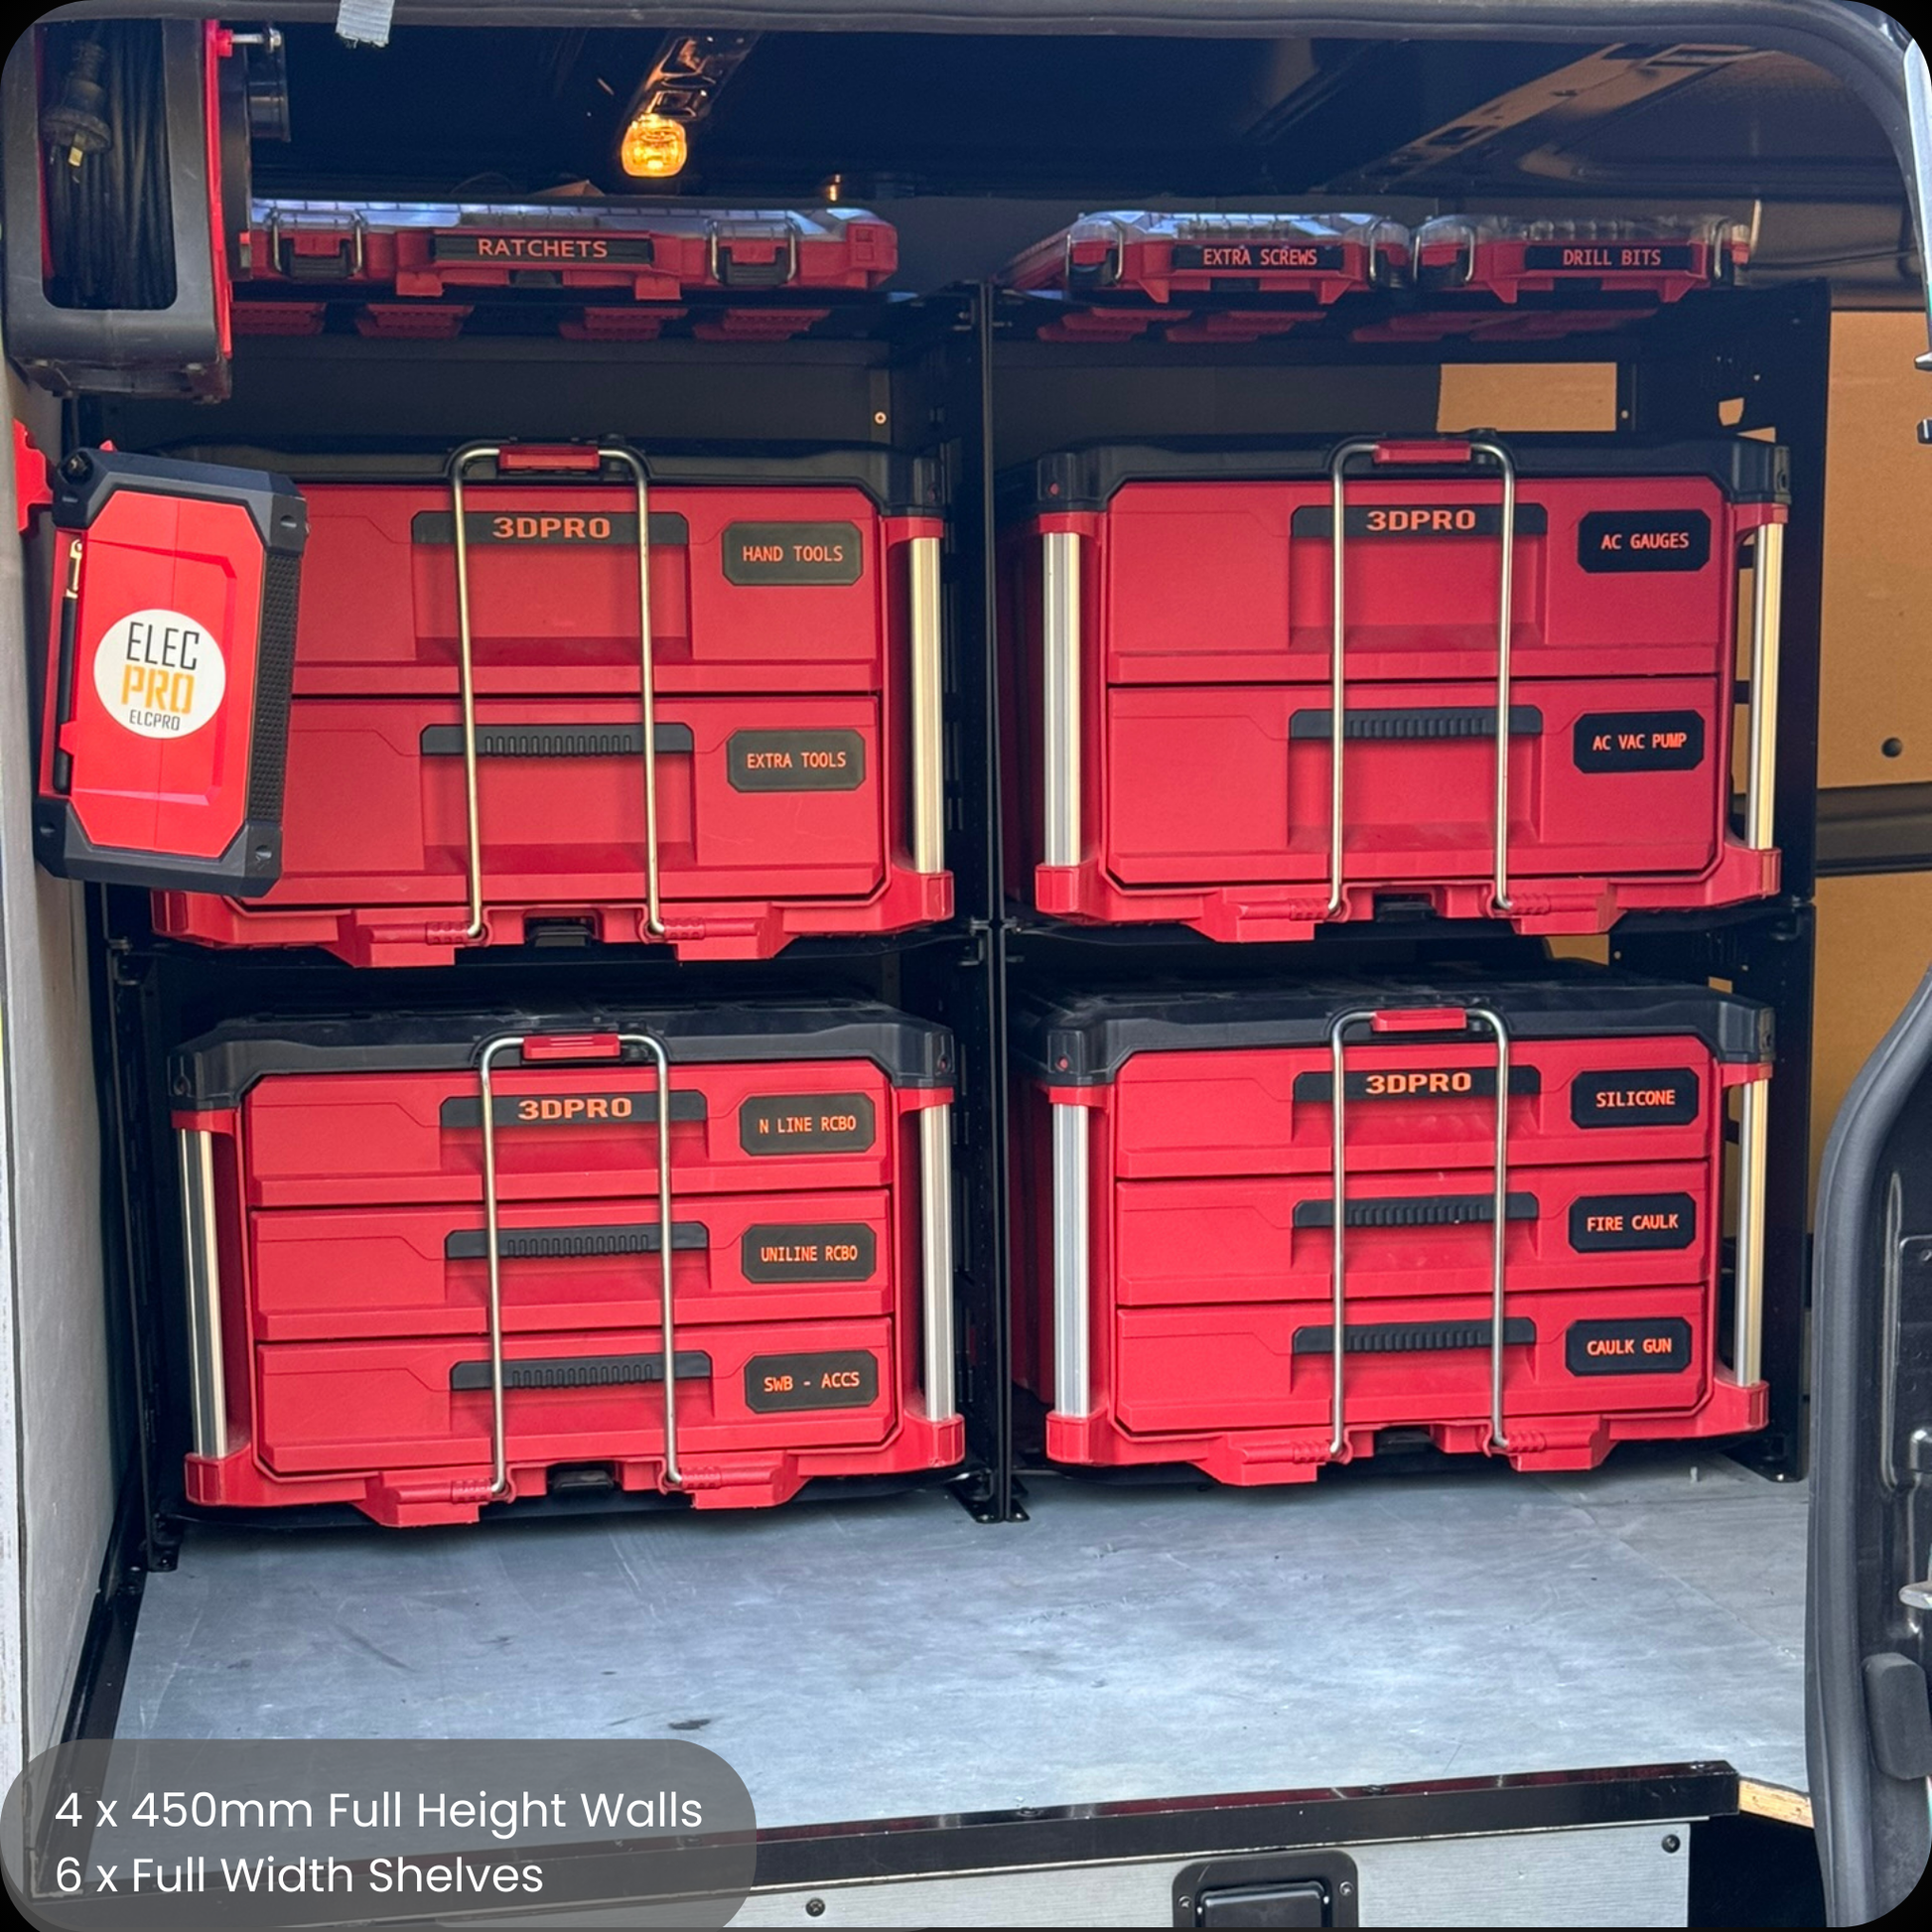
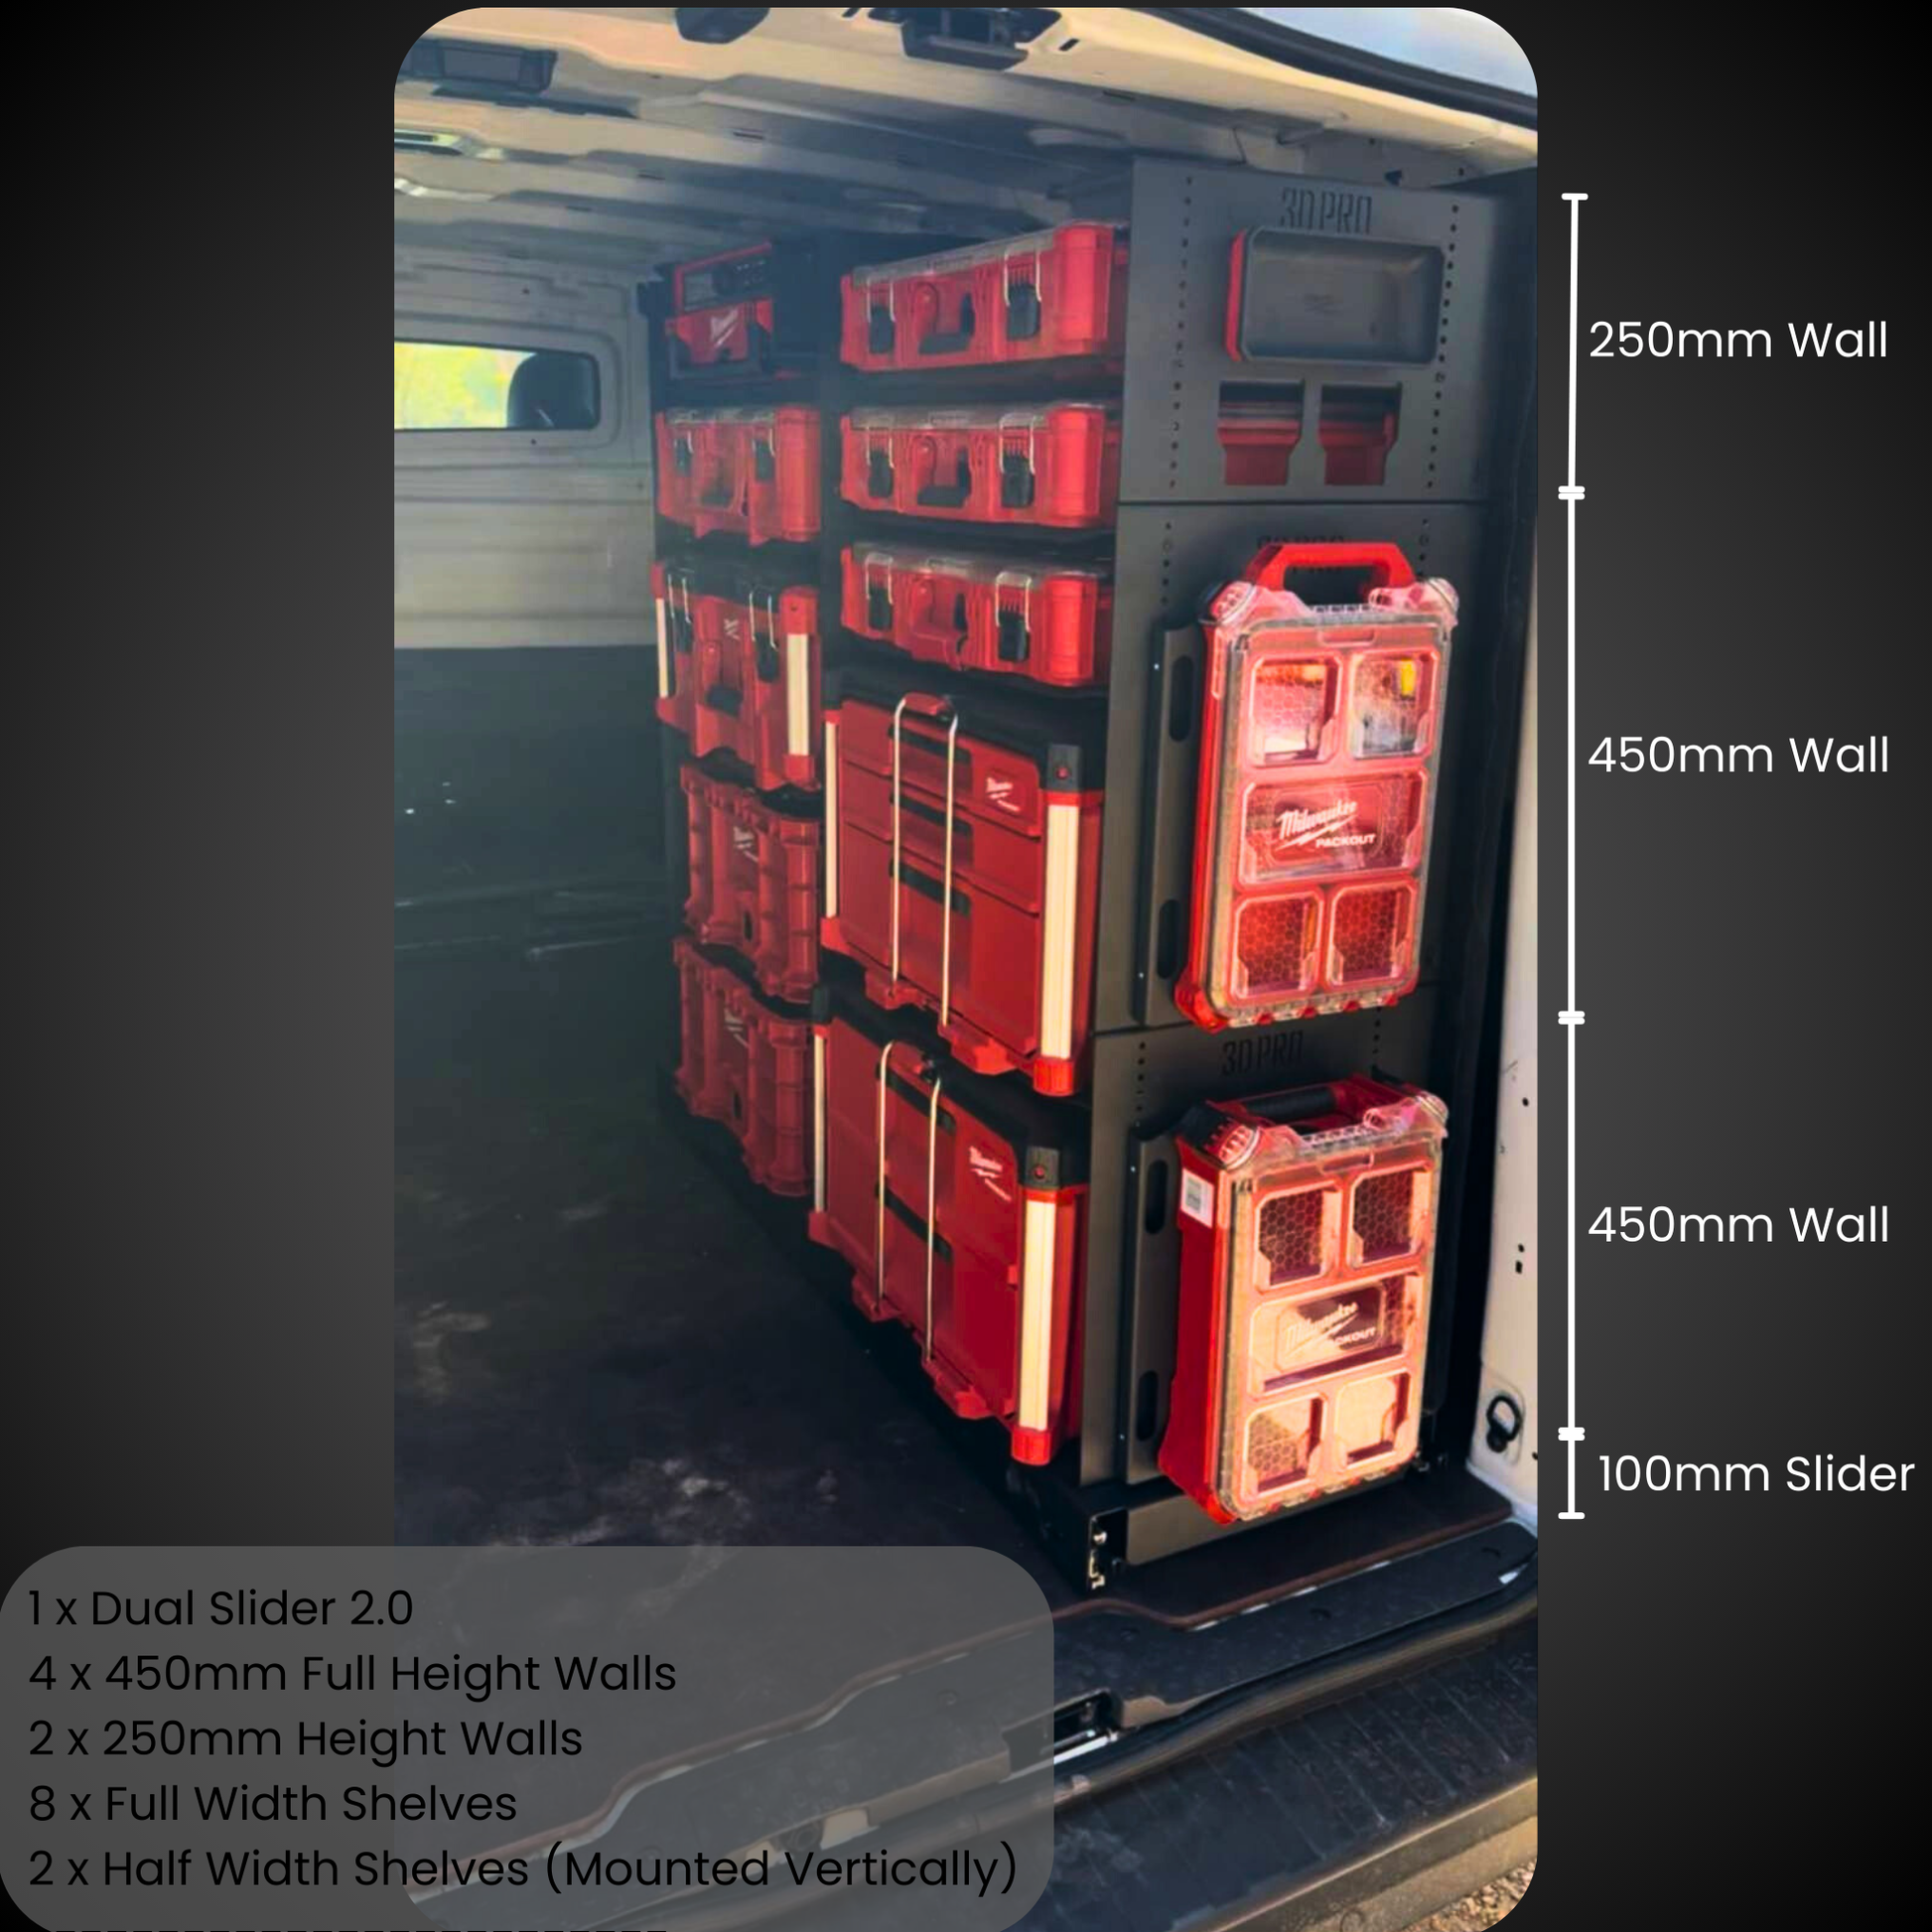
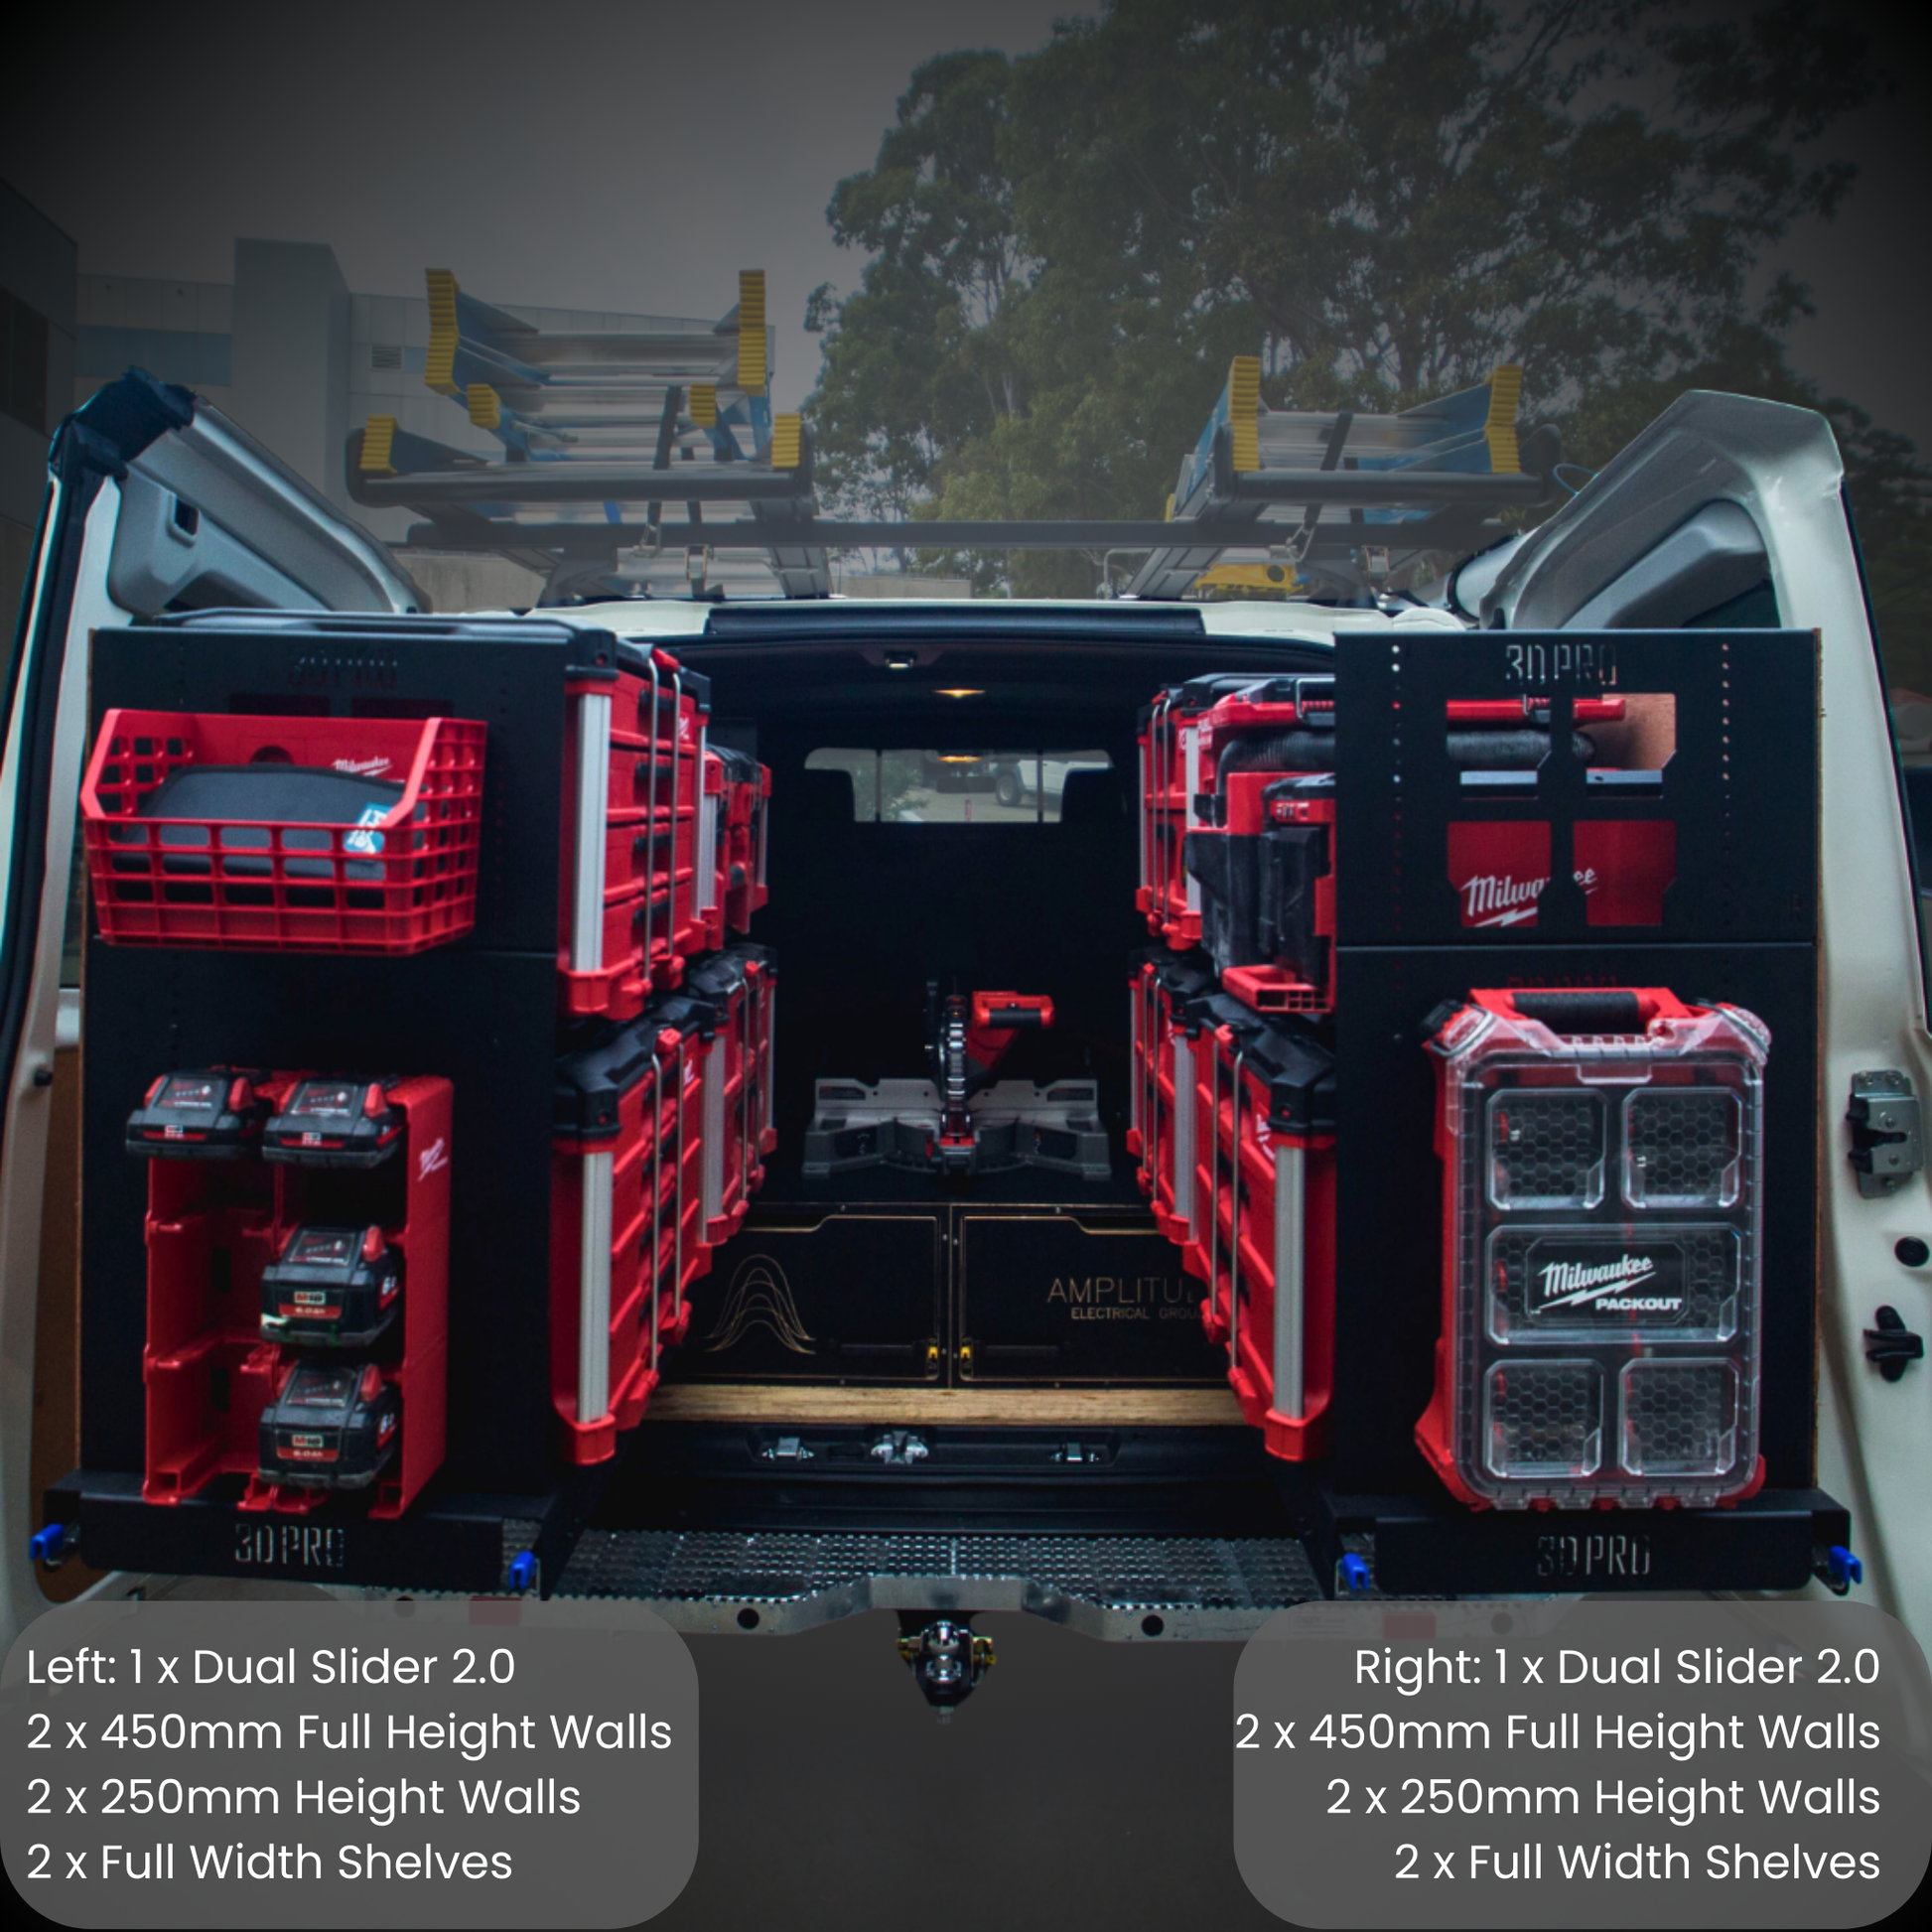
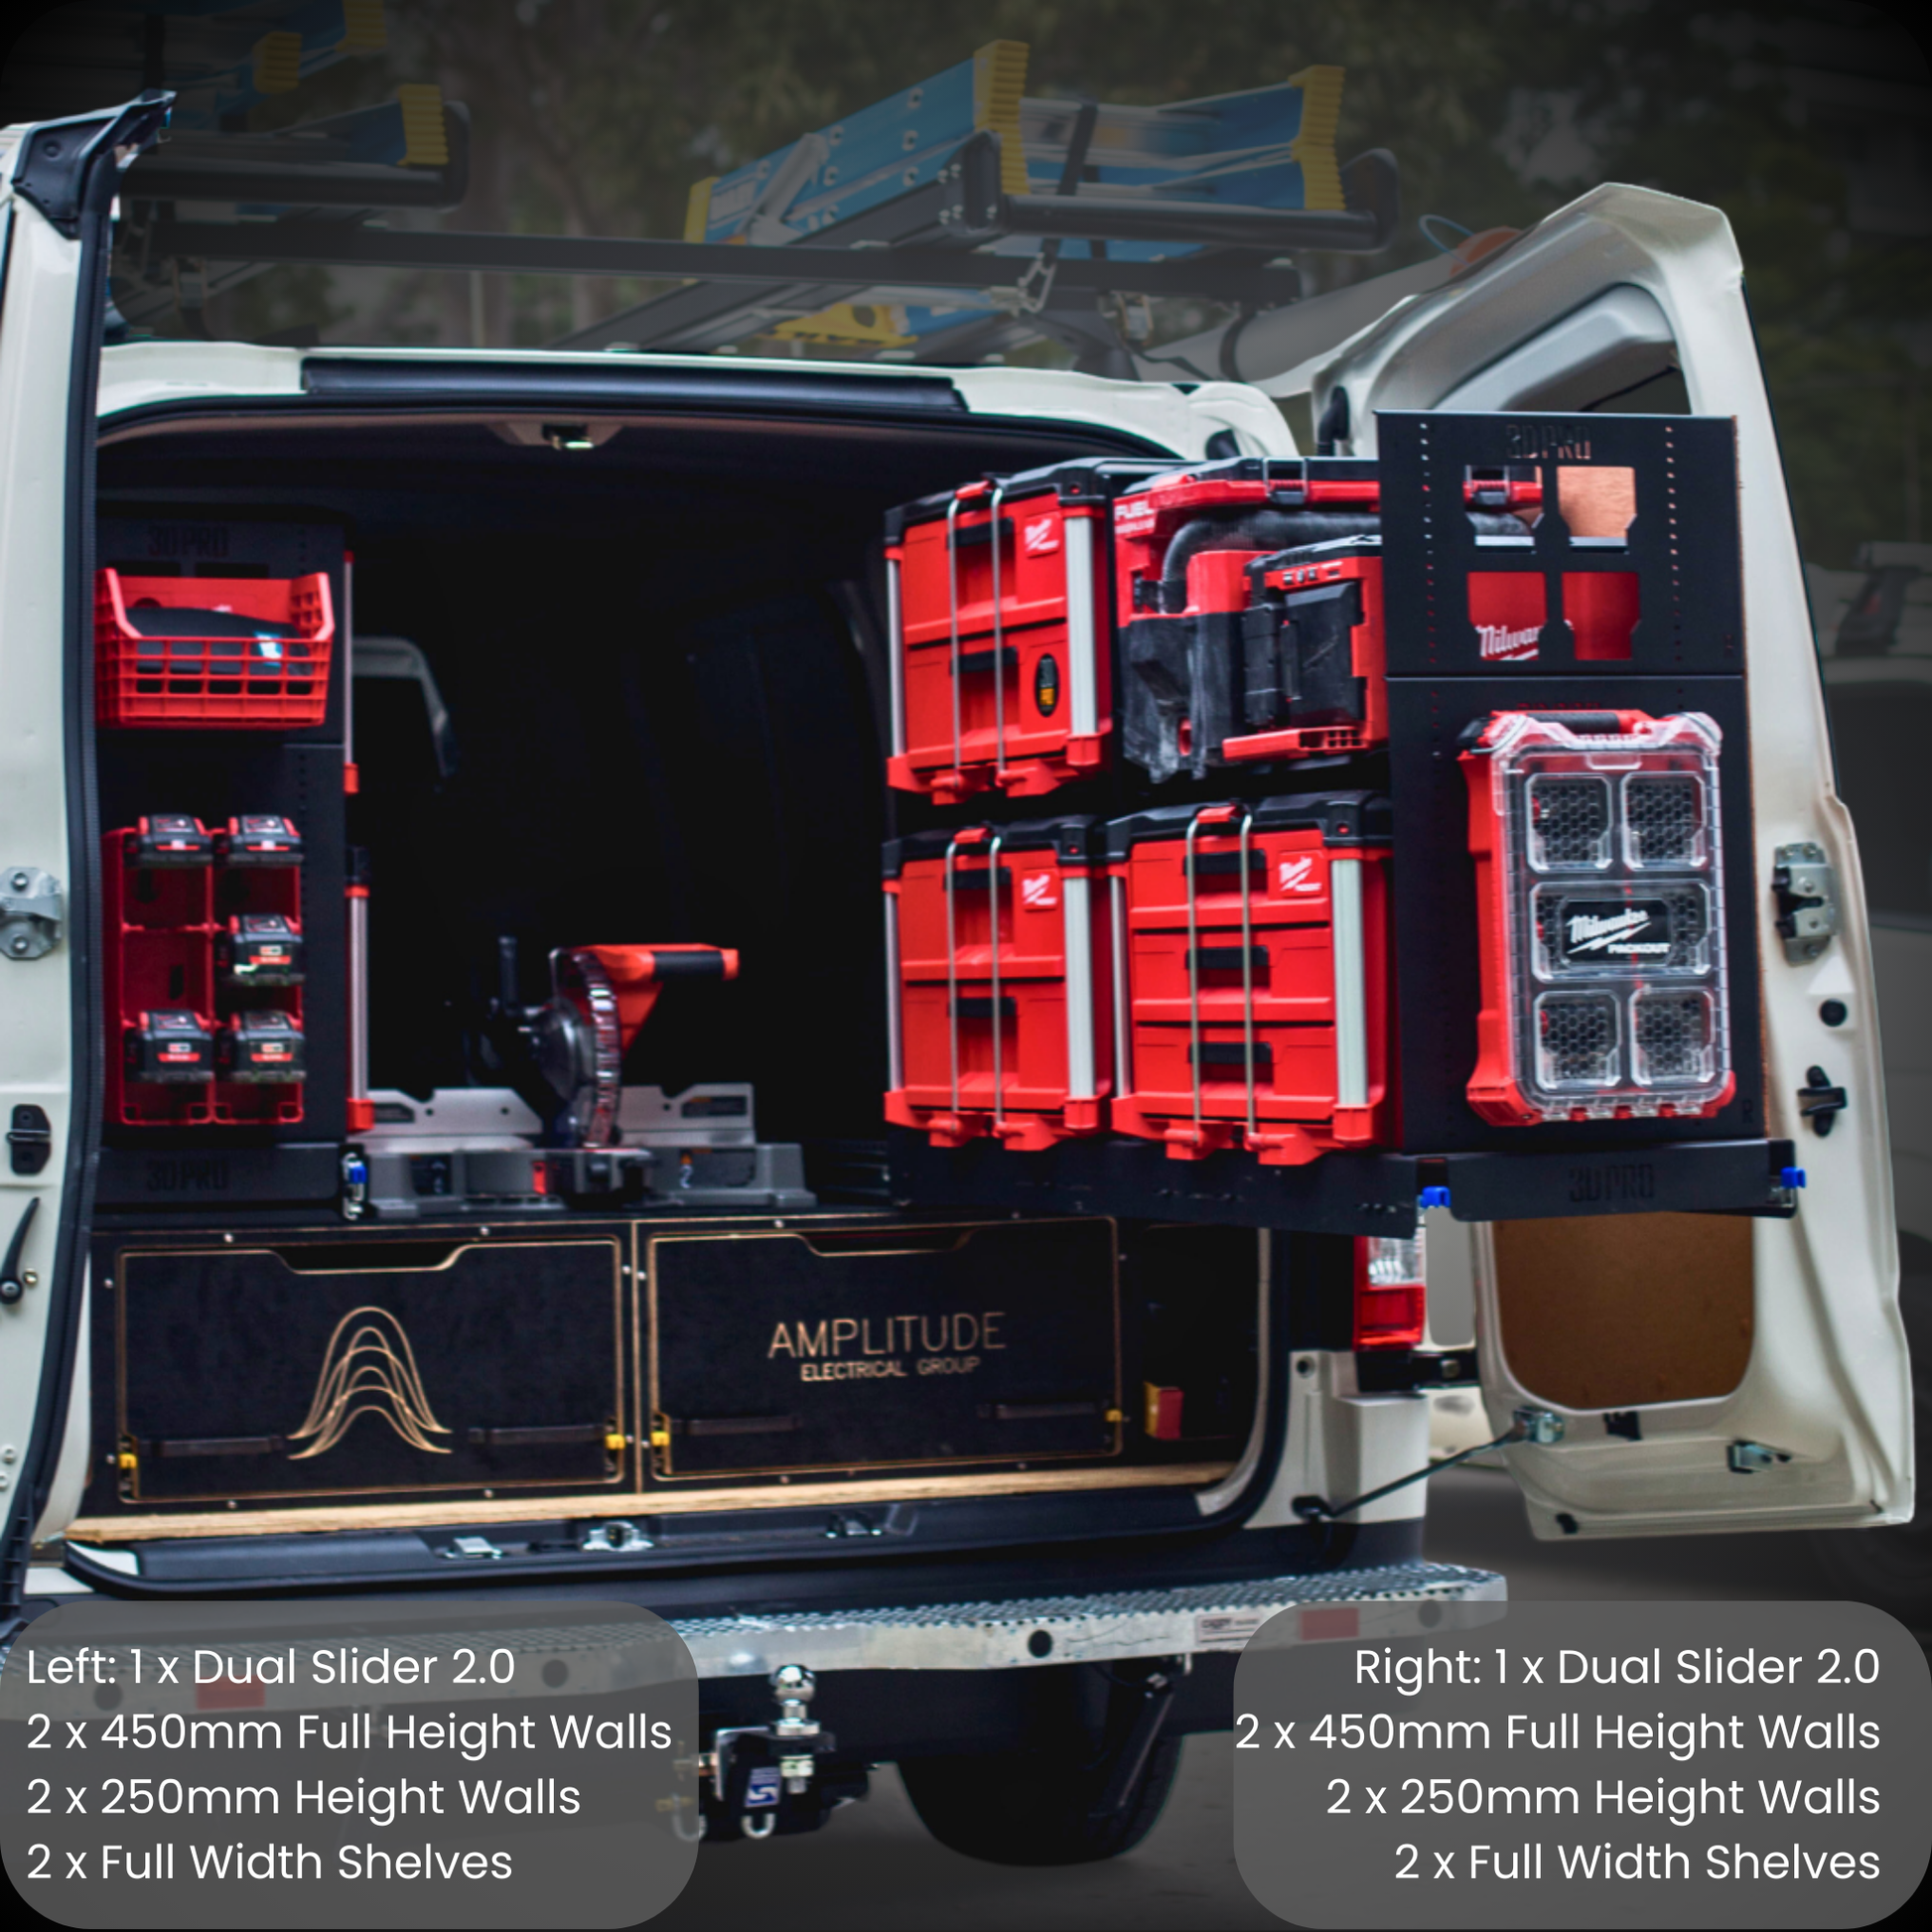
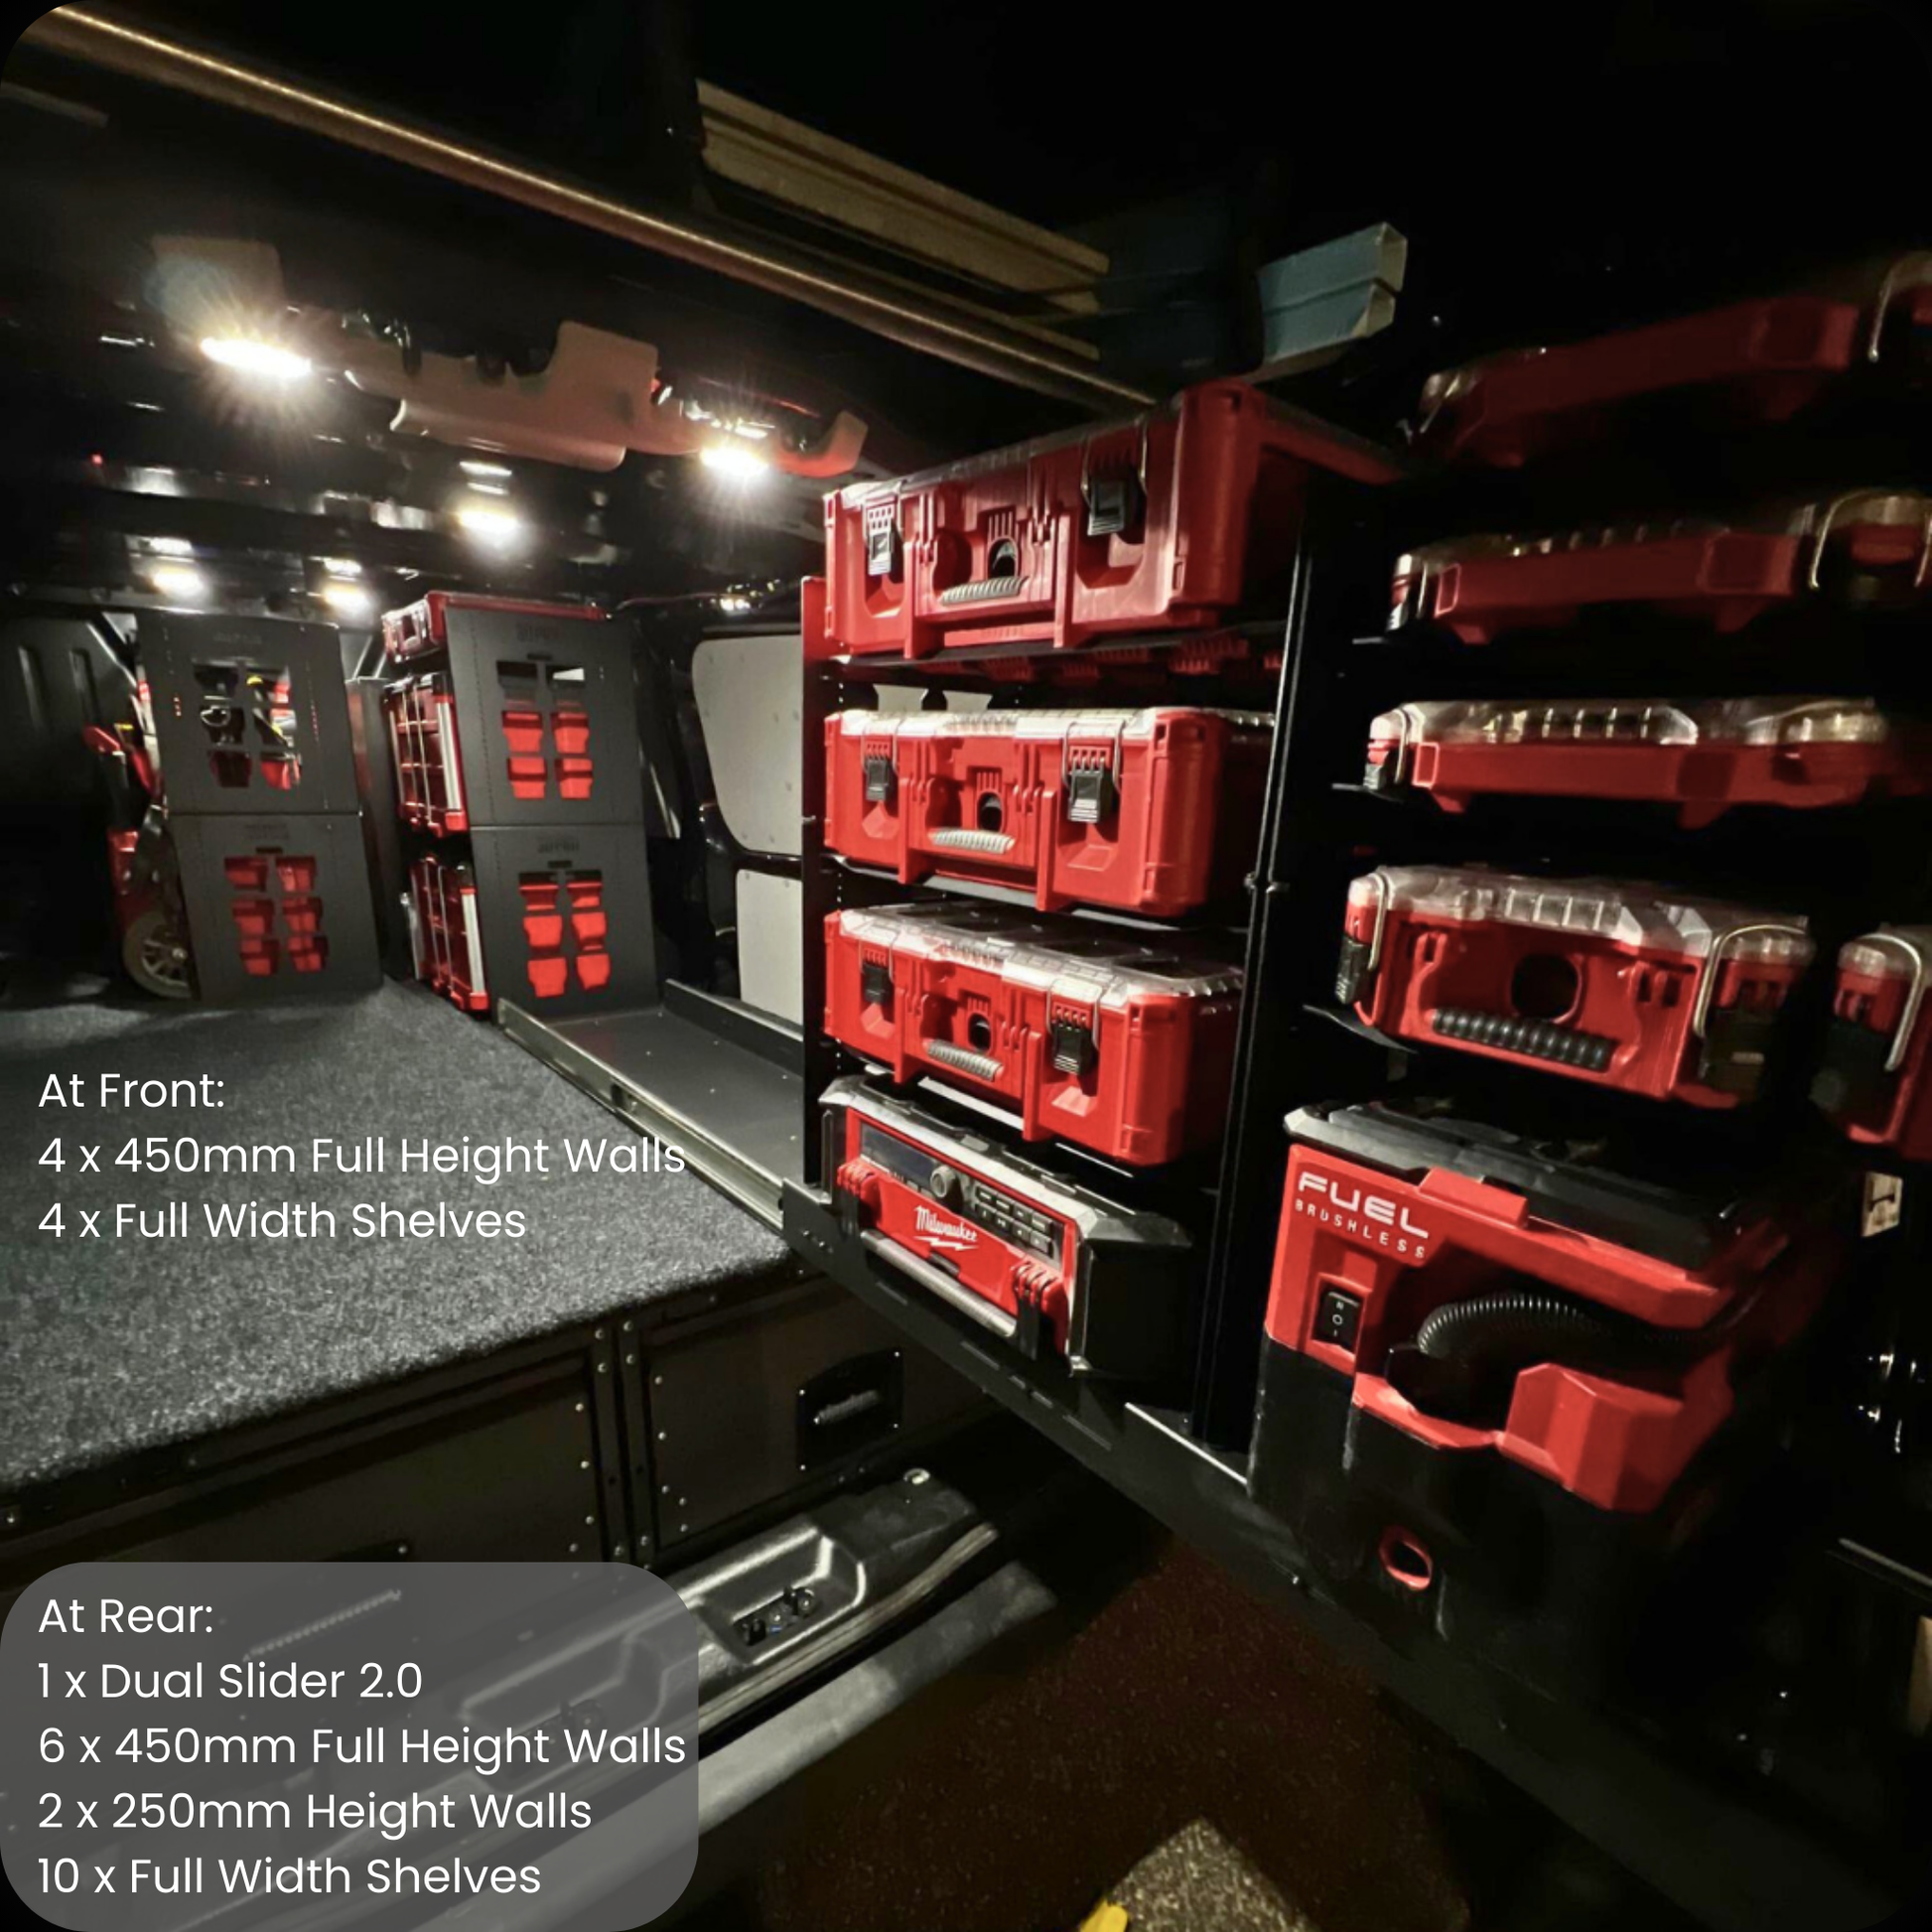


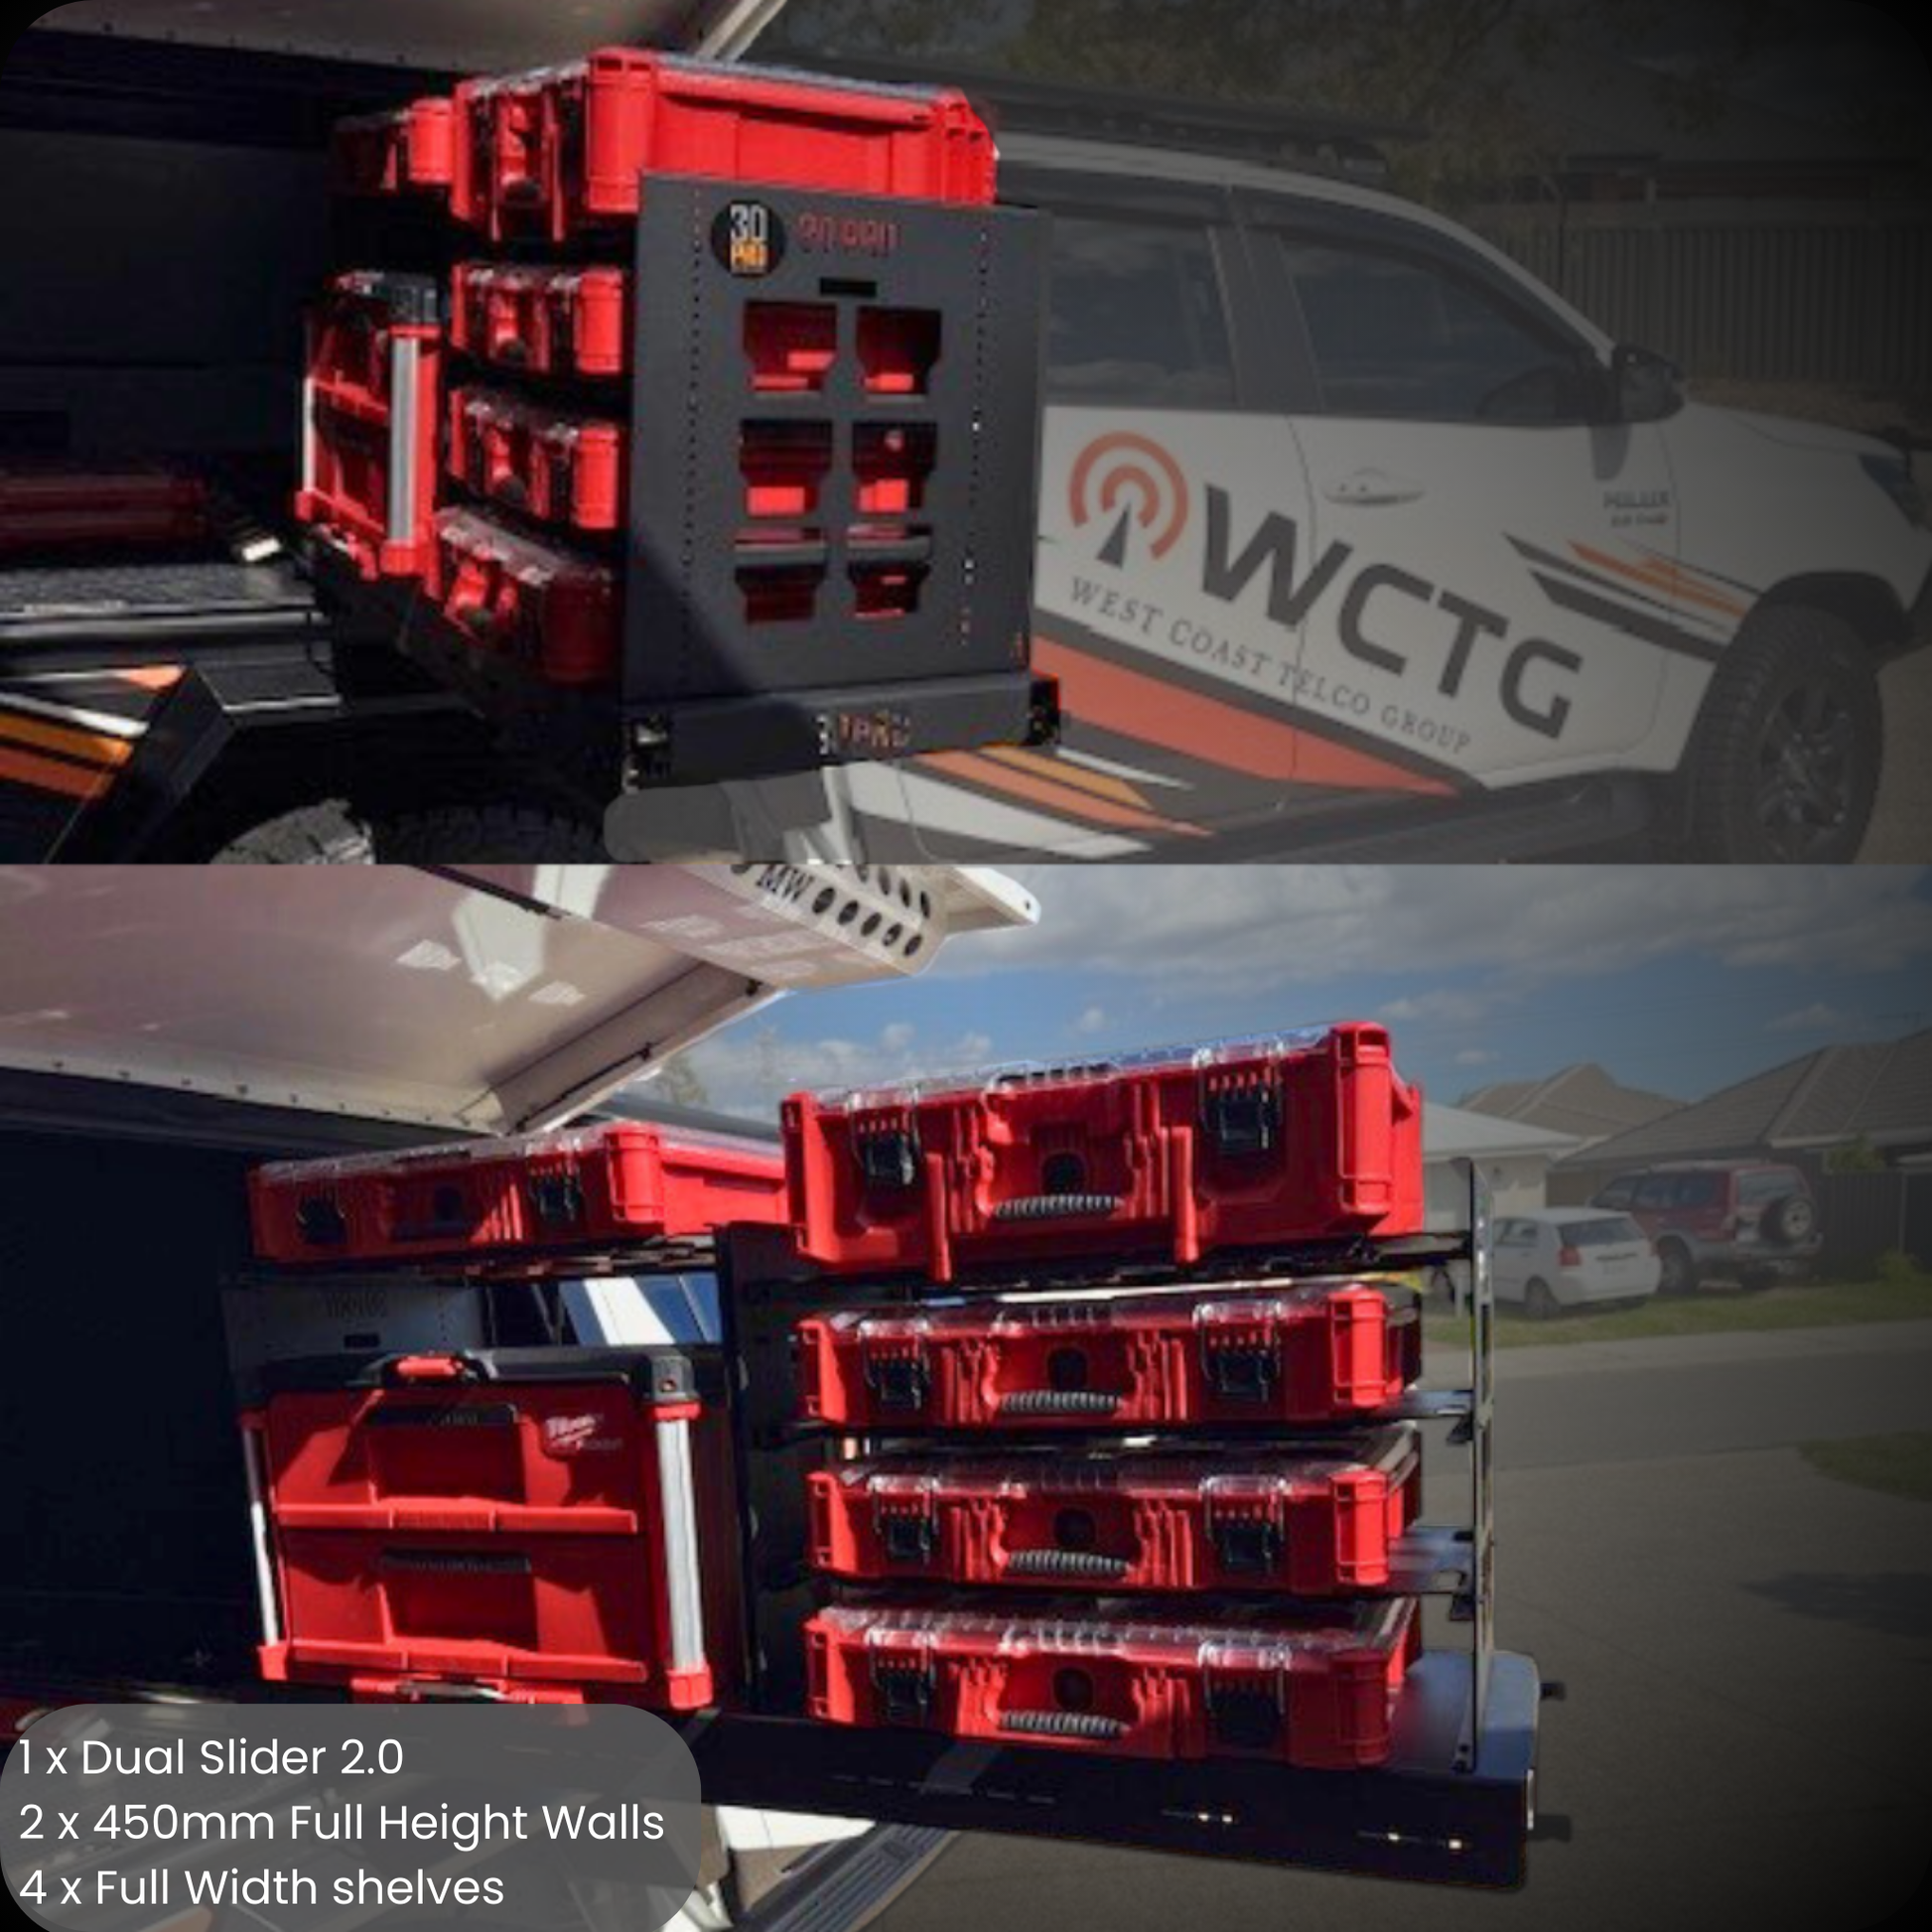


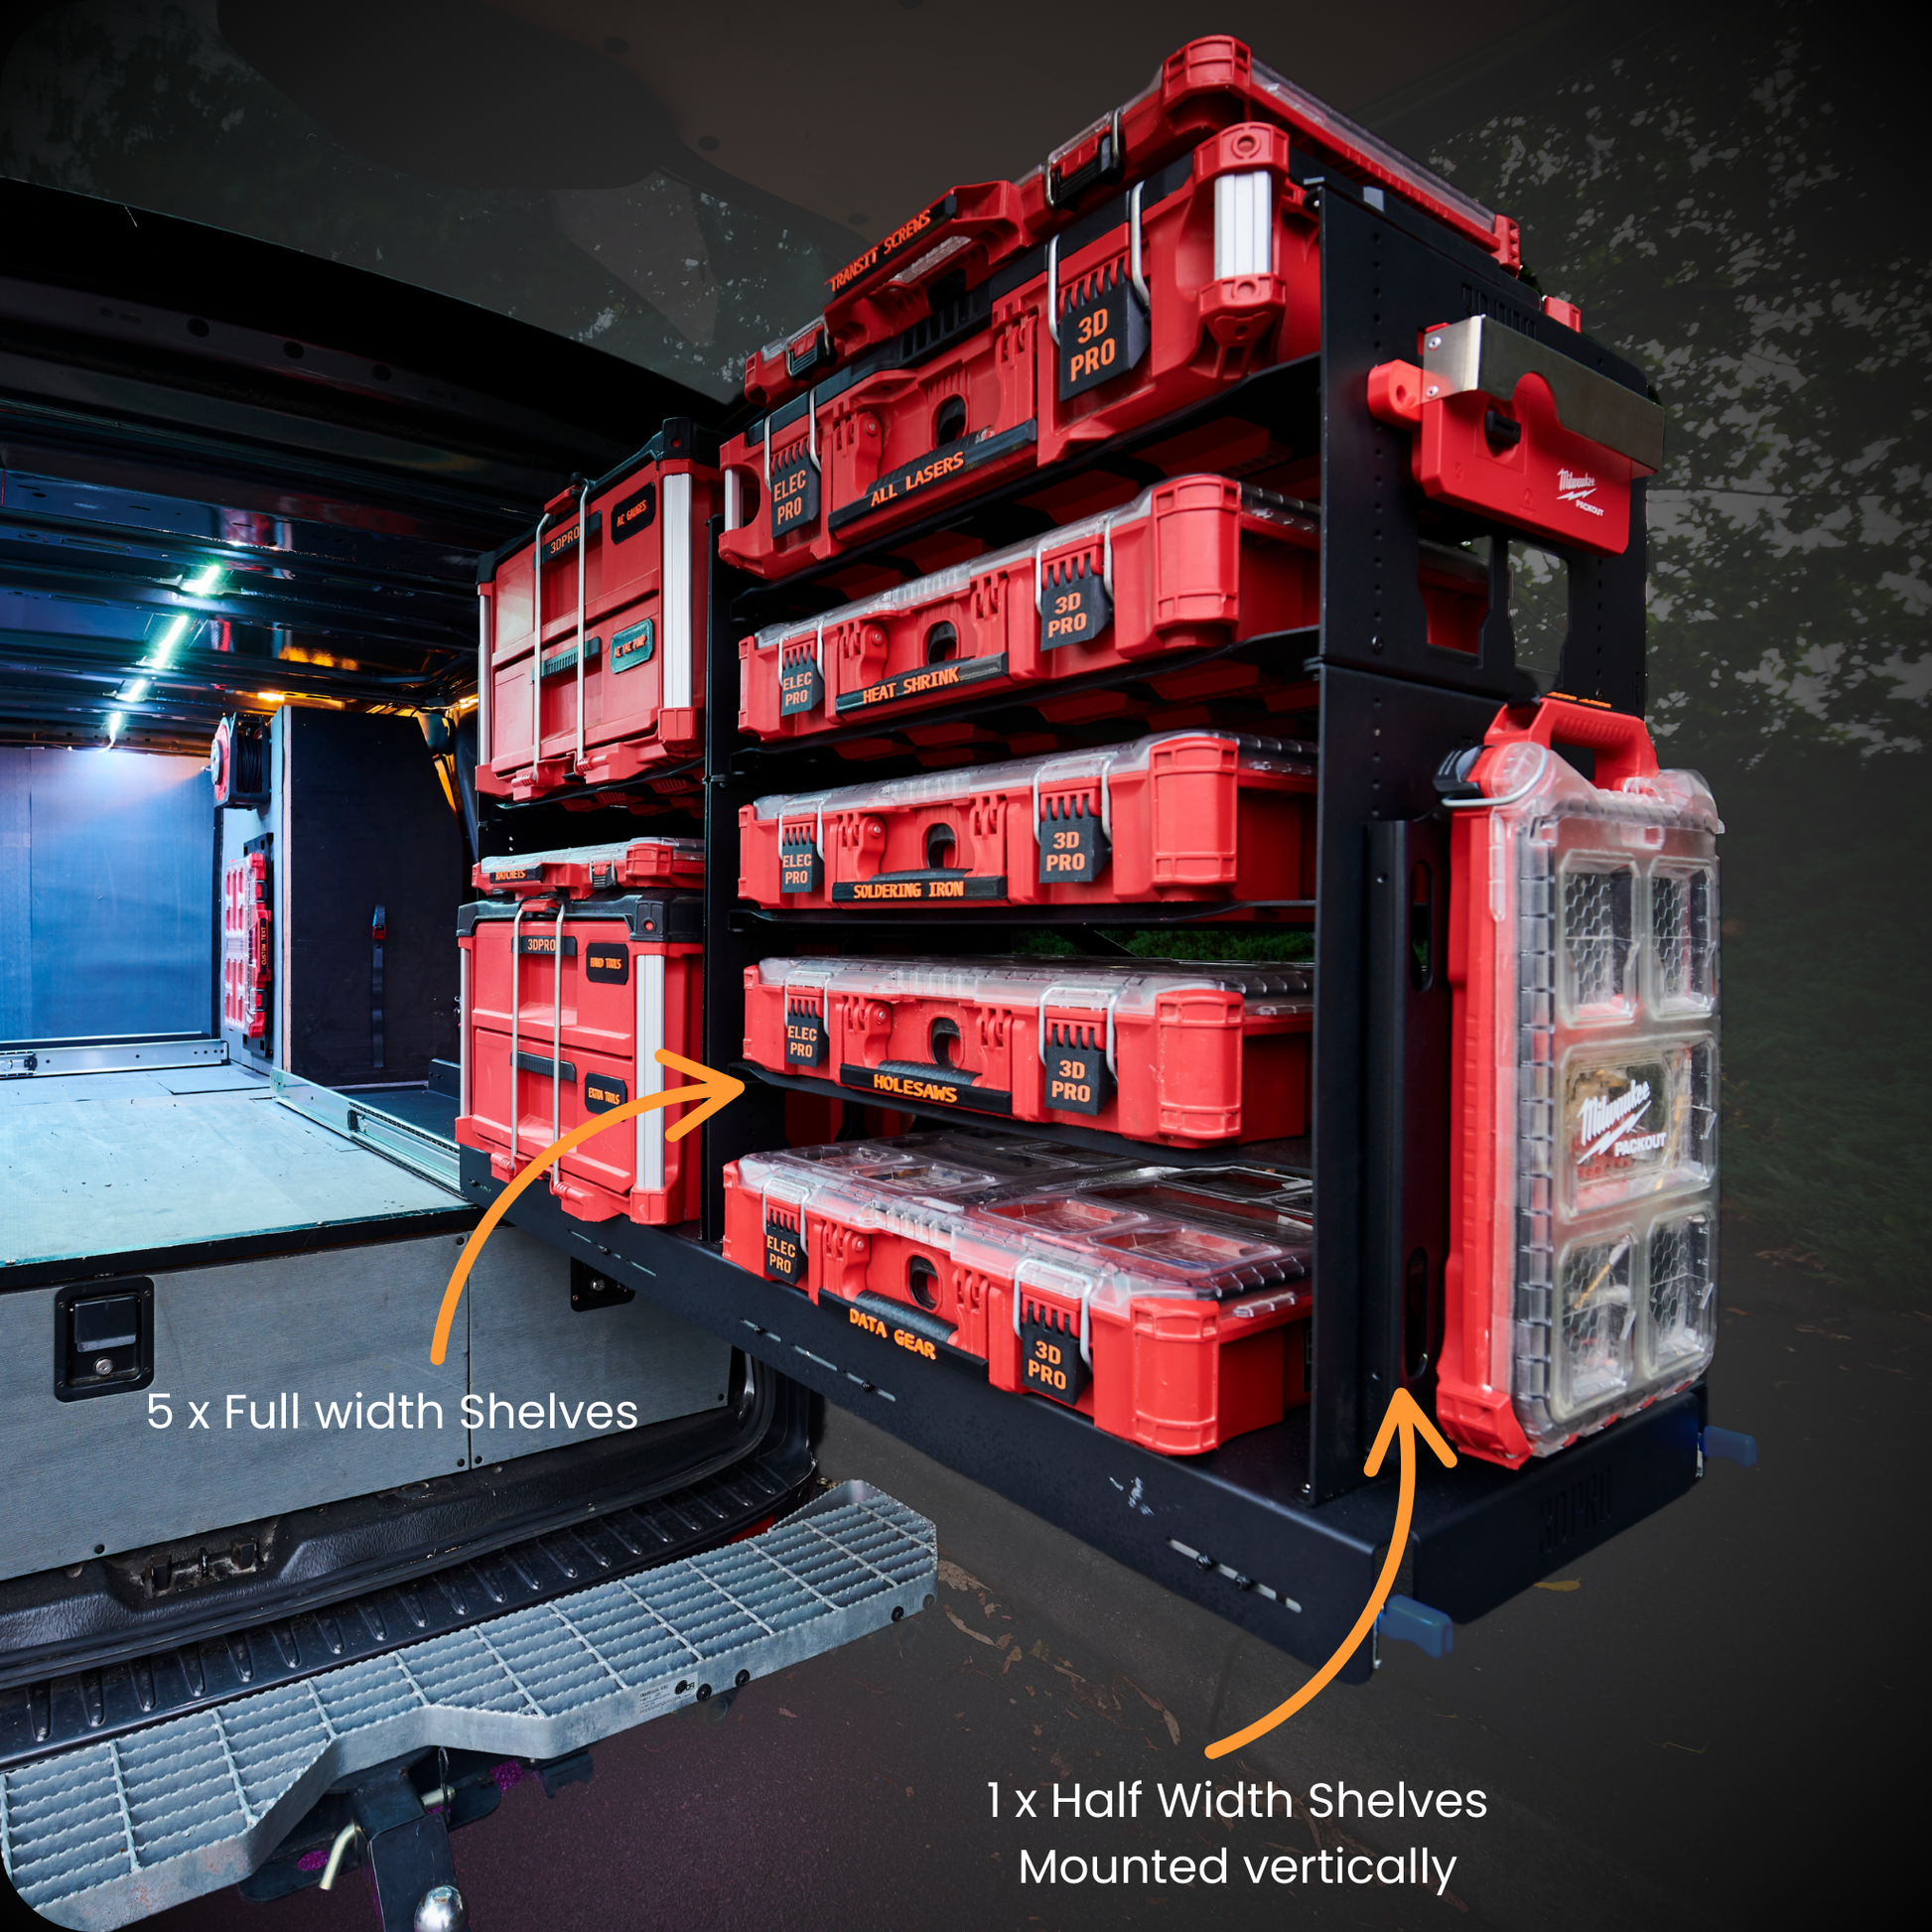


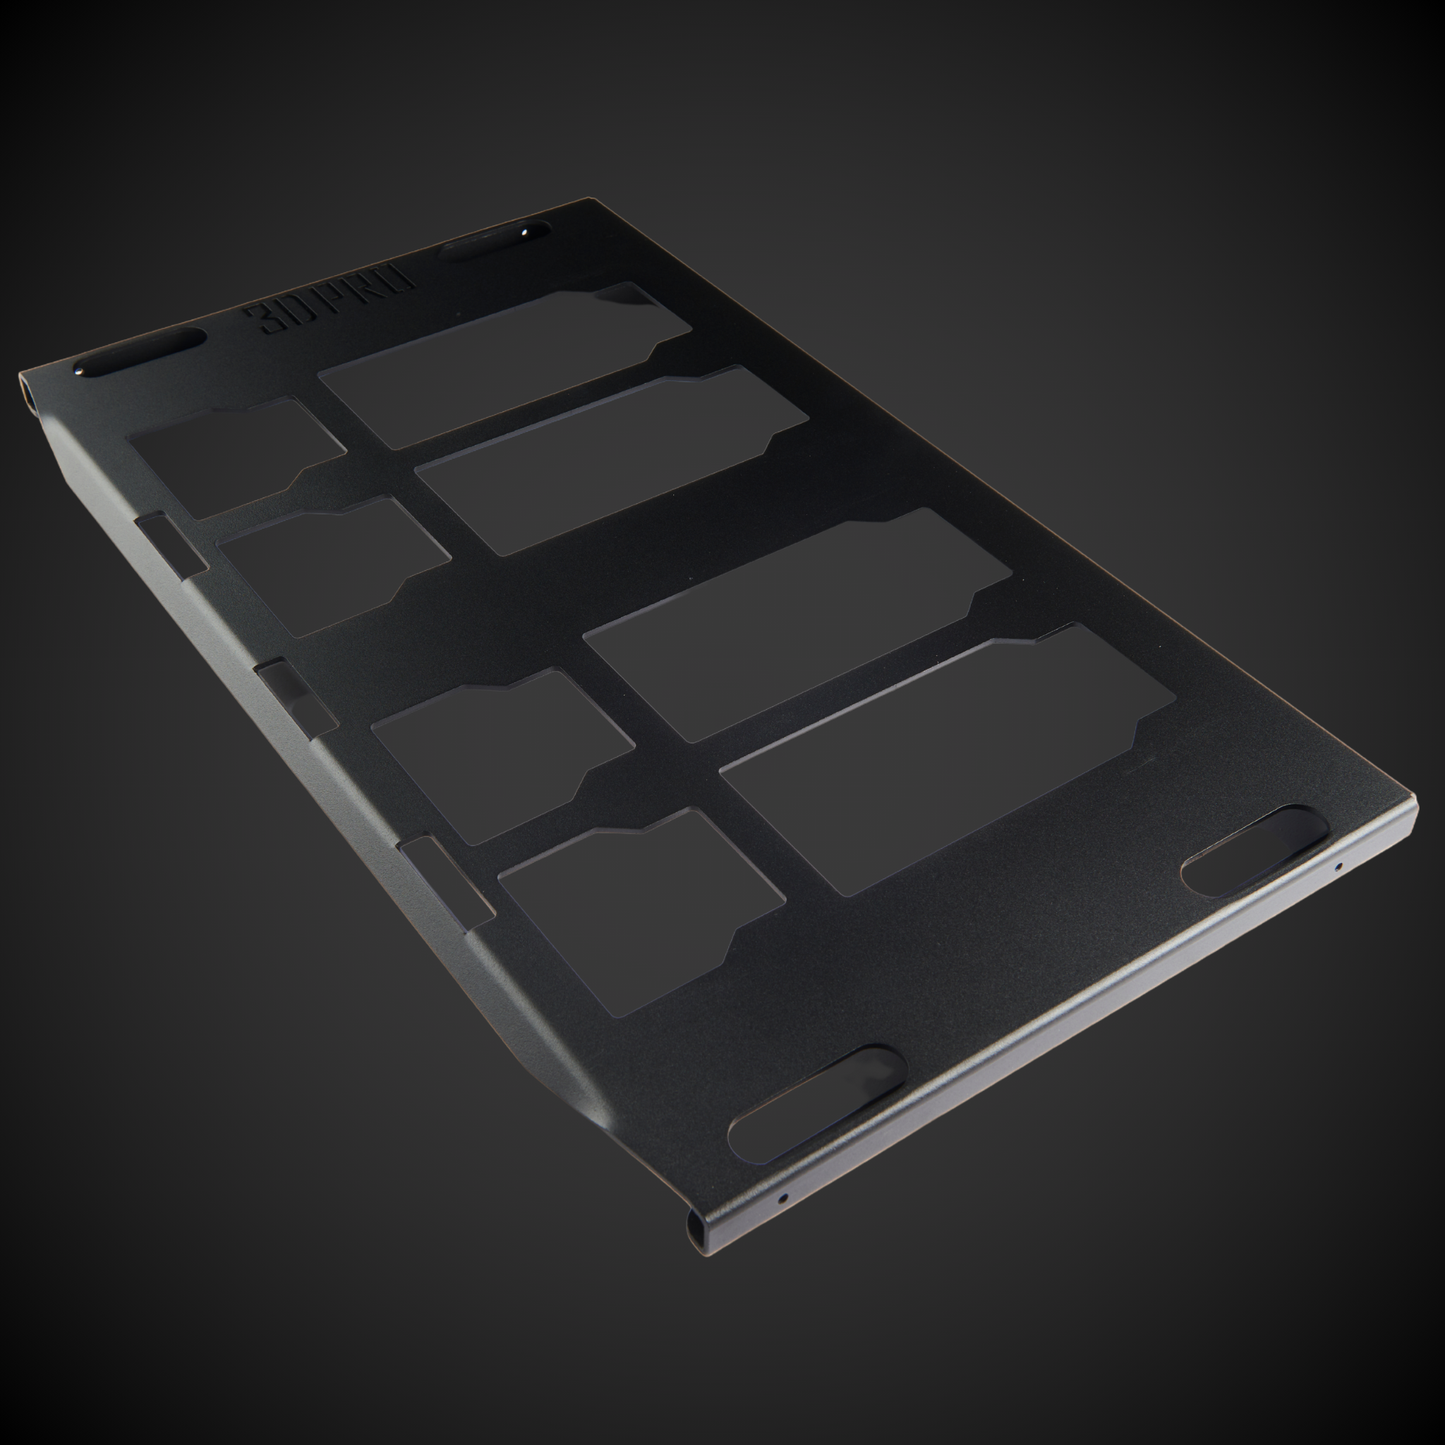
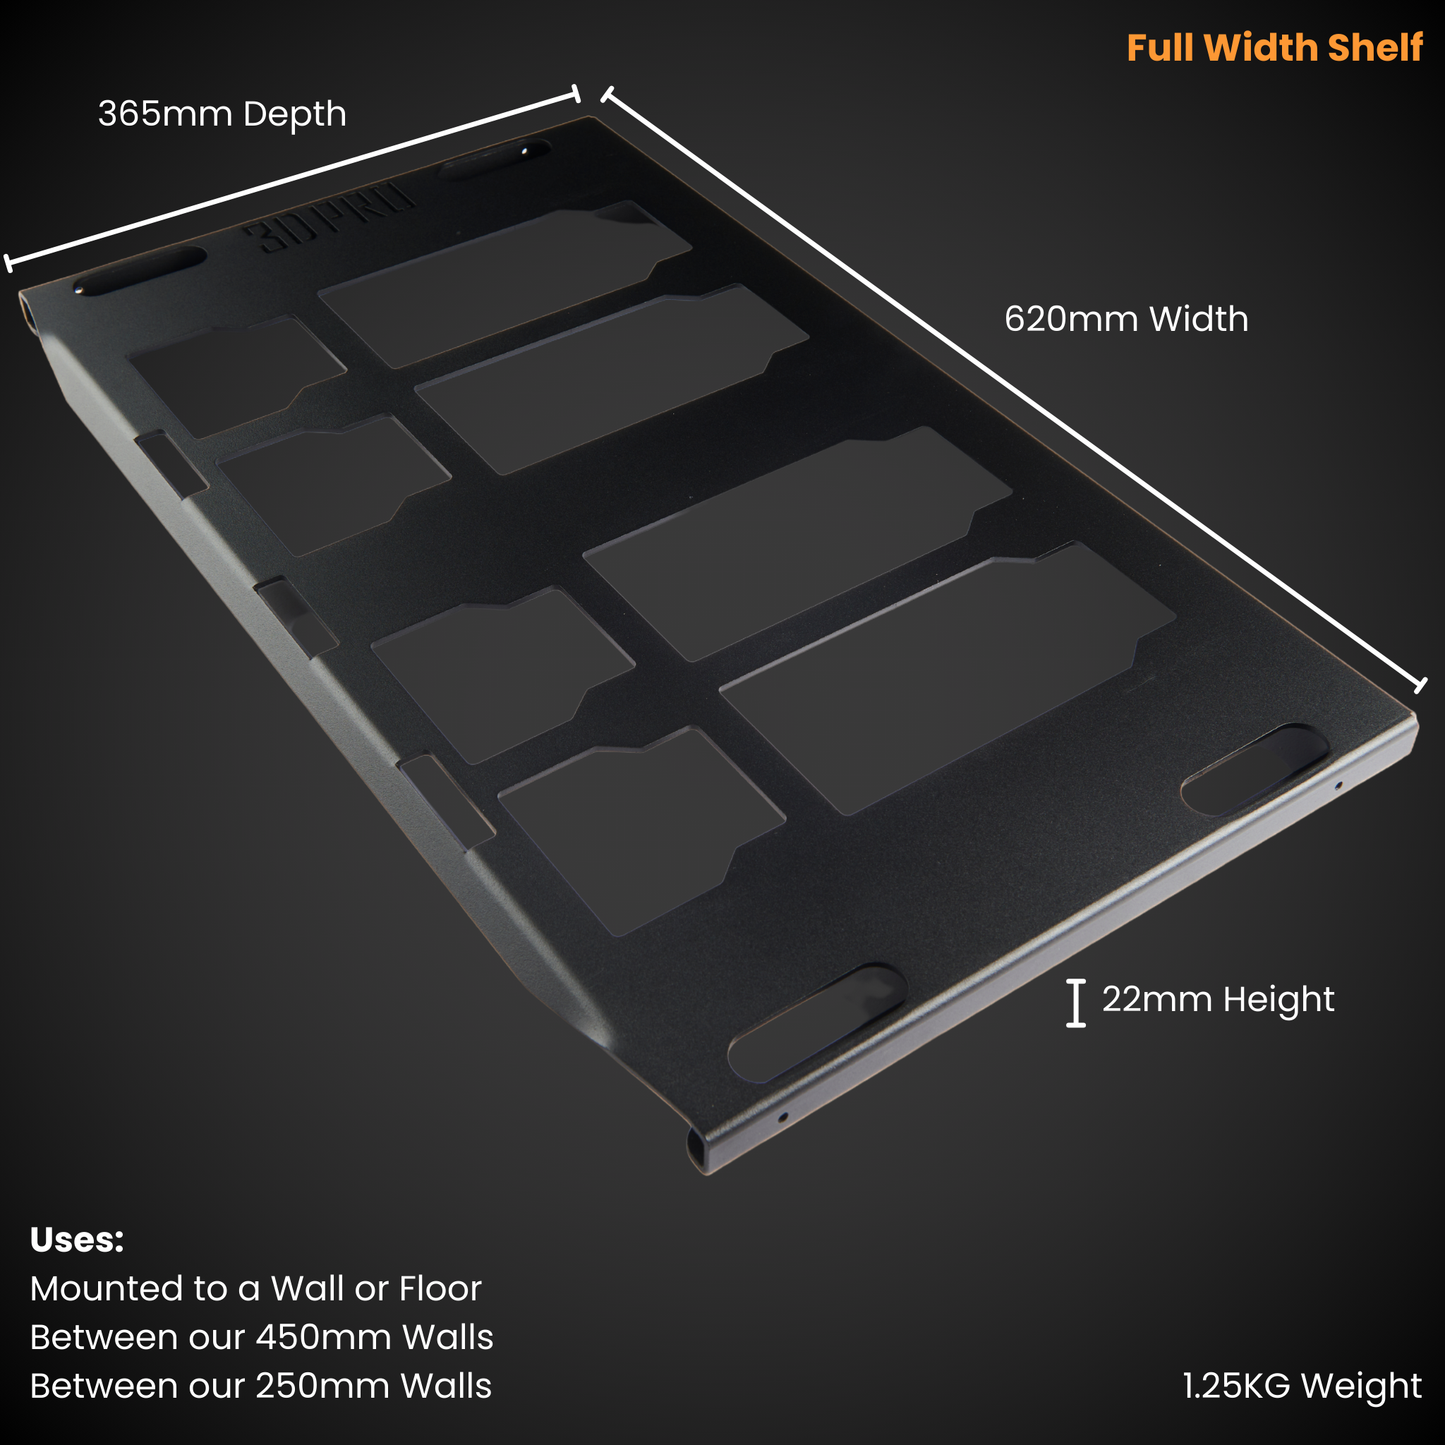
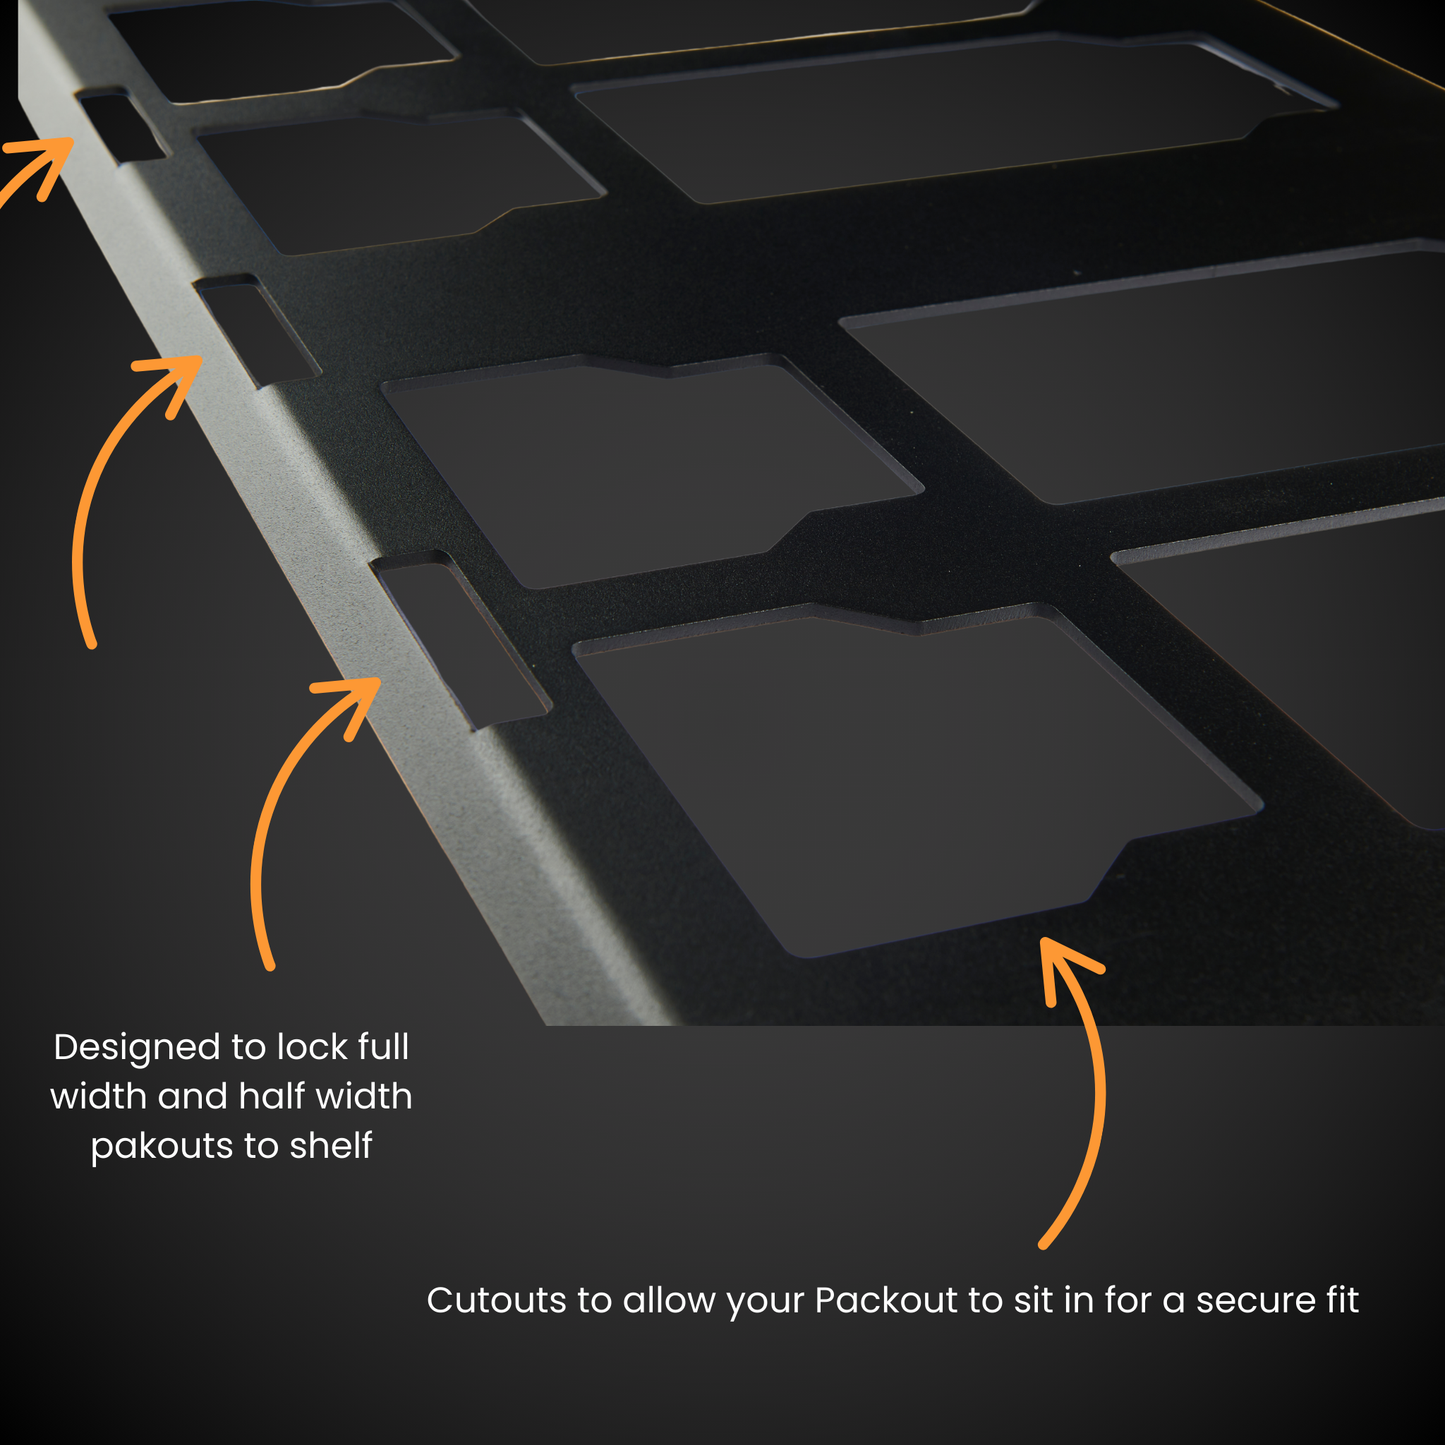
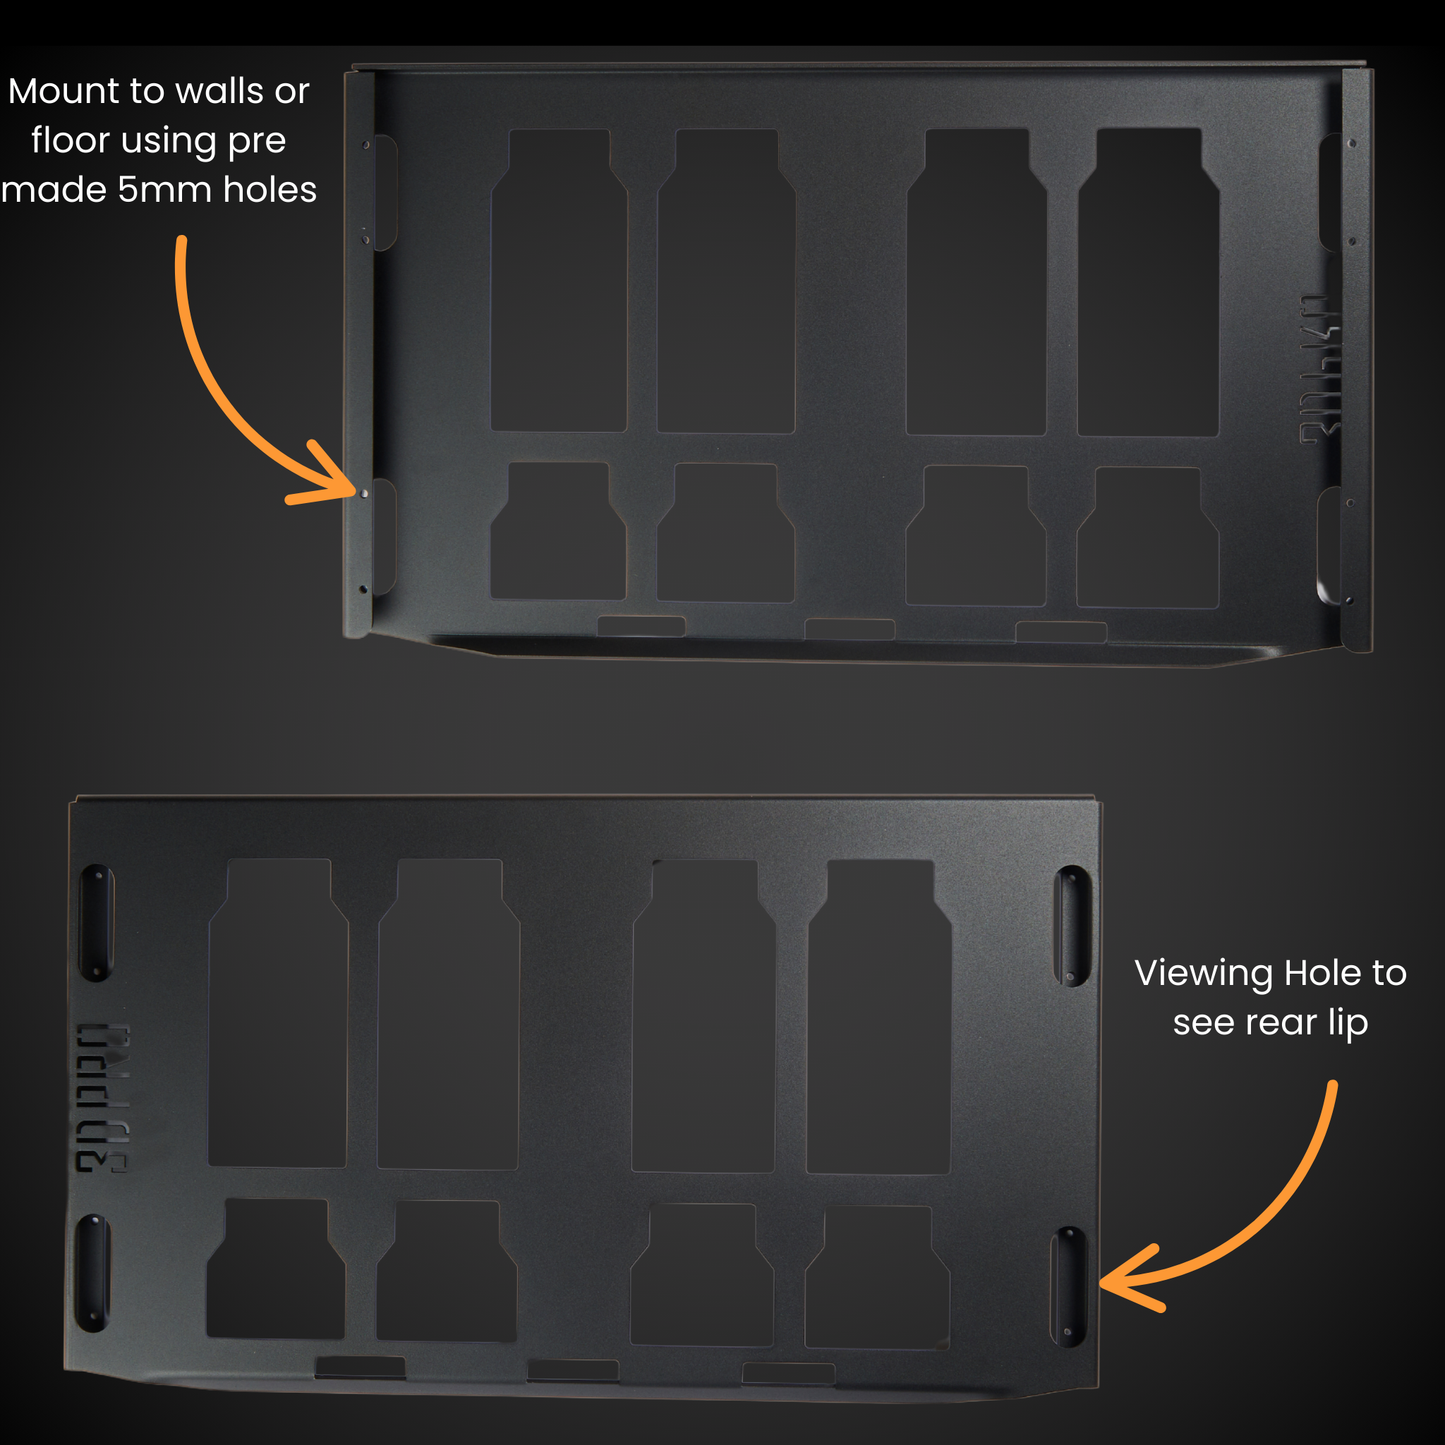
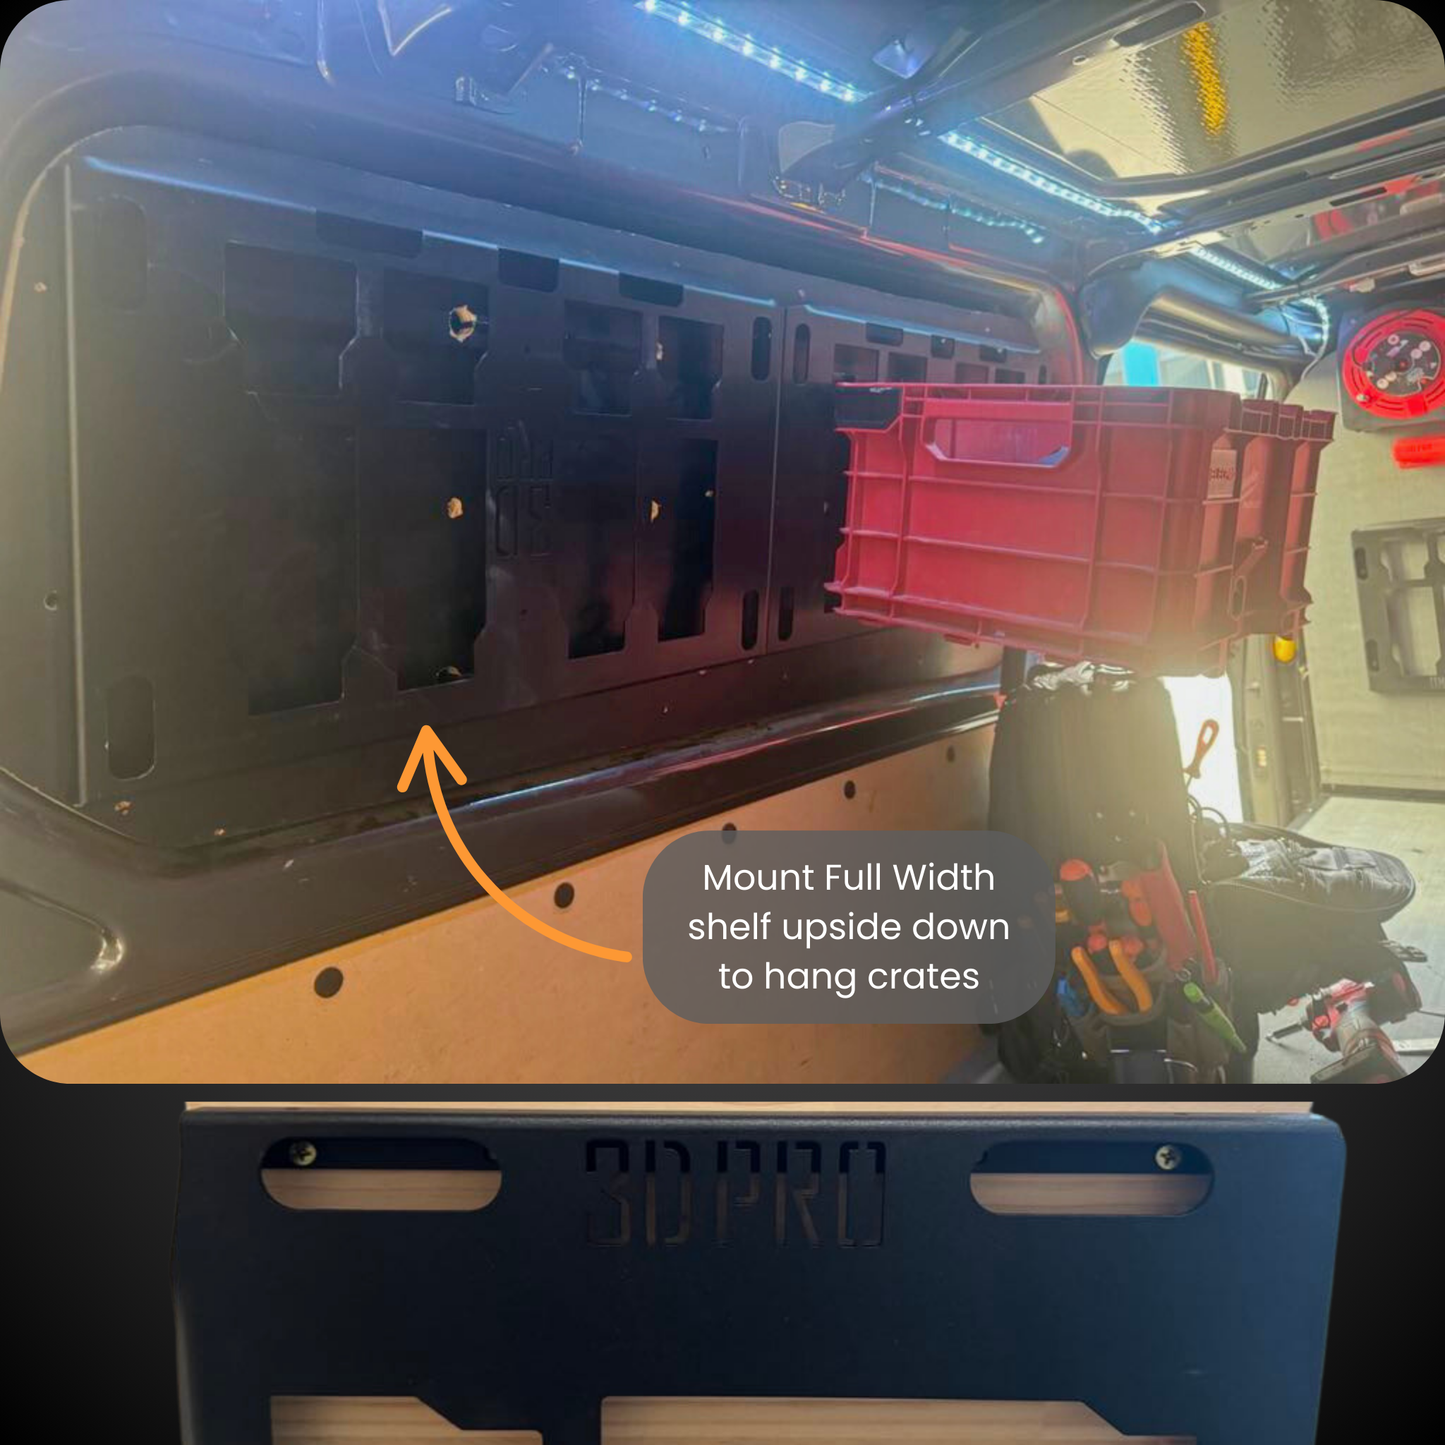
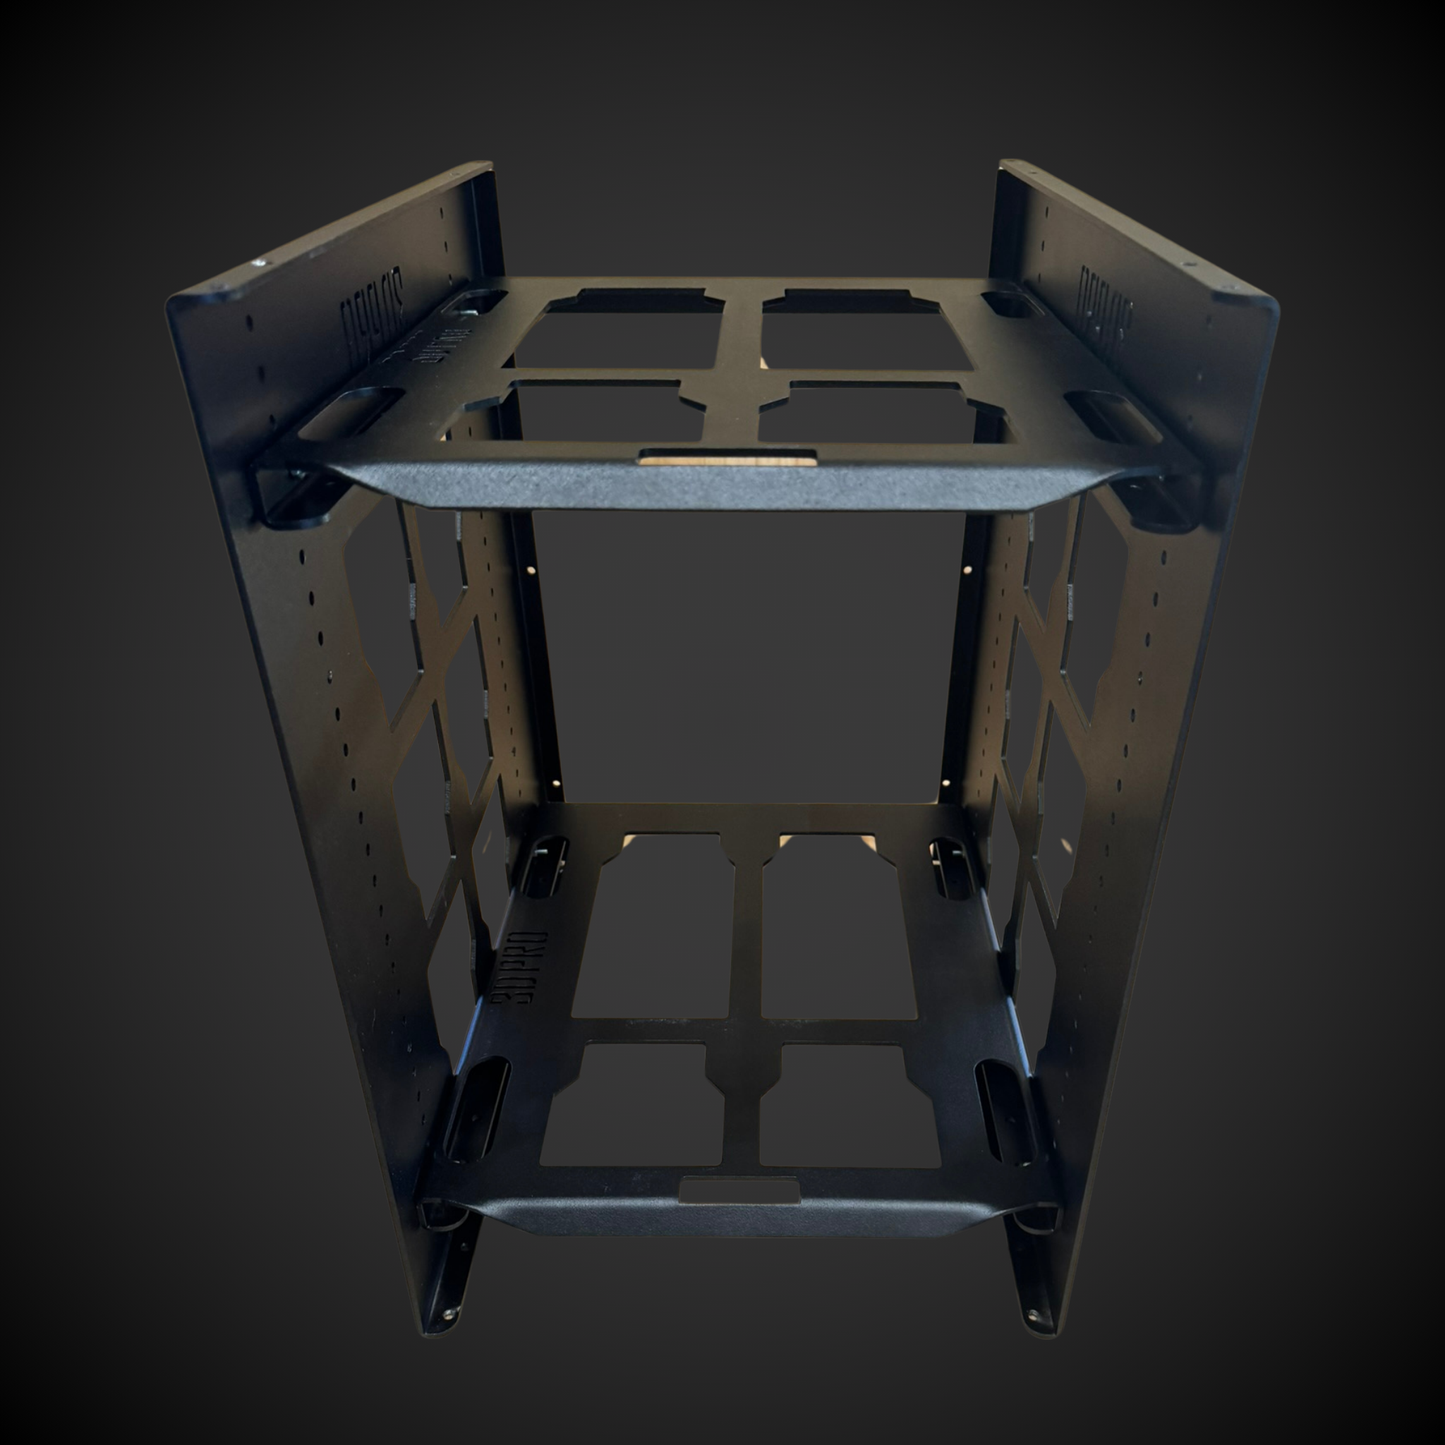
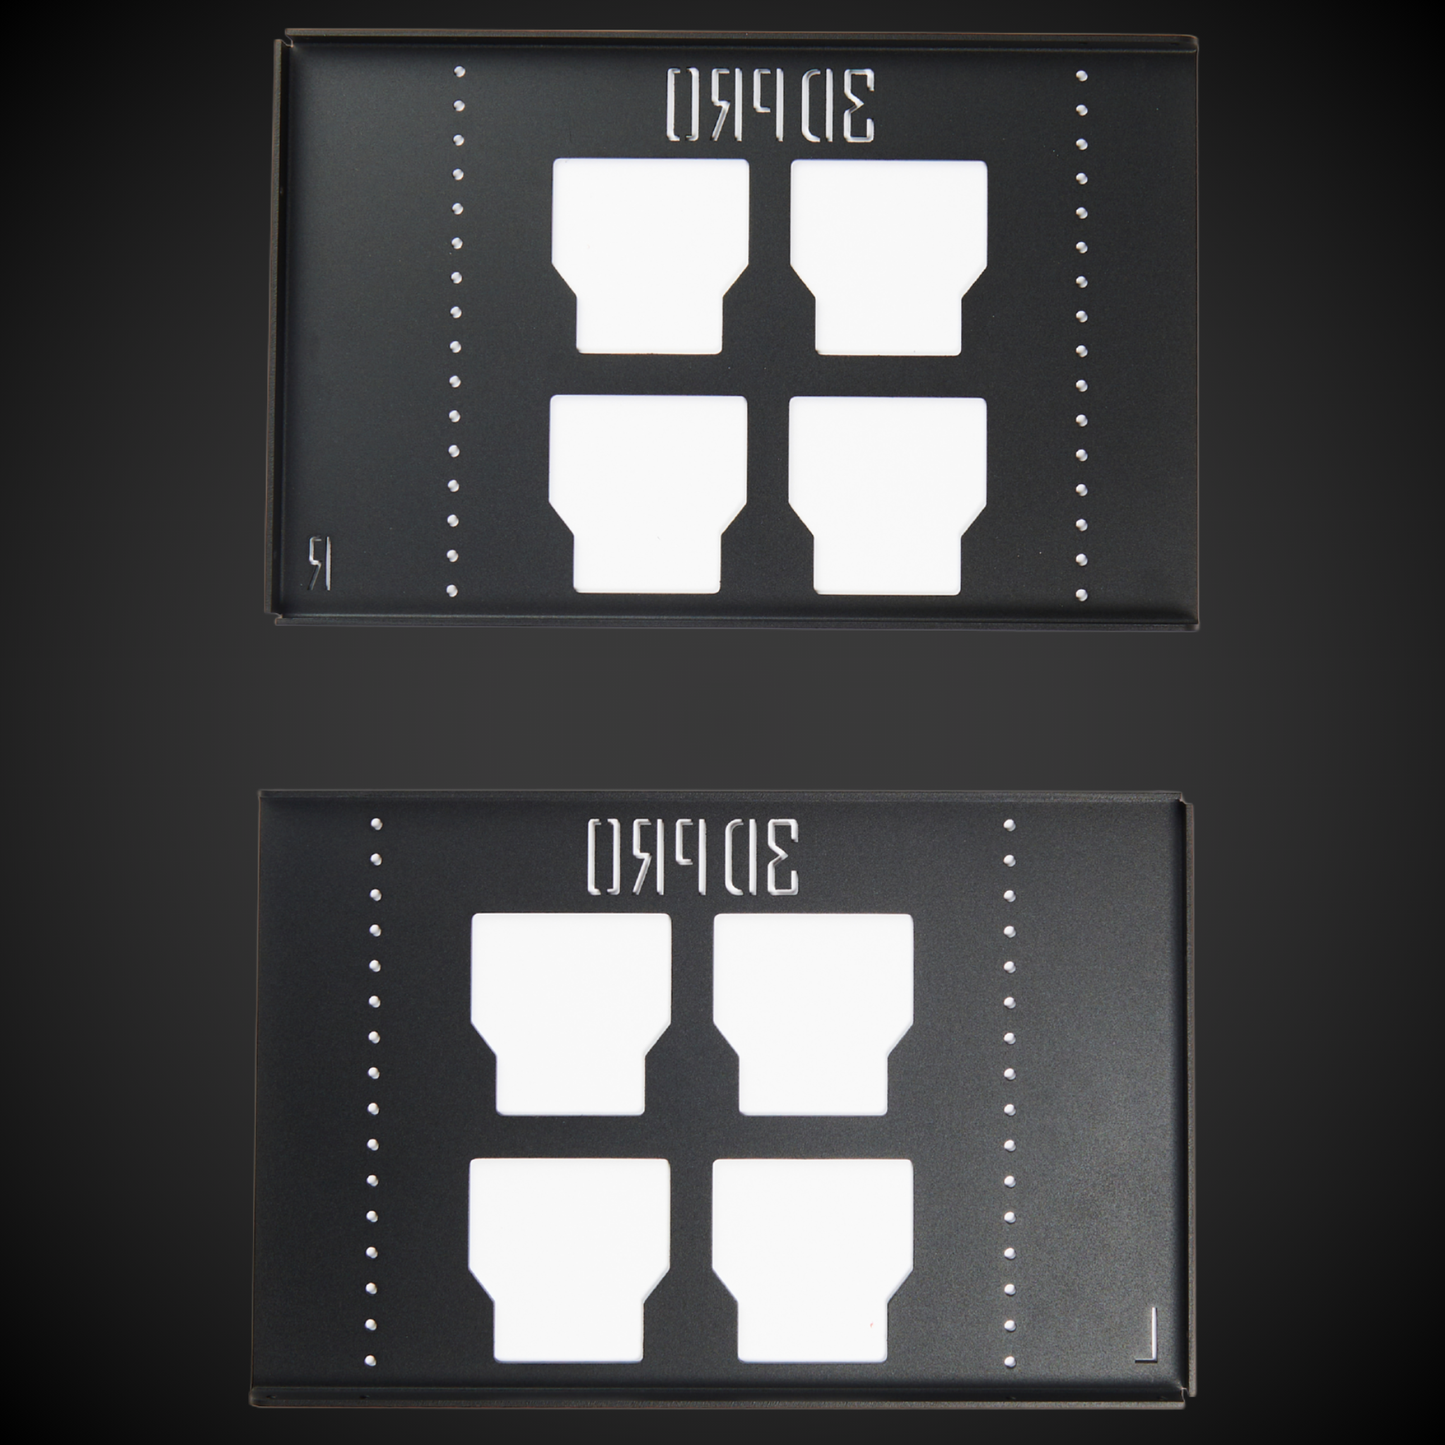
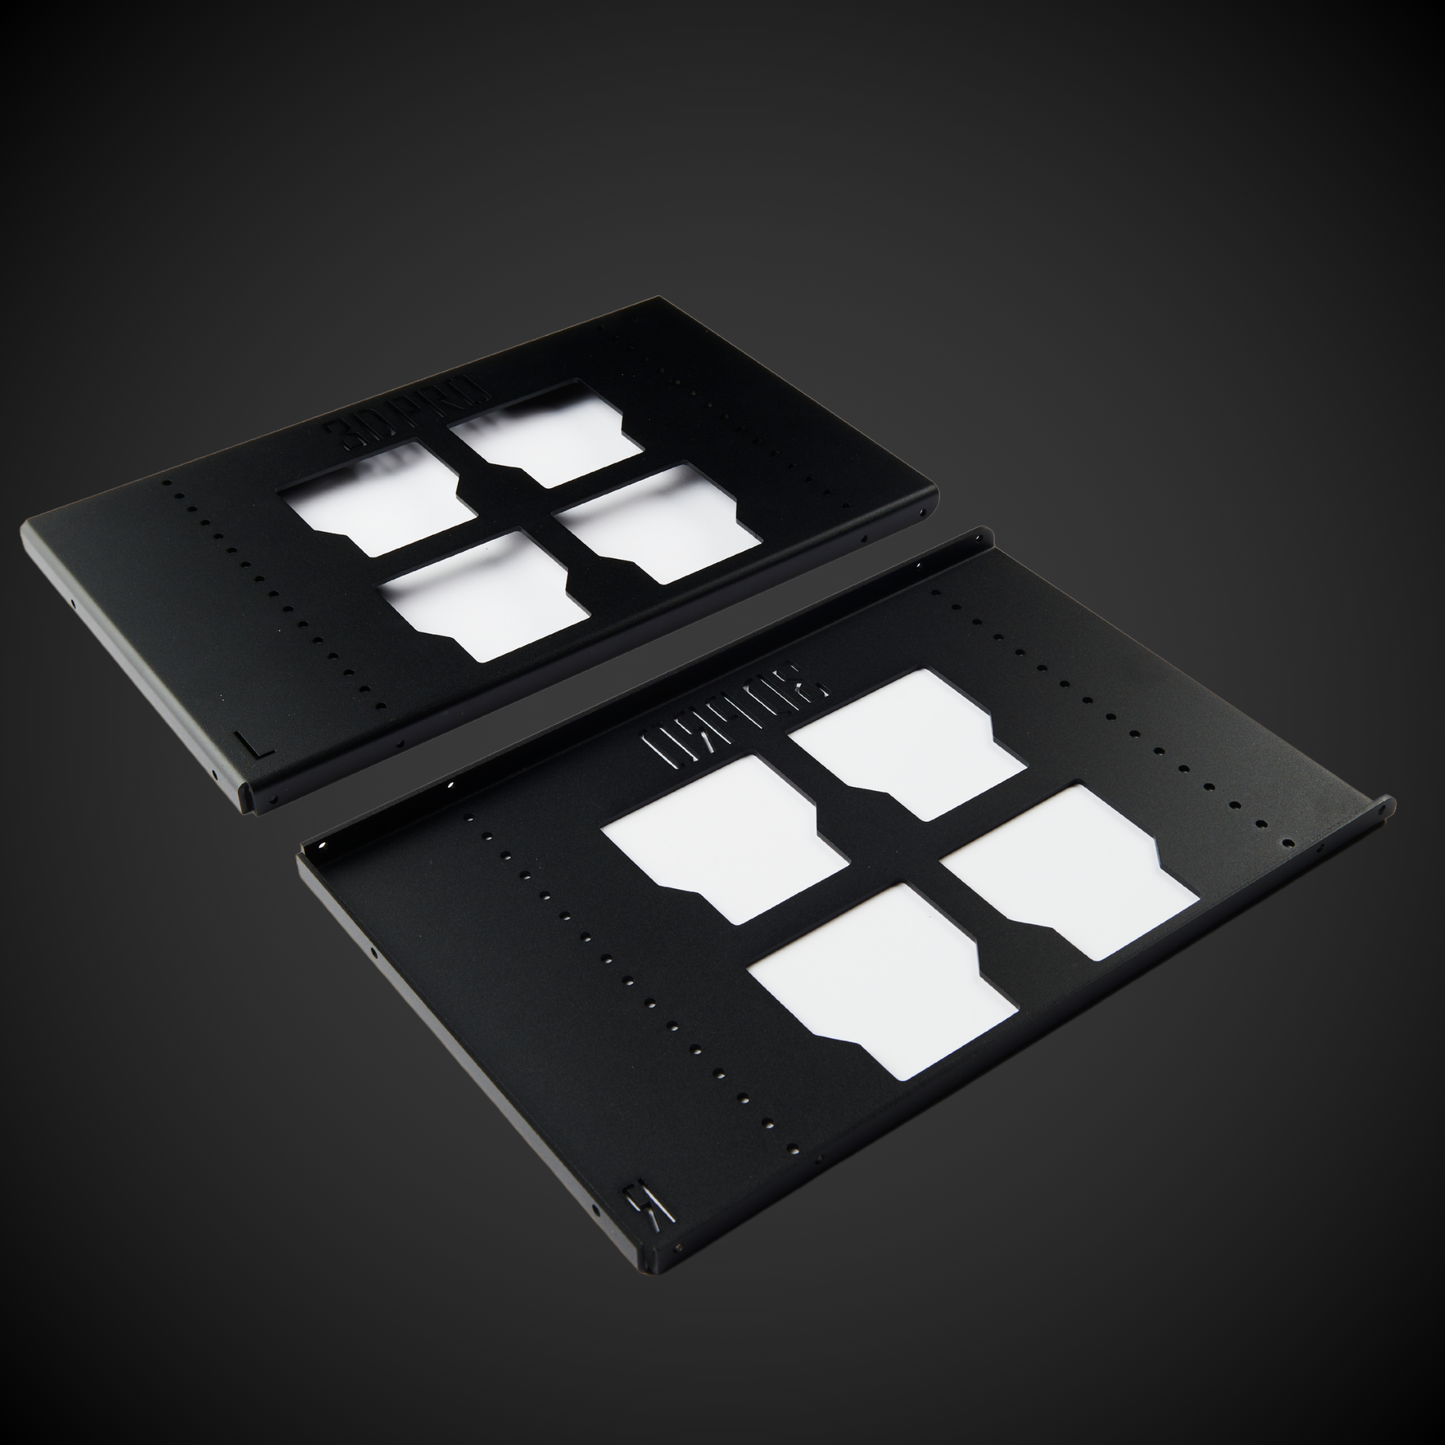
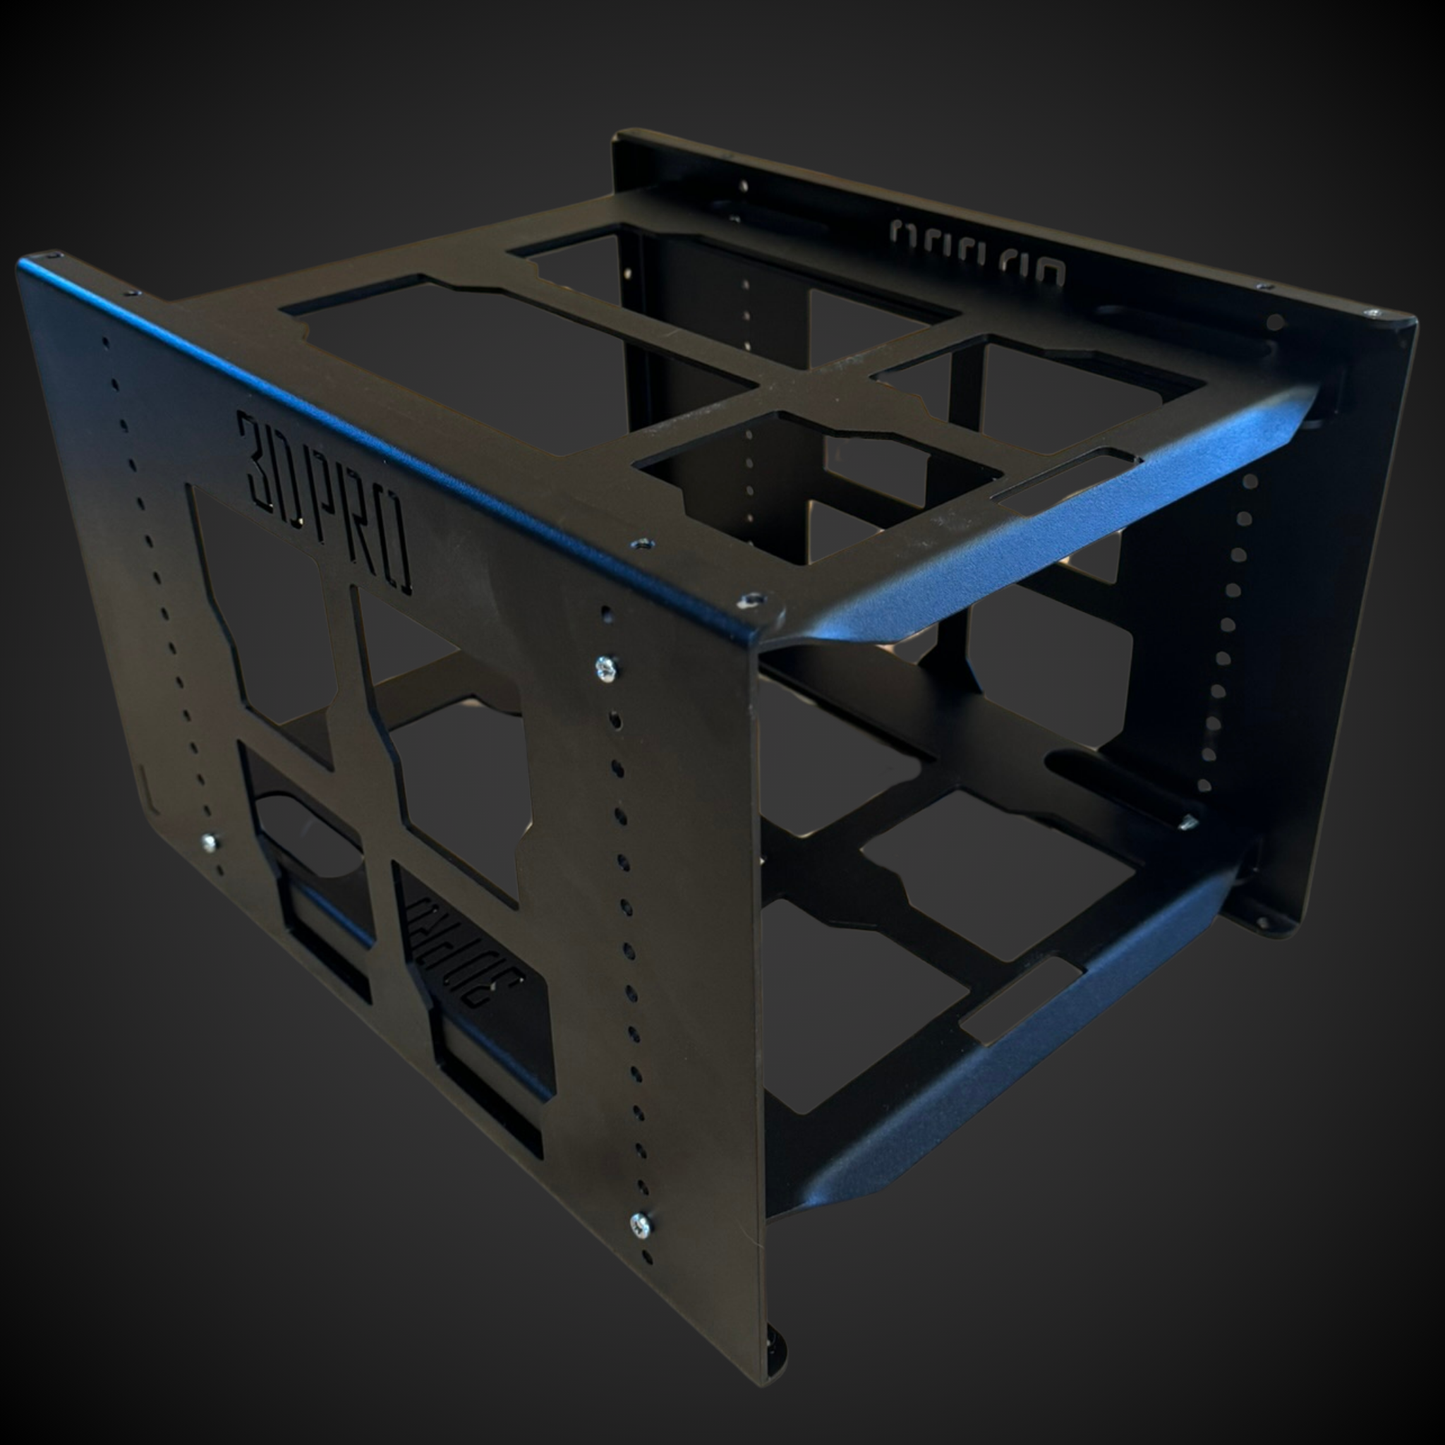
Full Width Shelf (Pack A Shelf)
Quantity
View full details
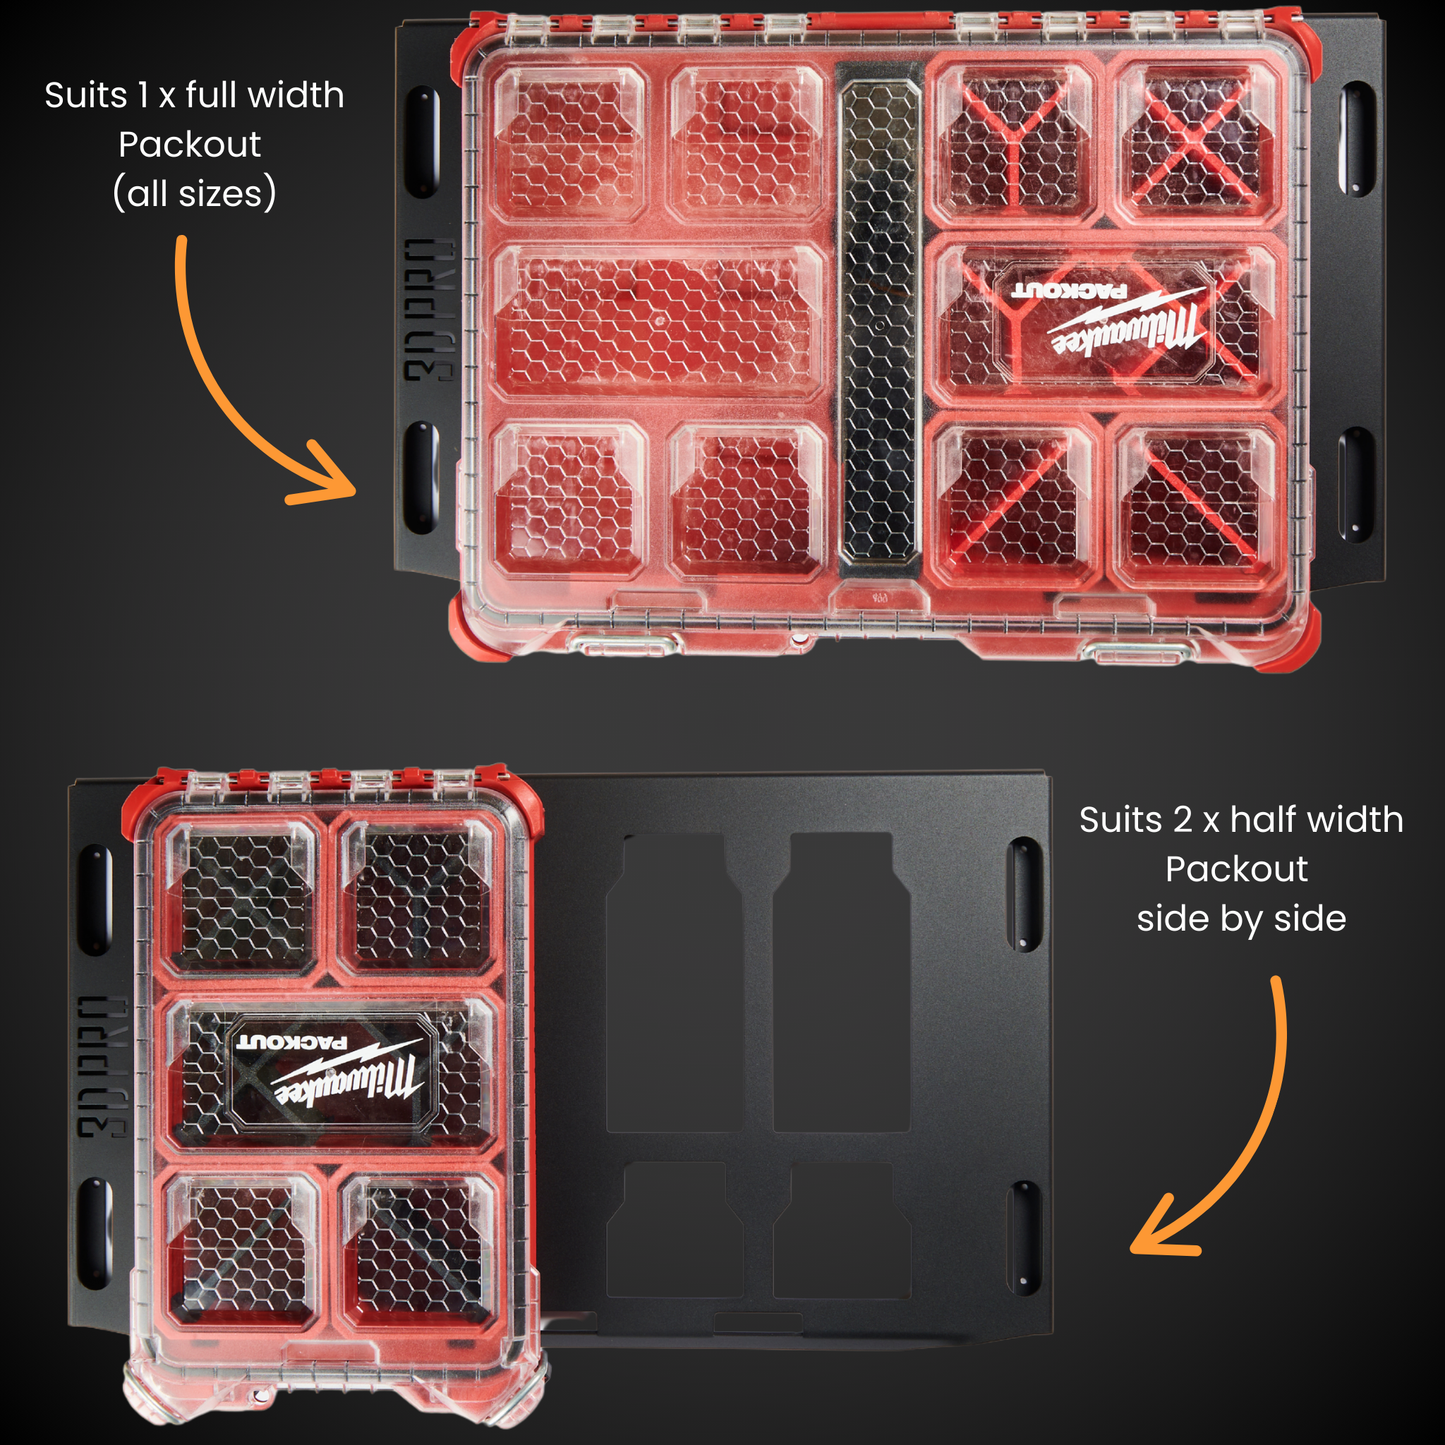
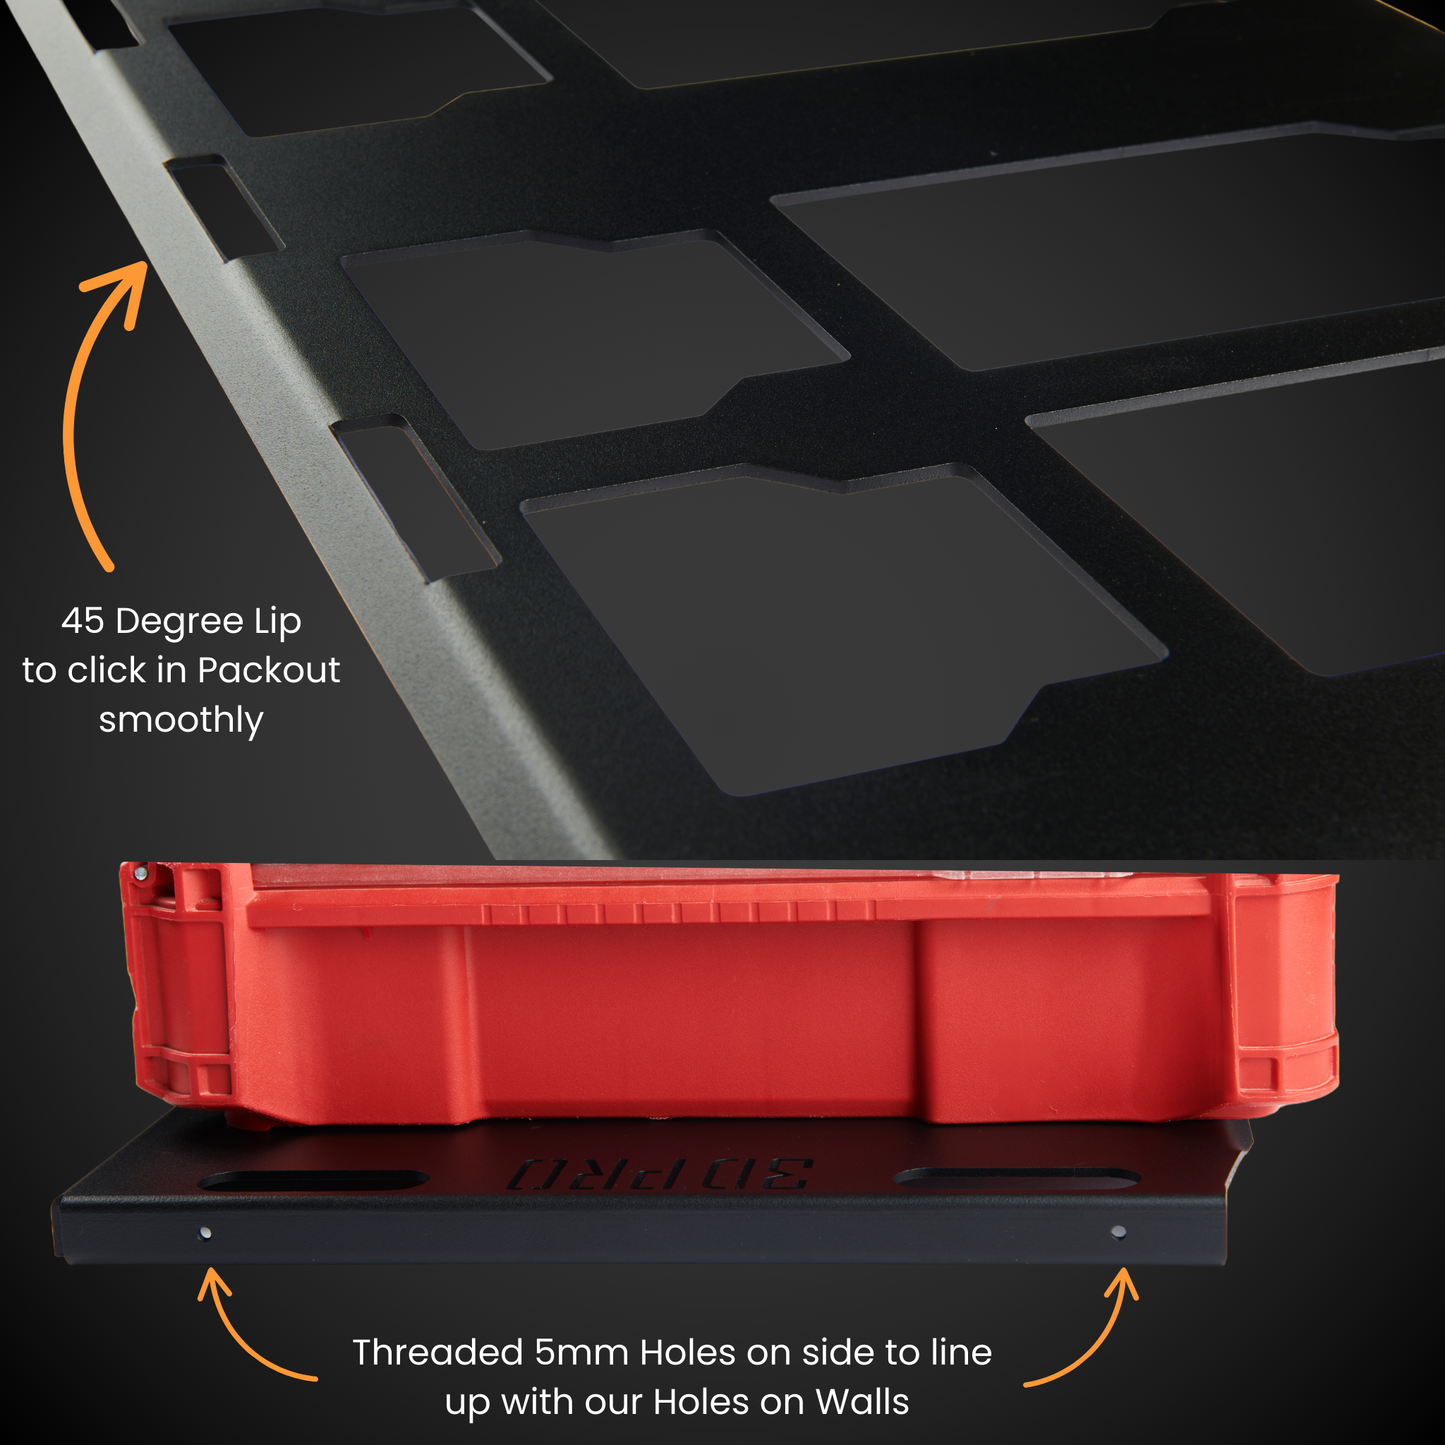
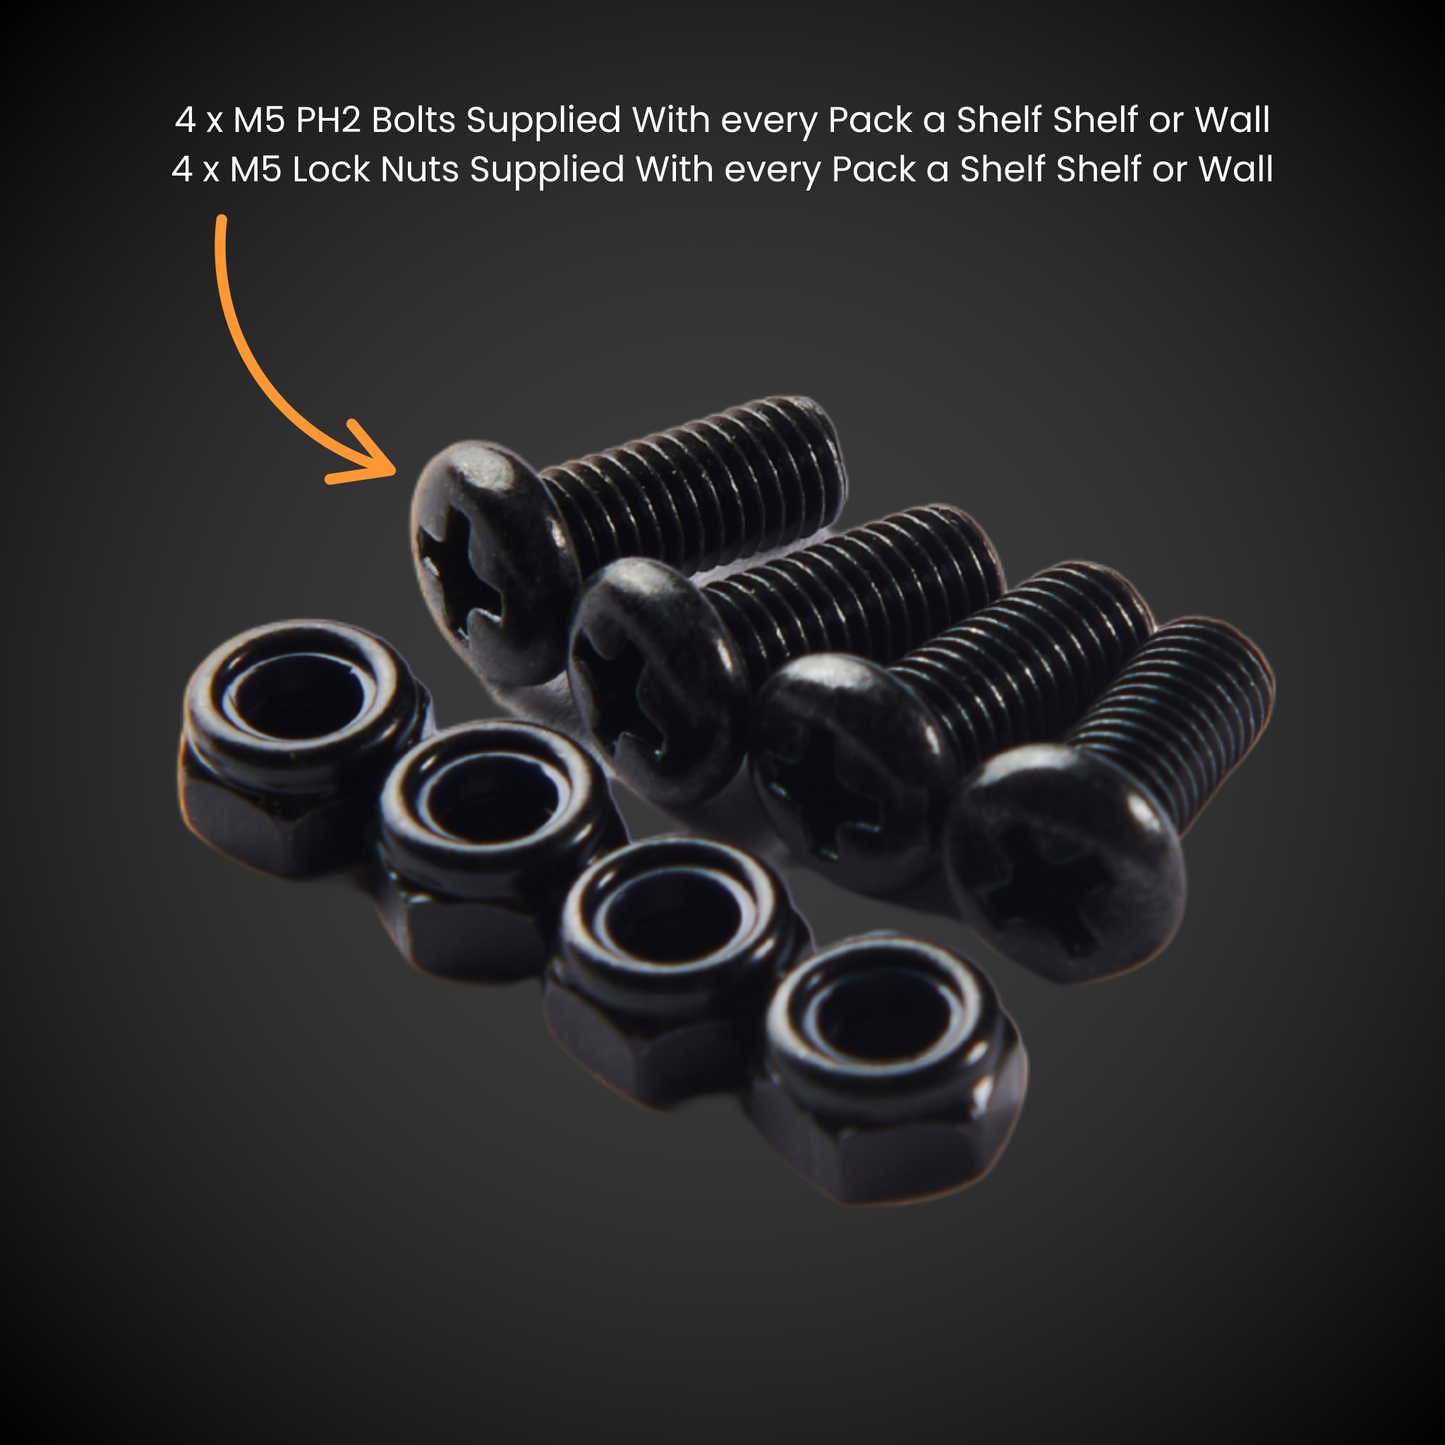


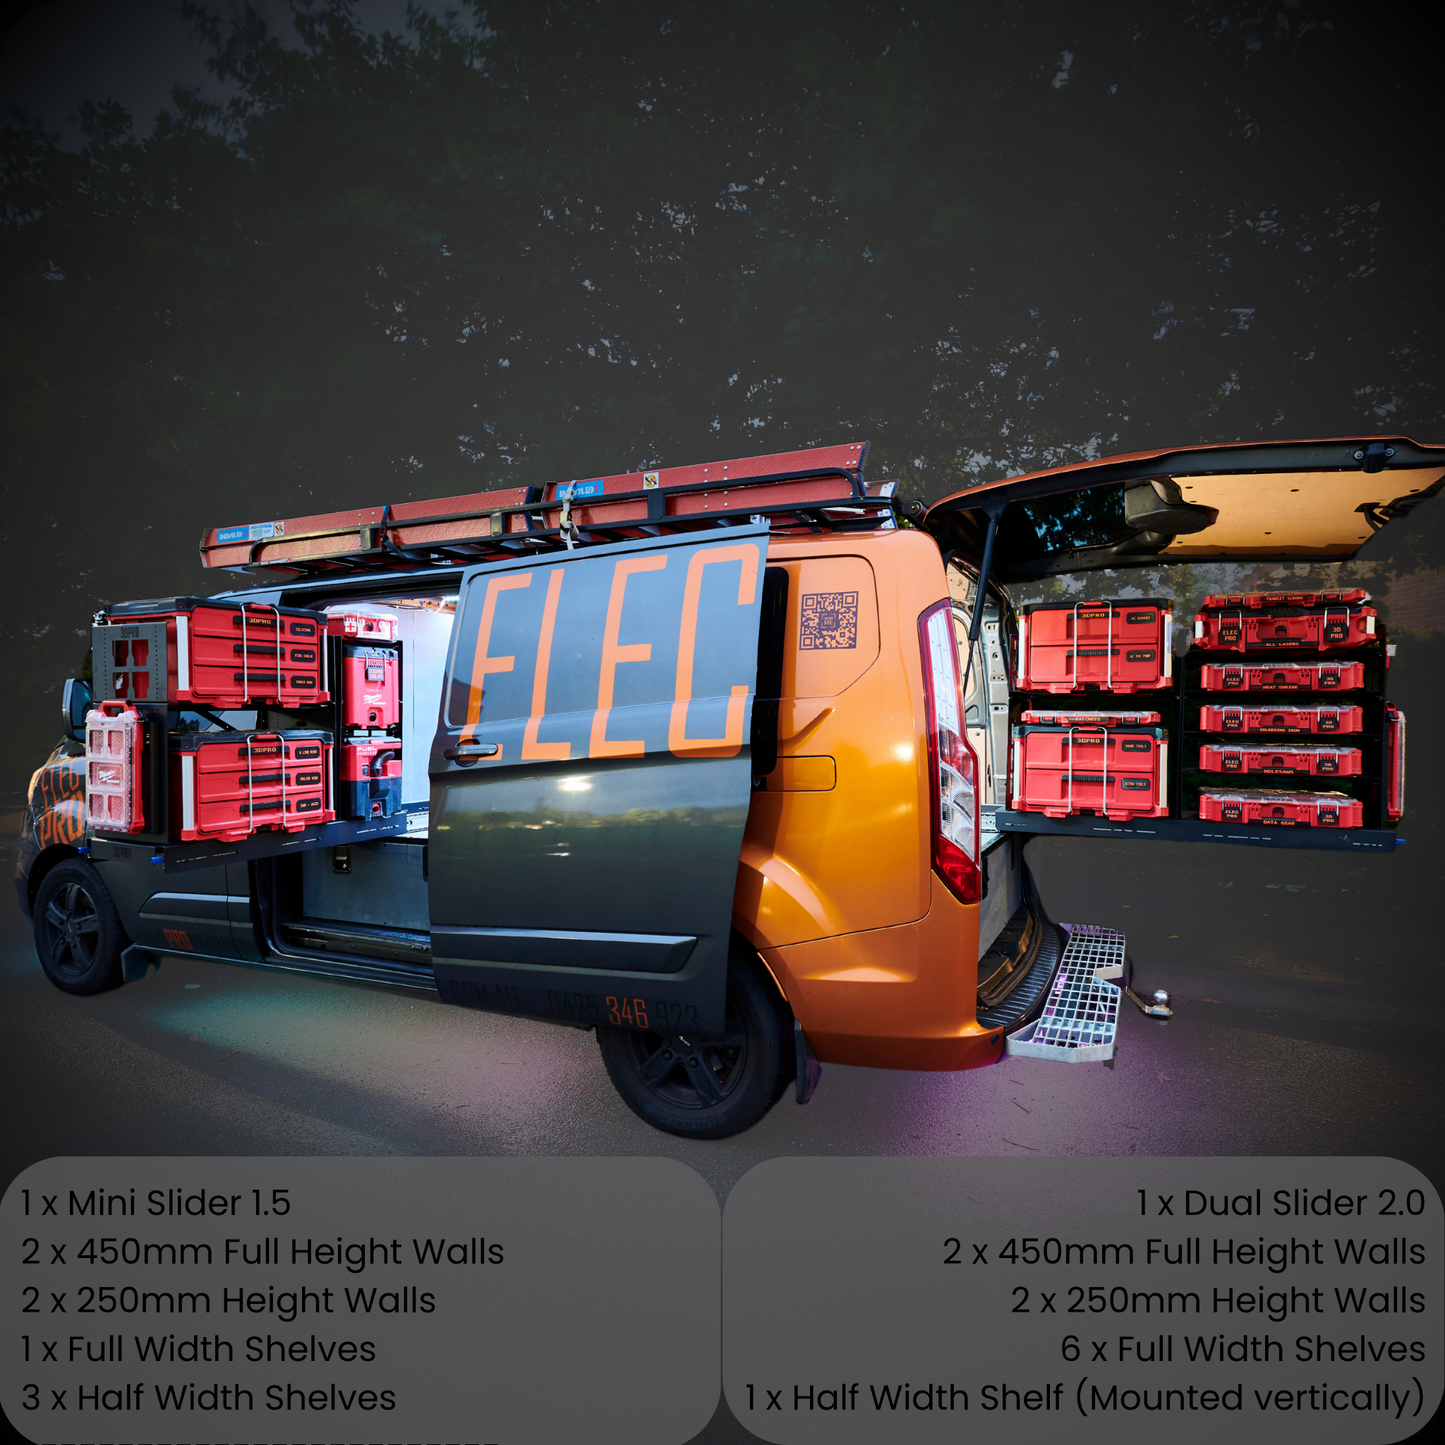


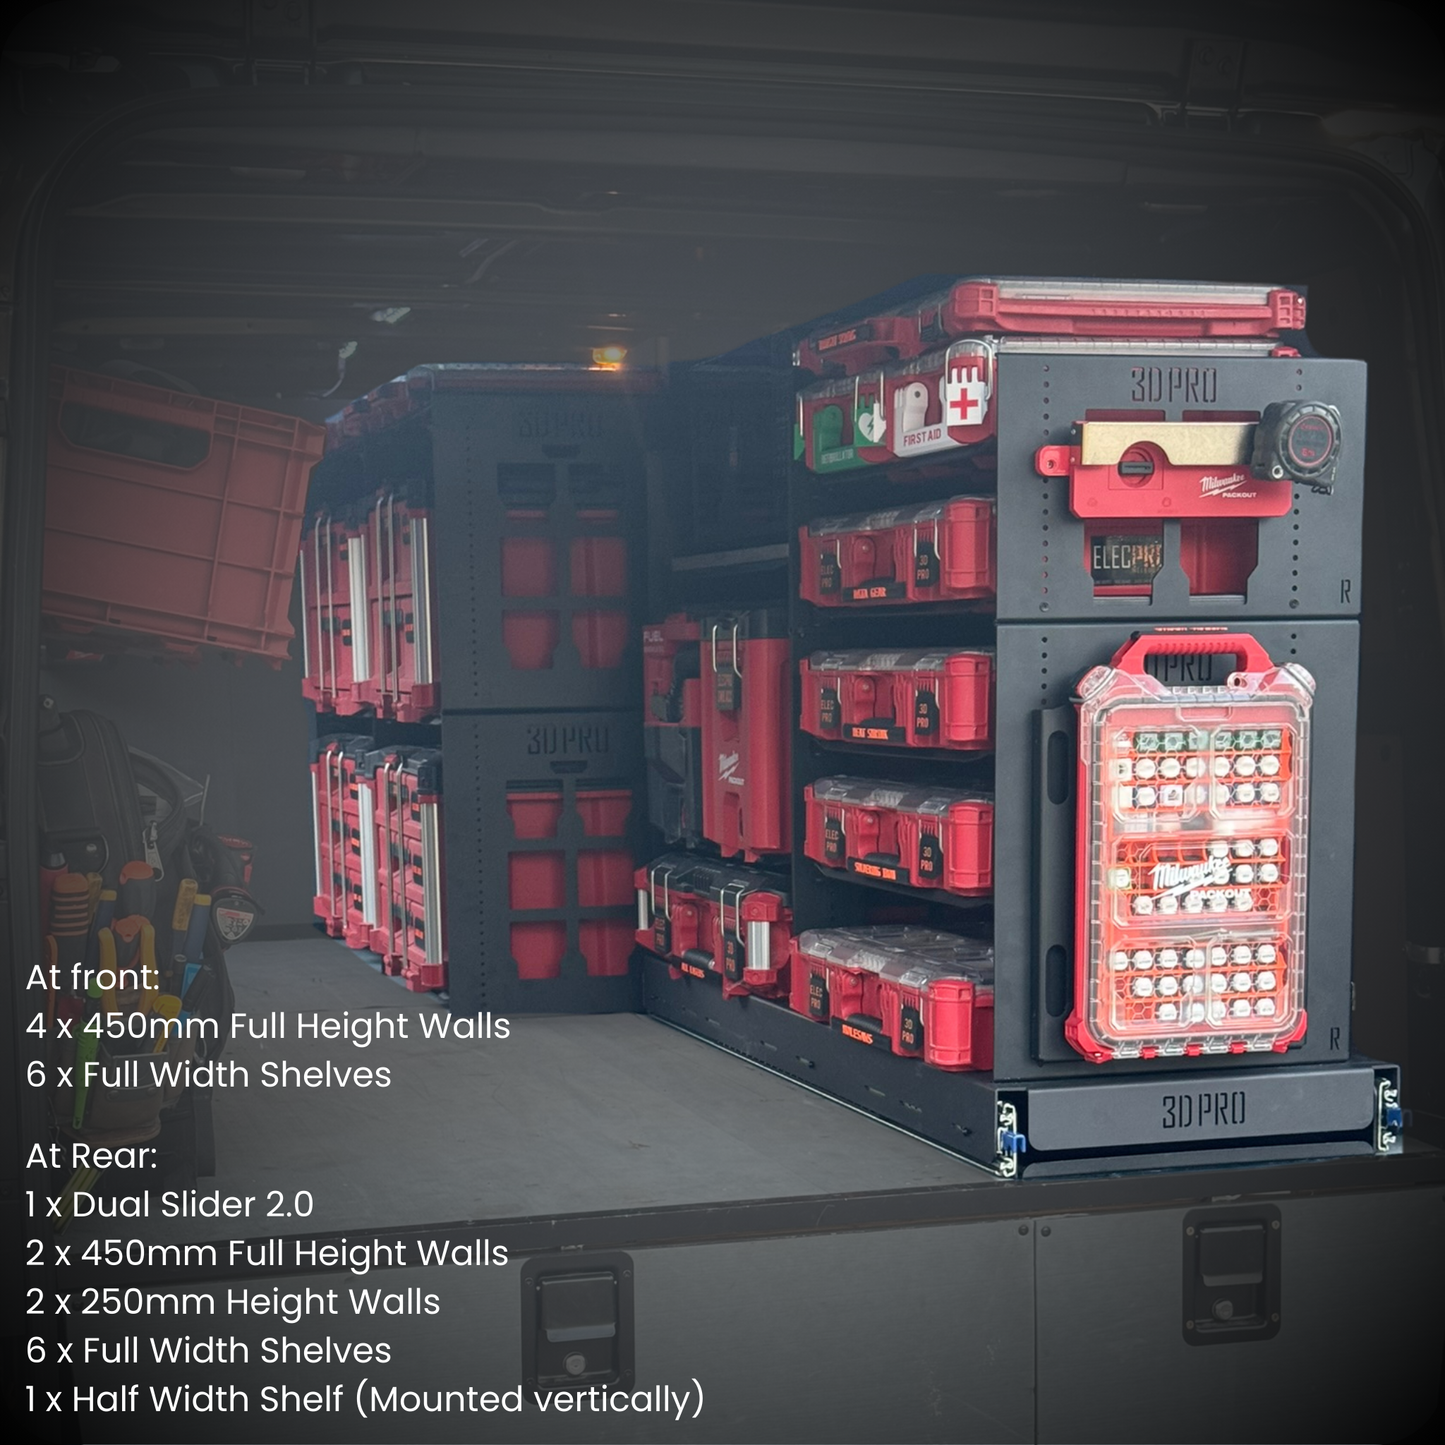


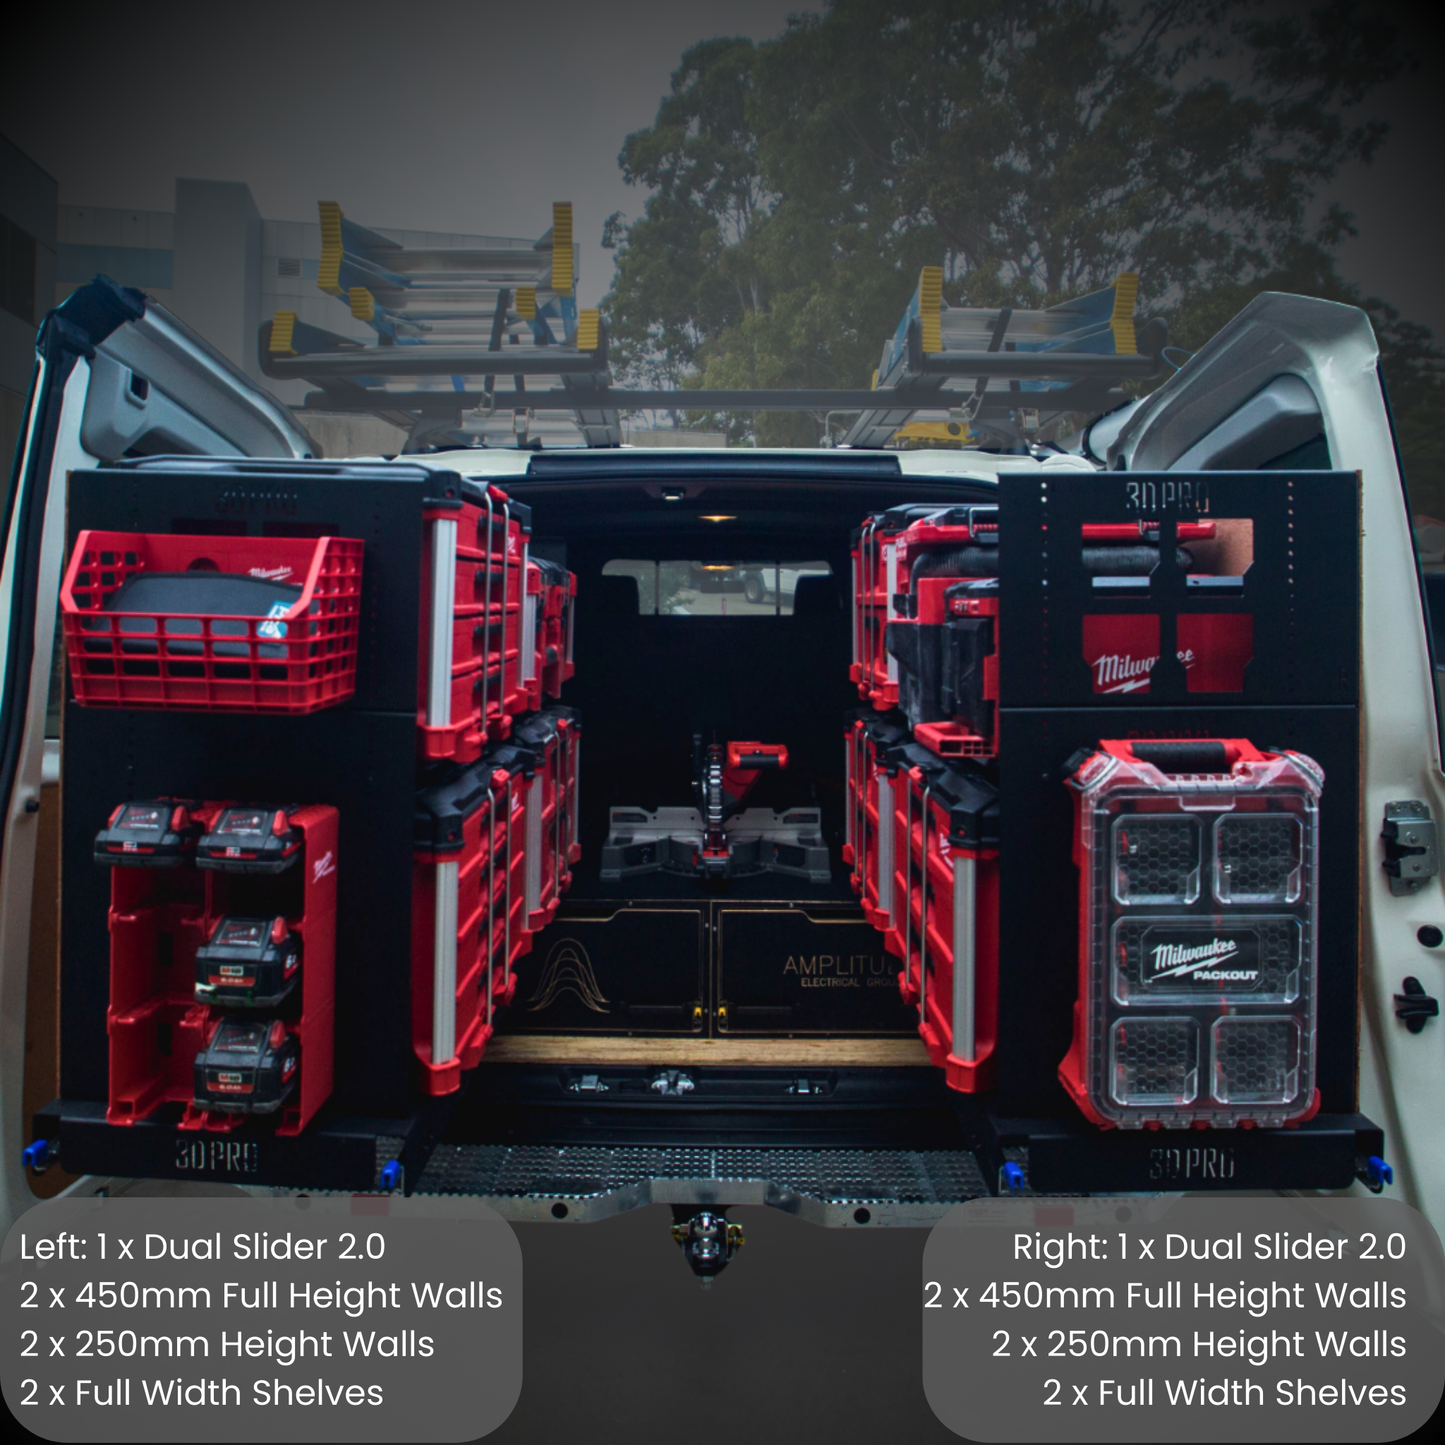


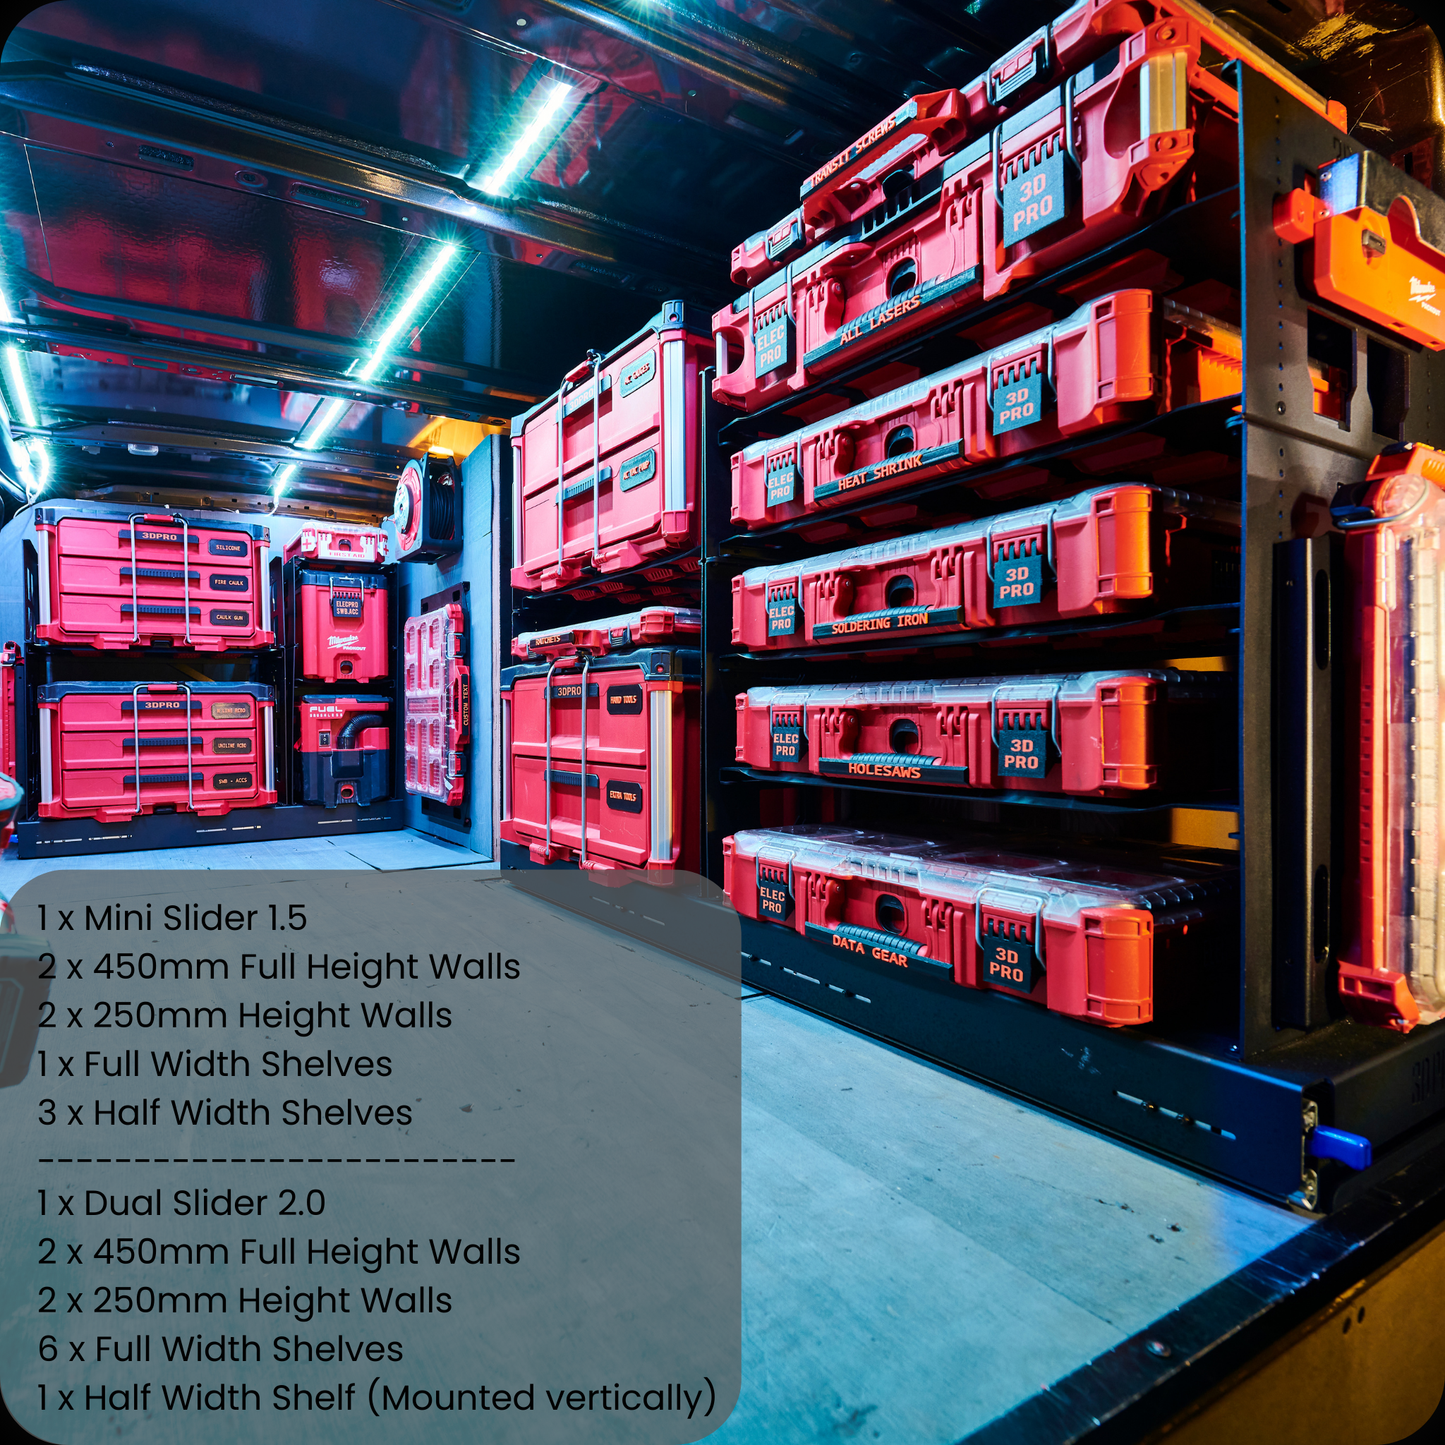

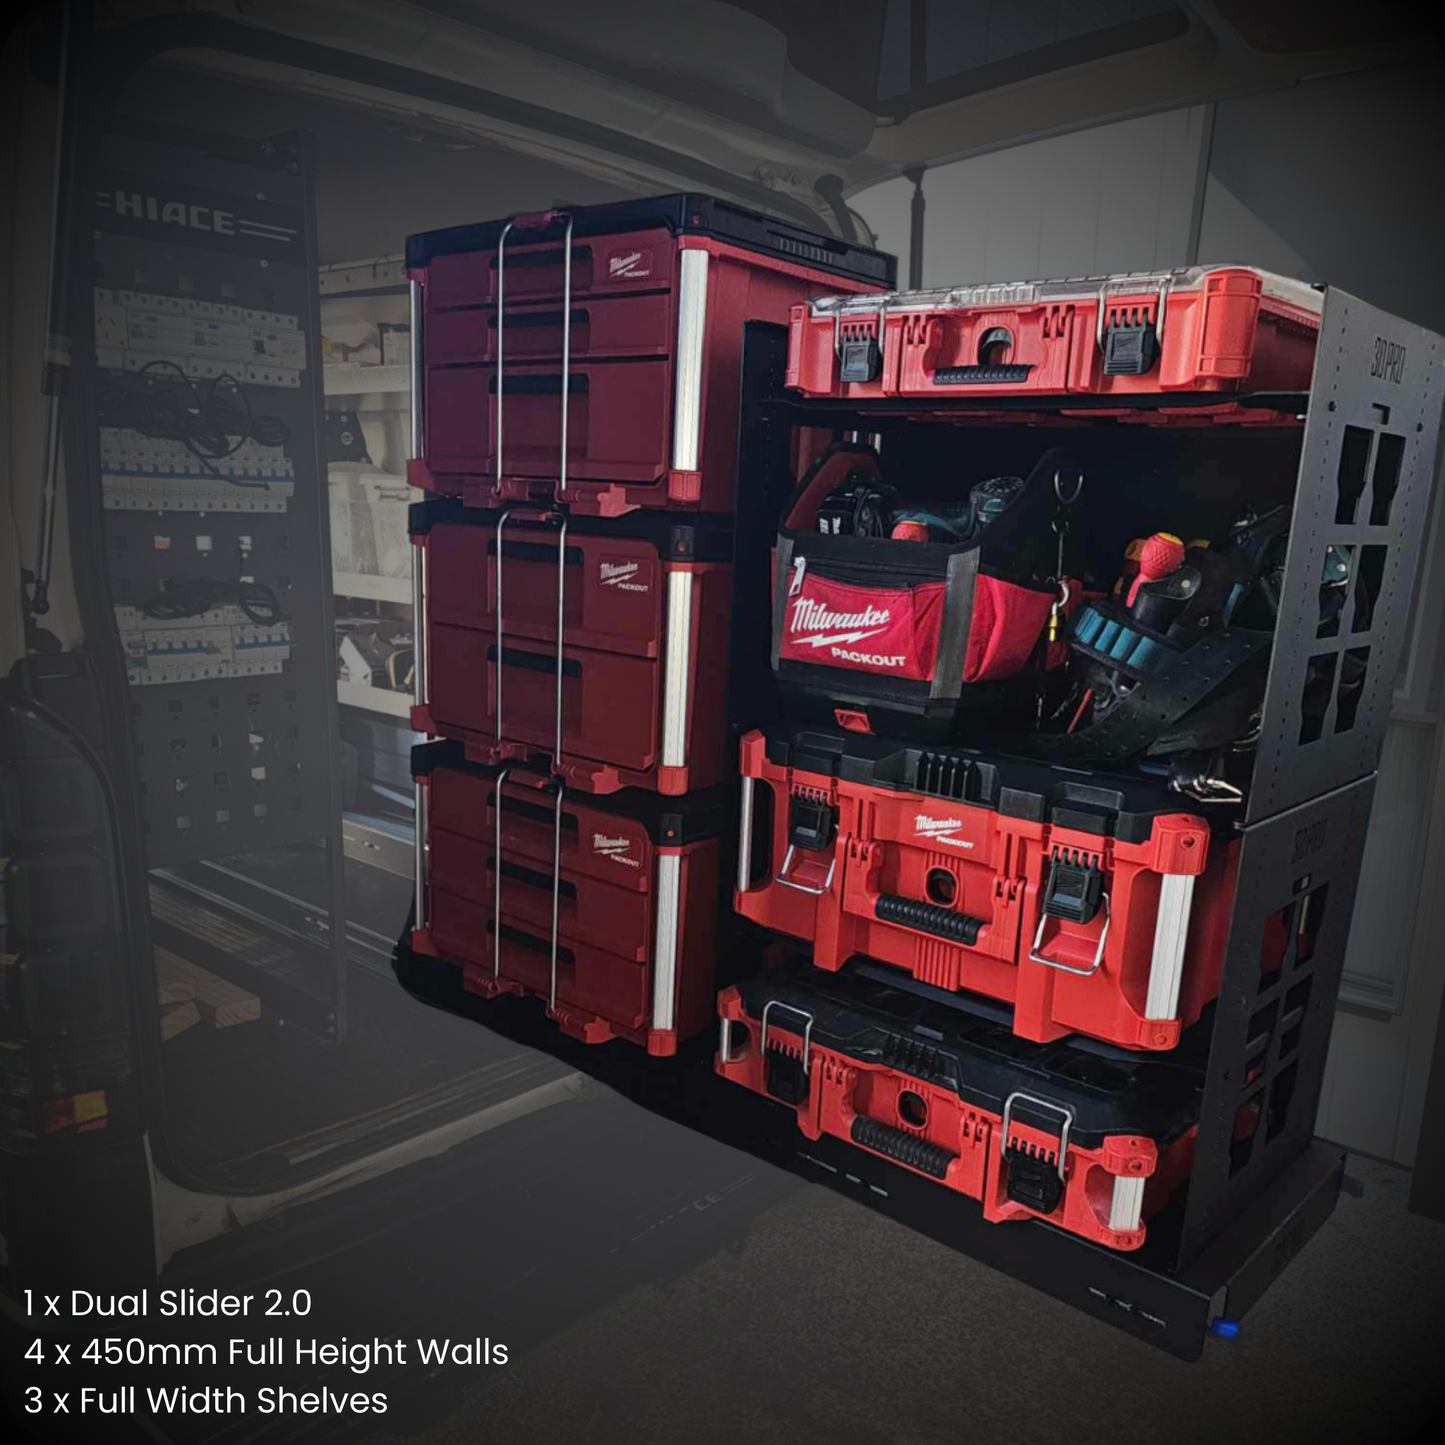


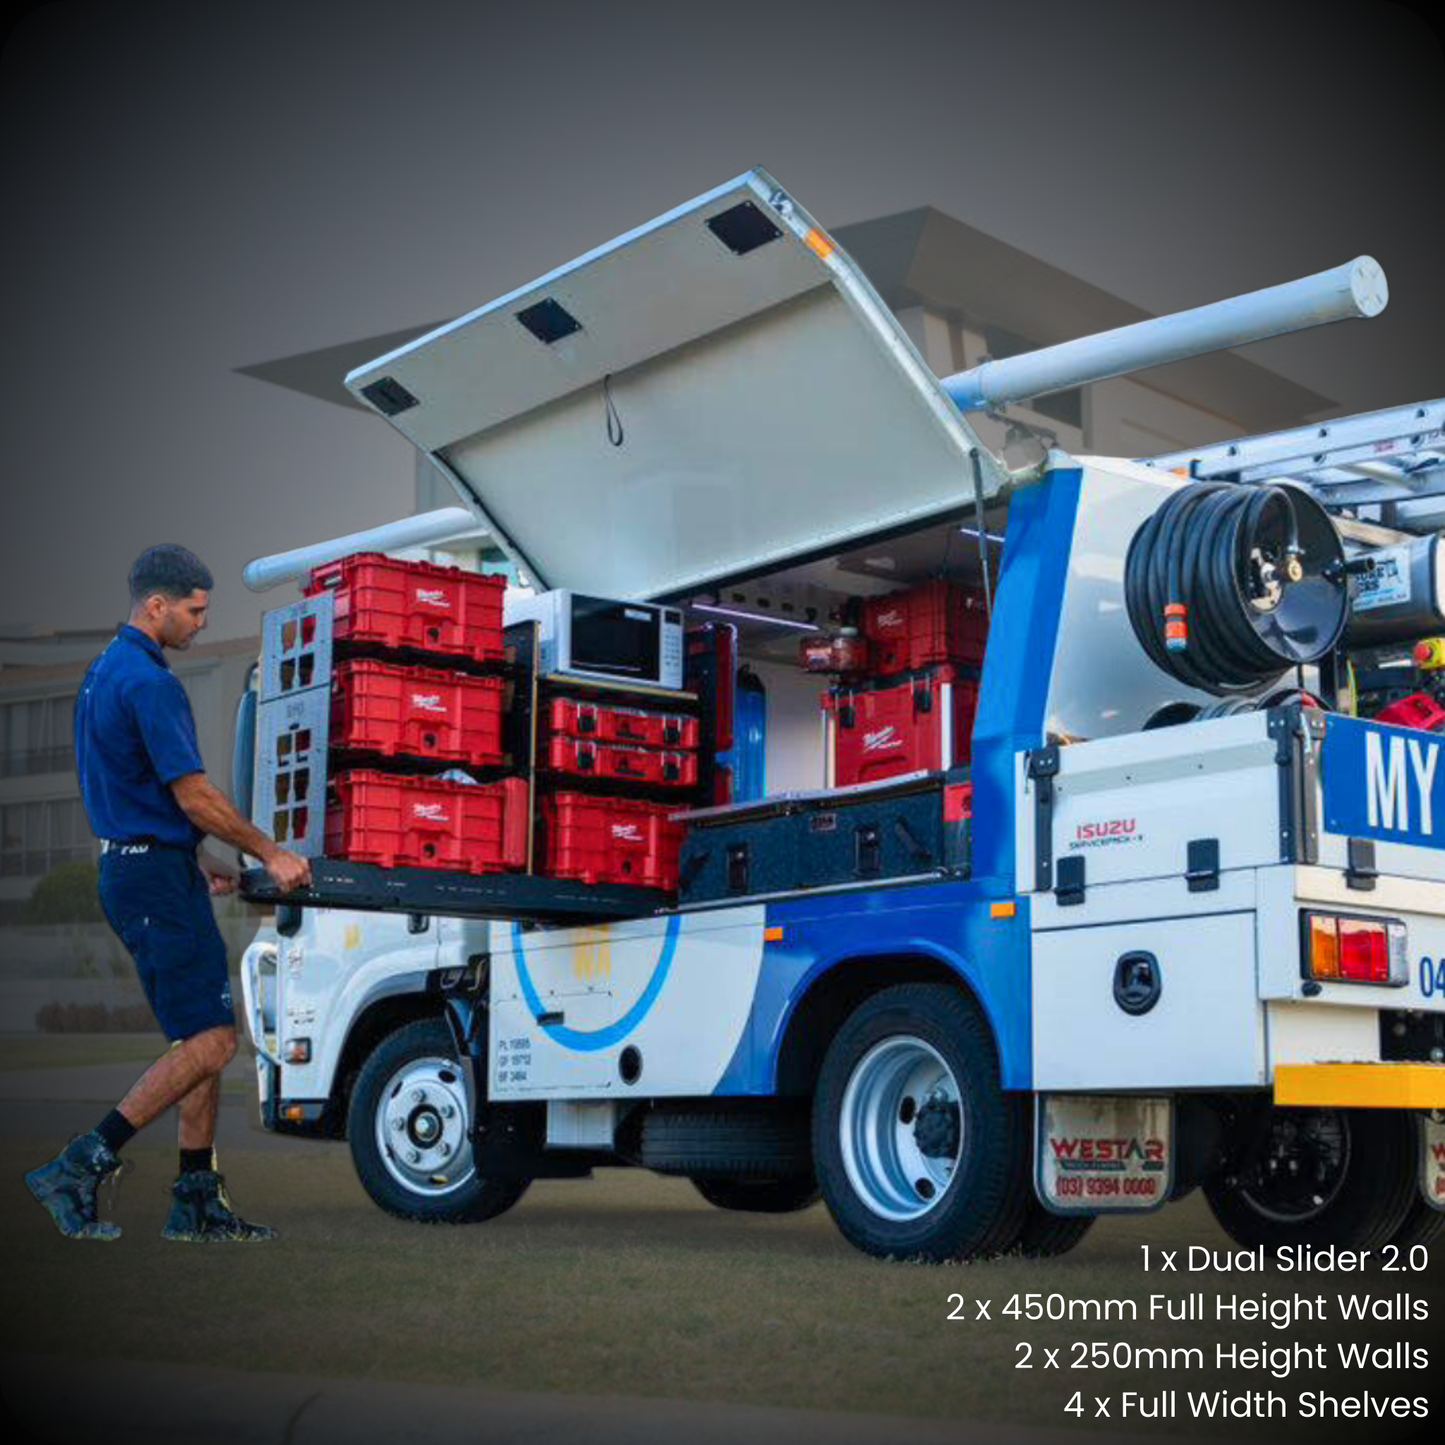
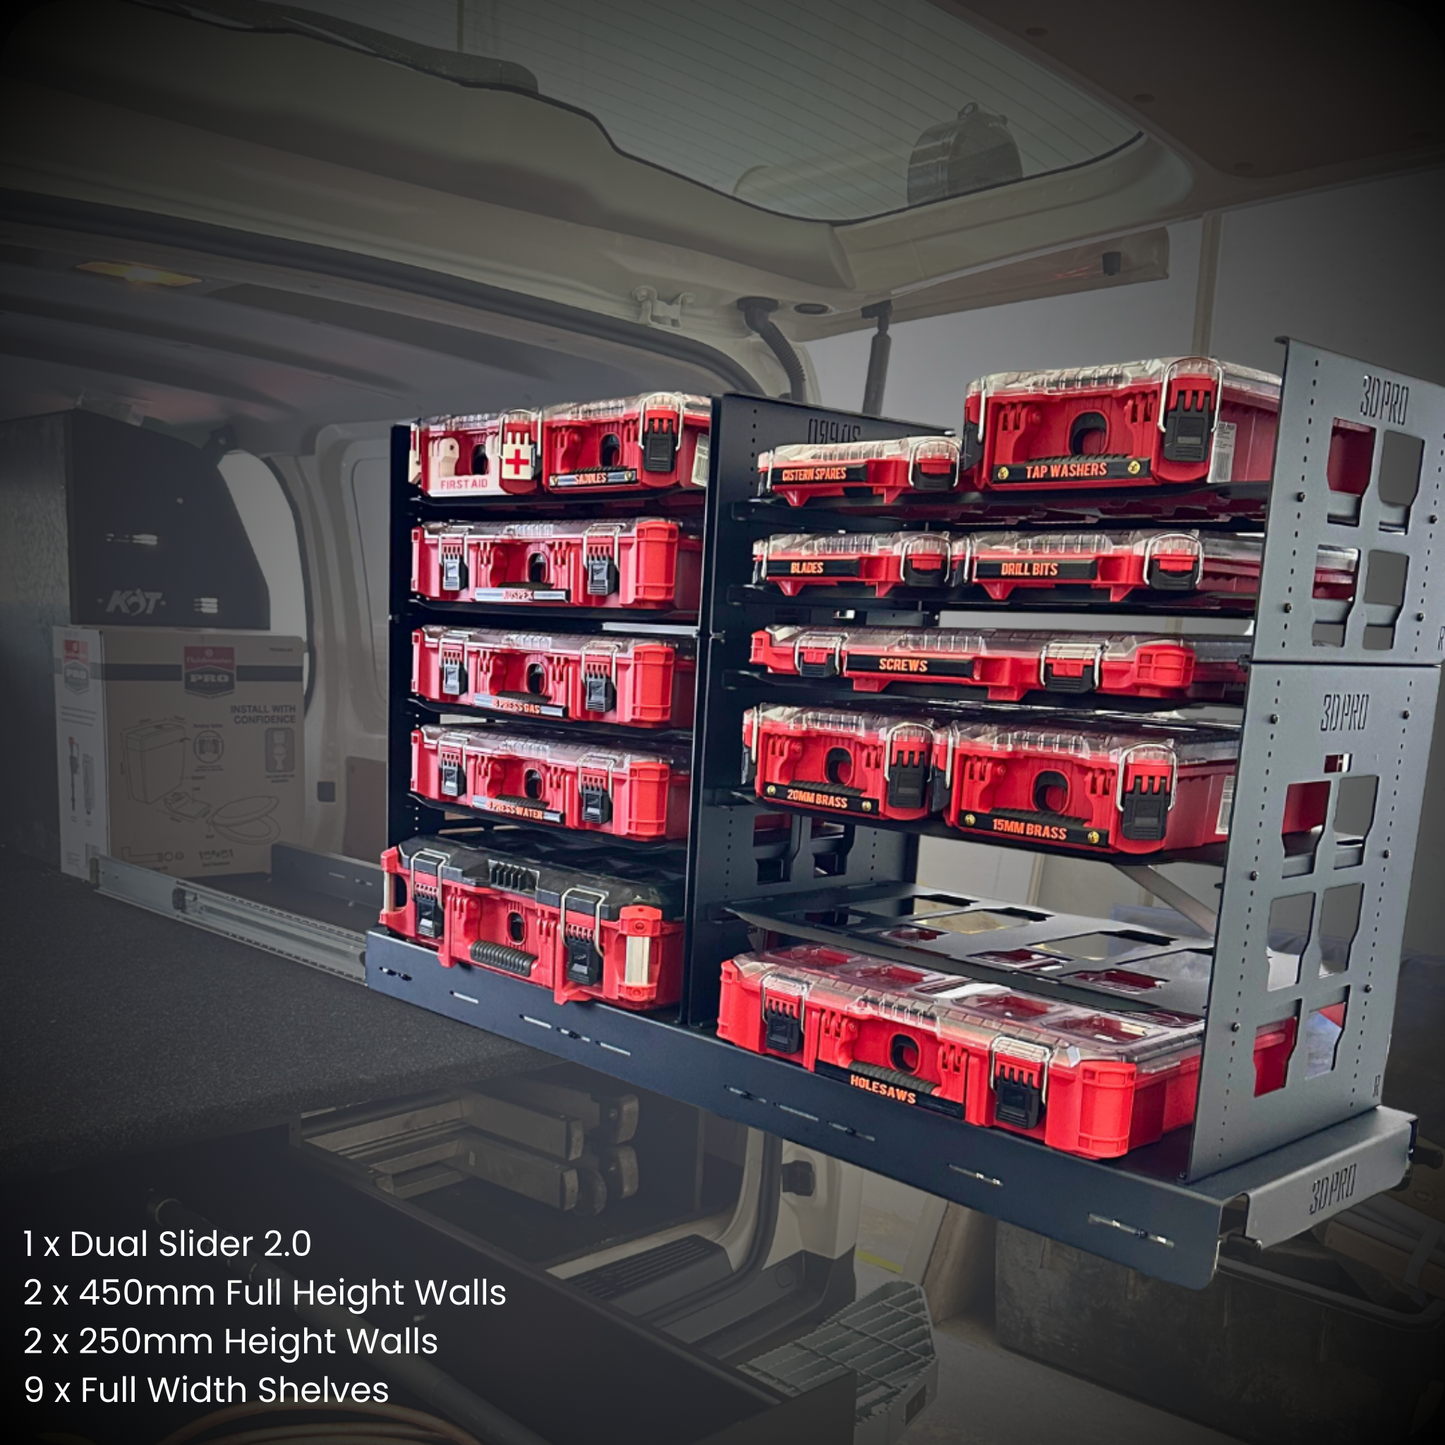
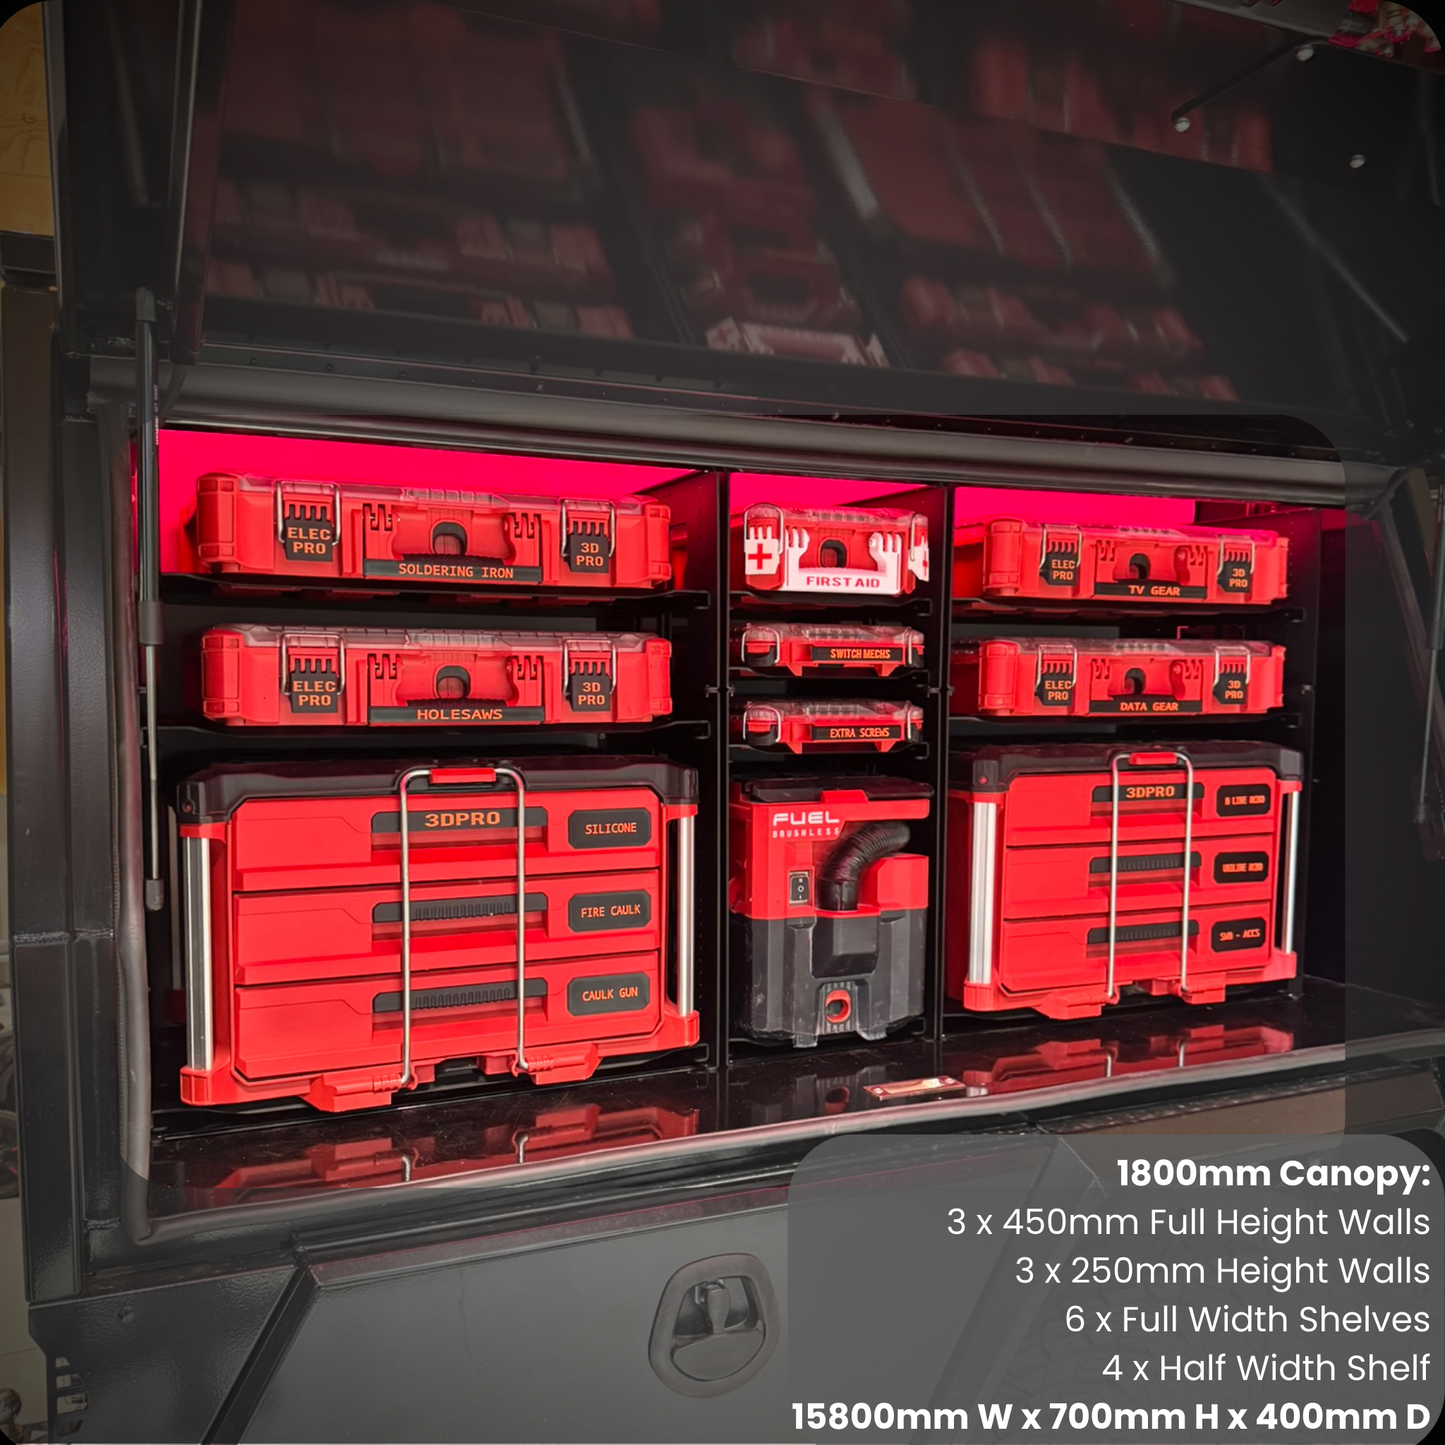


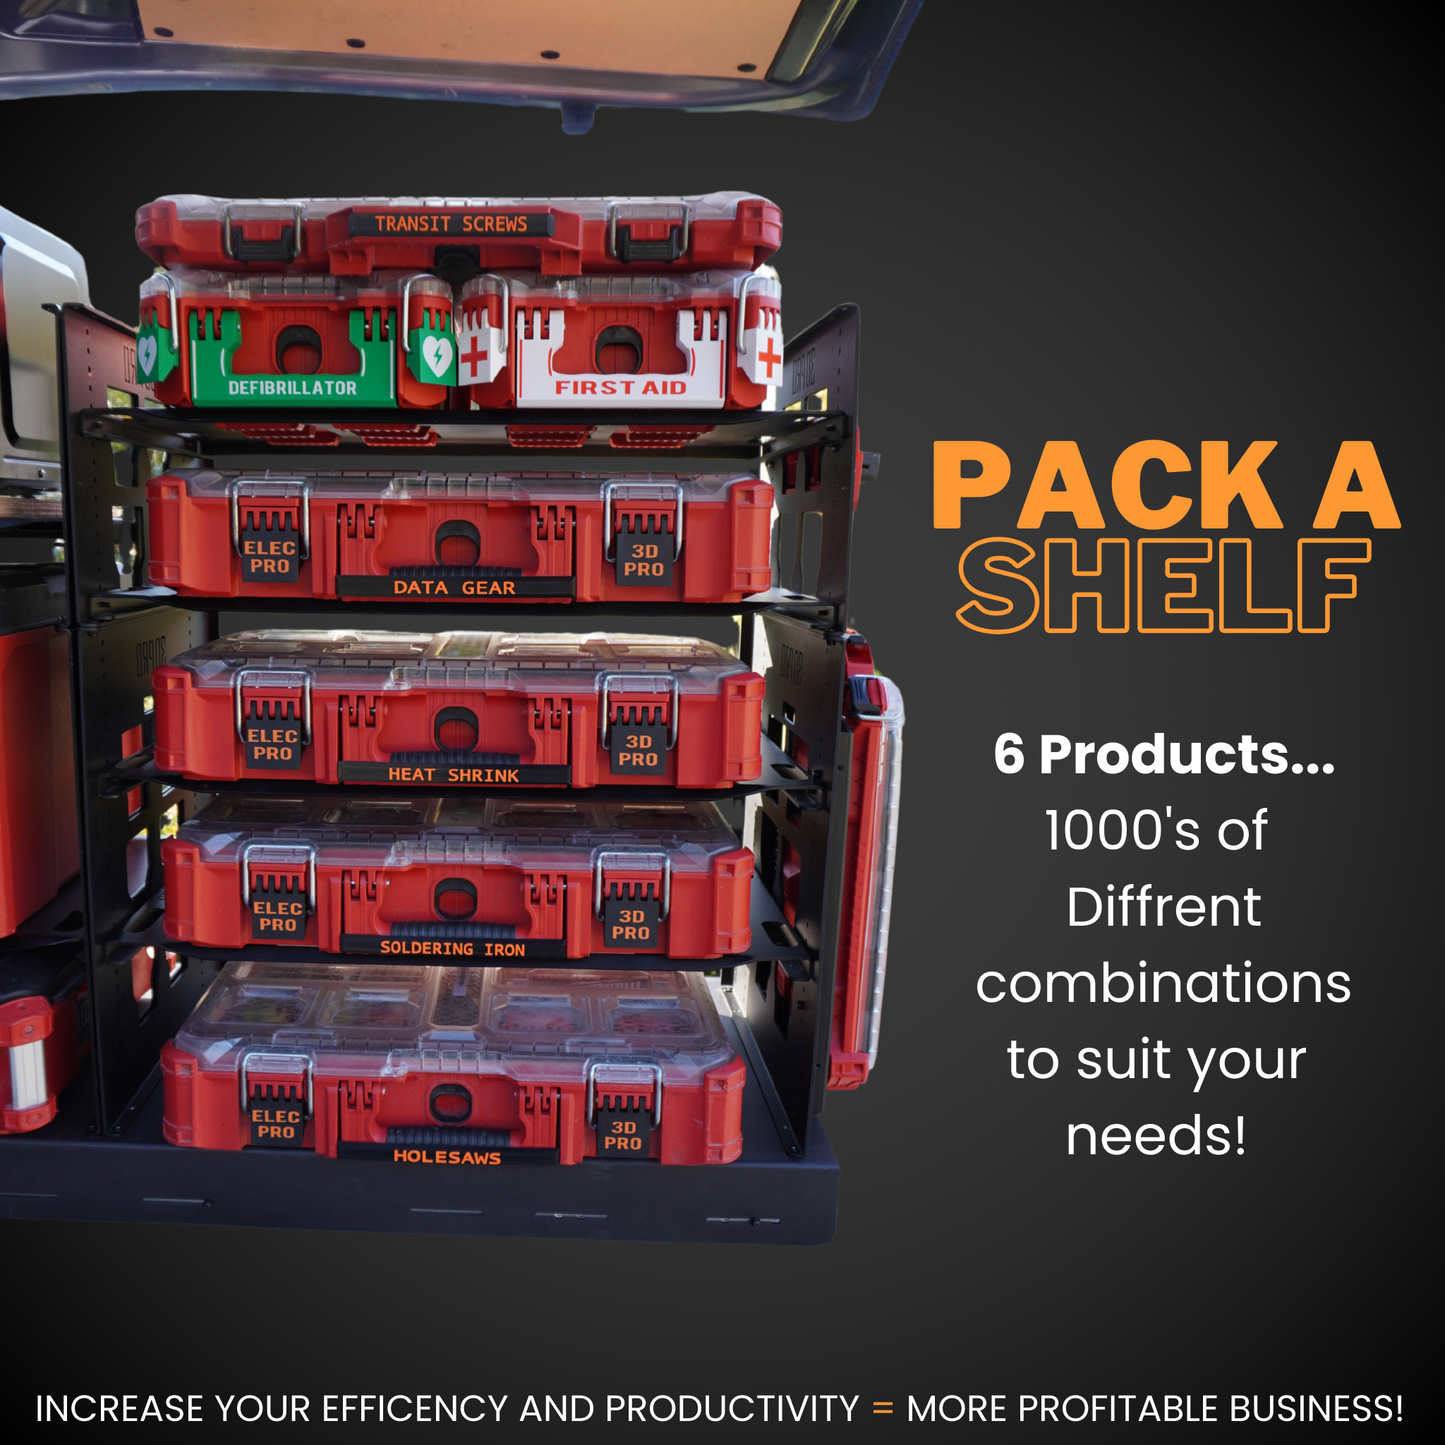


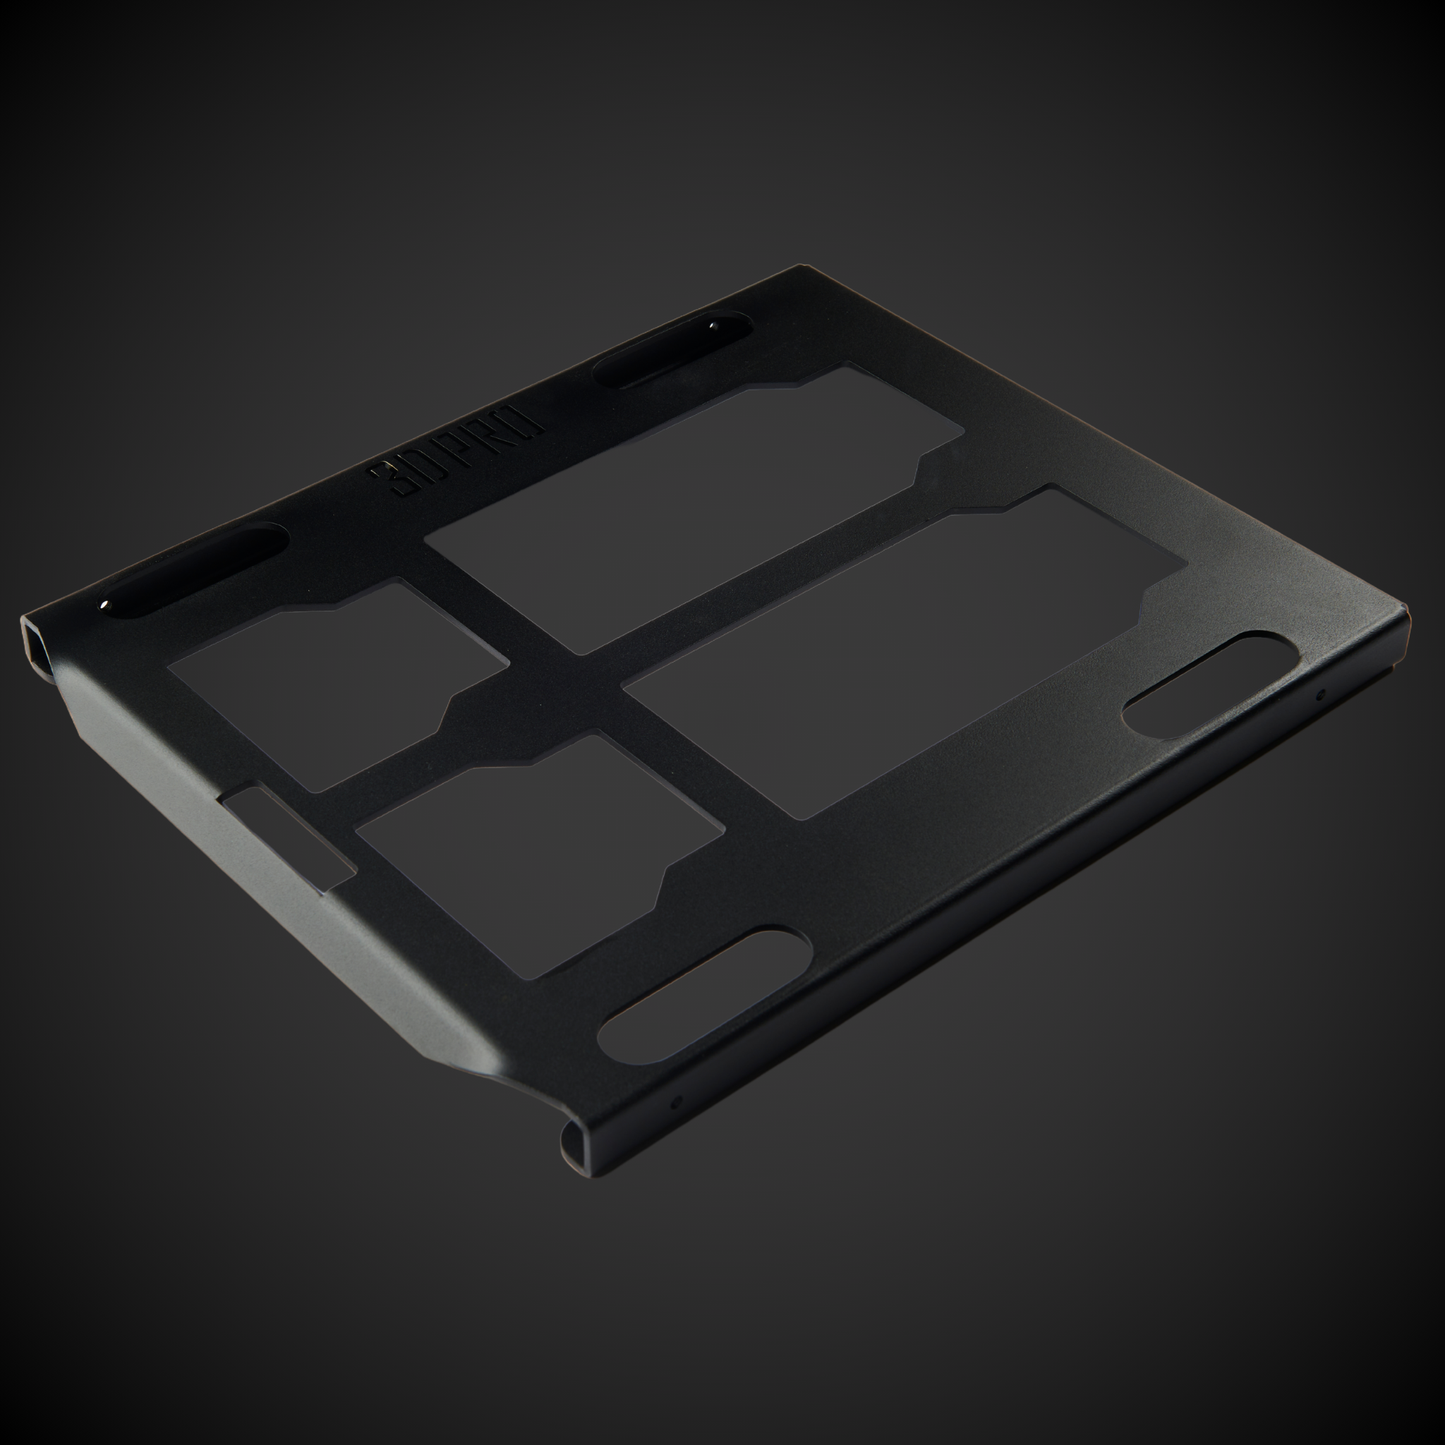
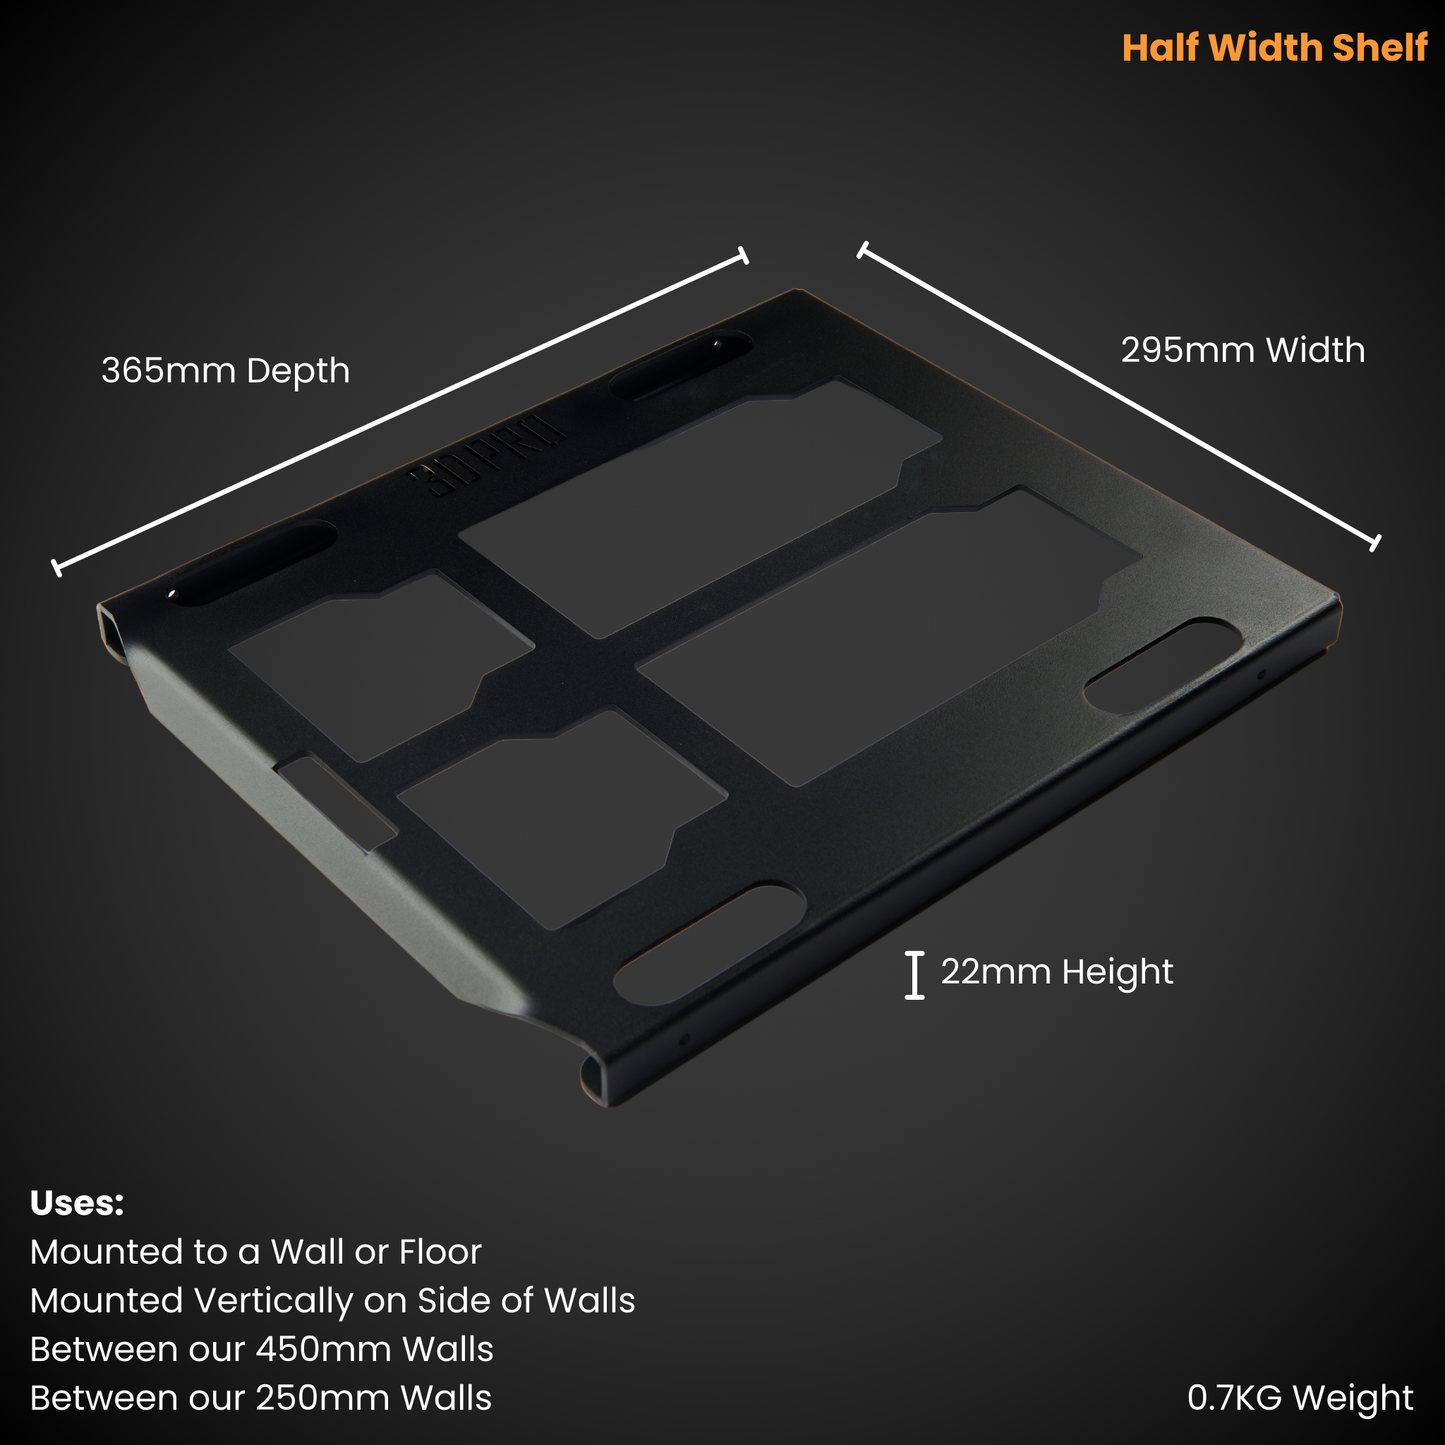
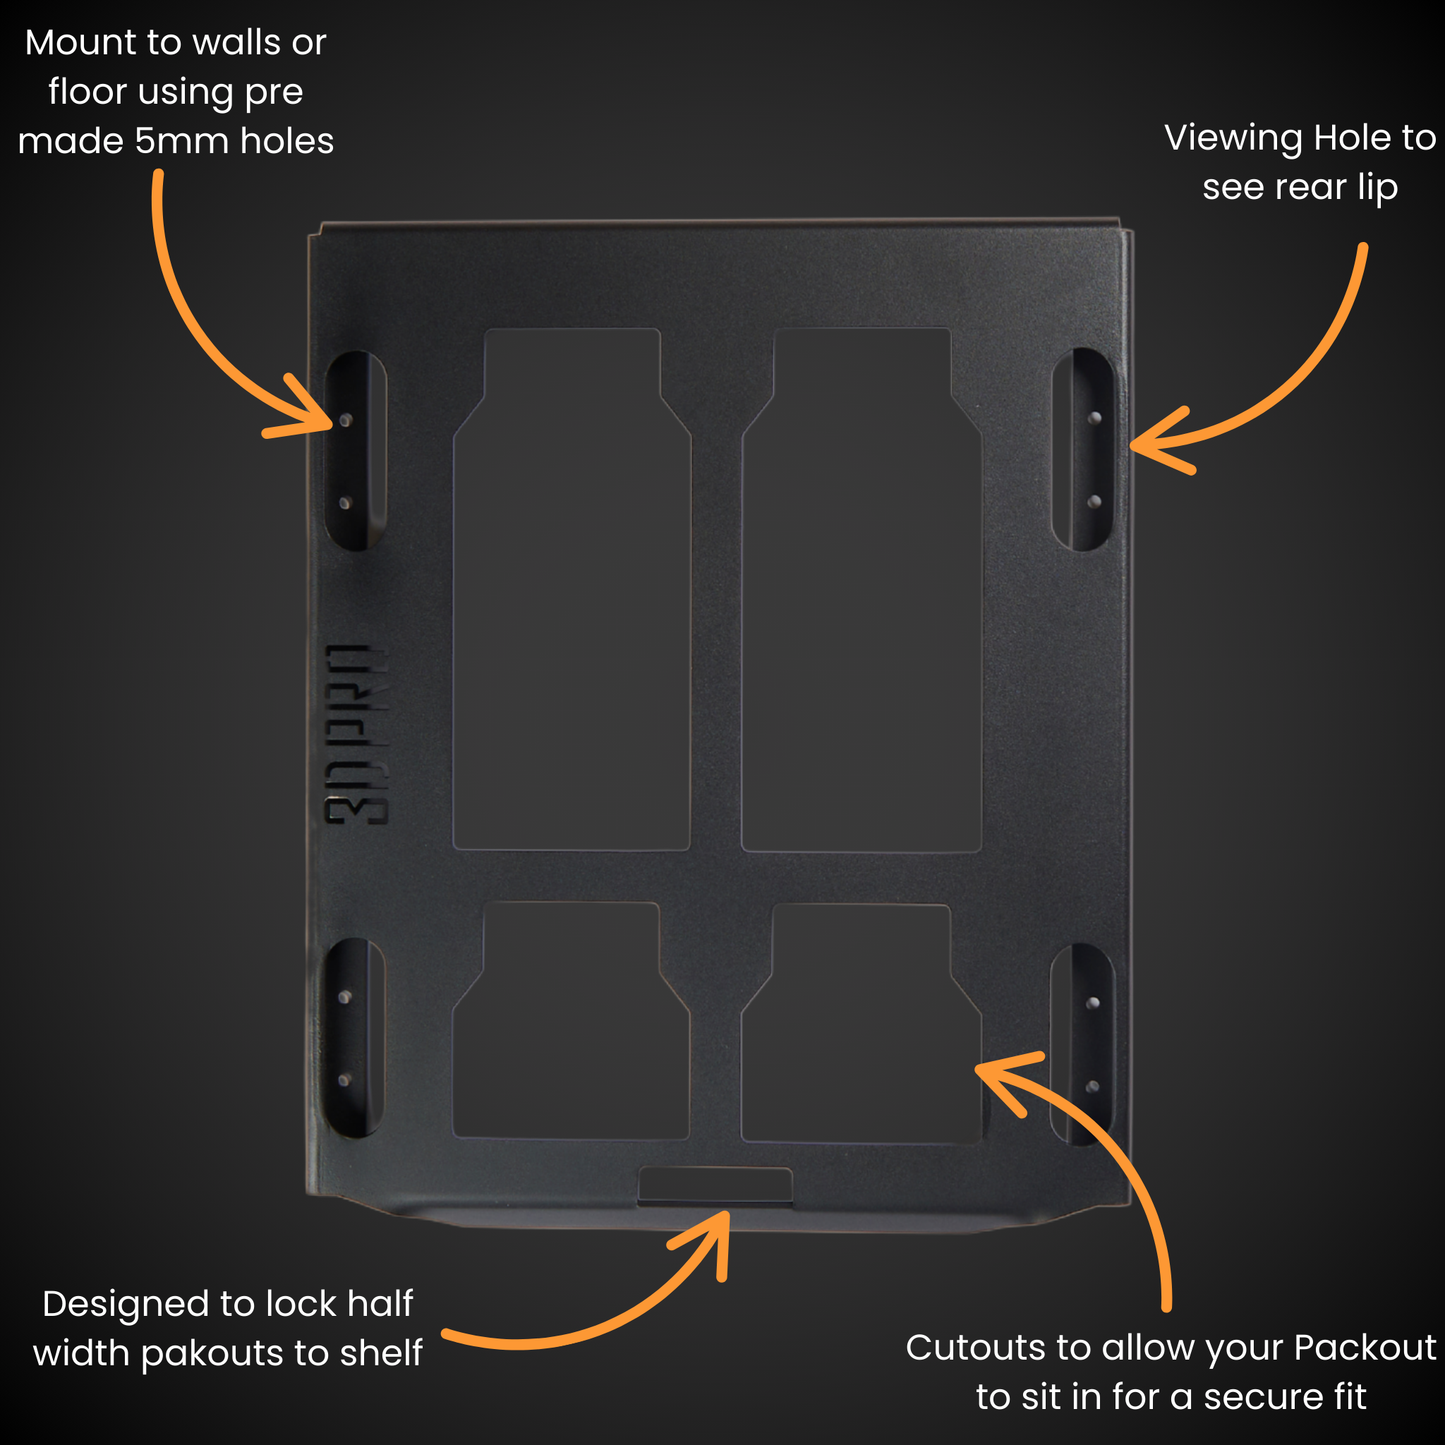
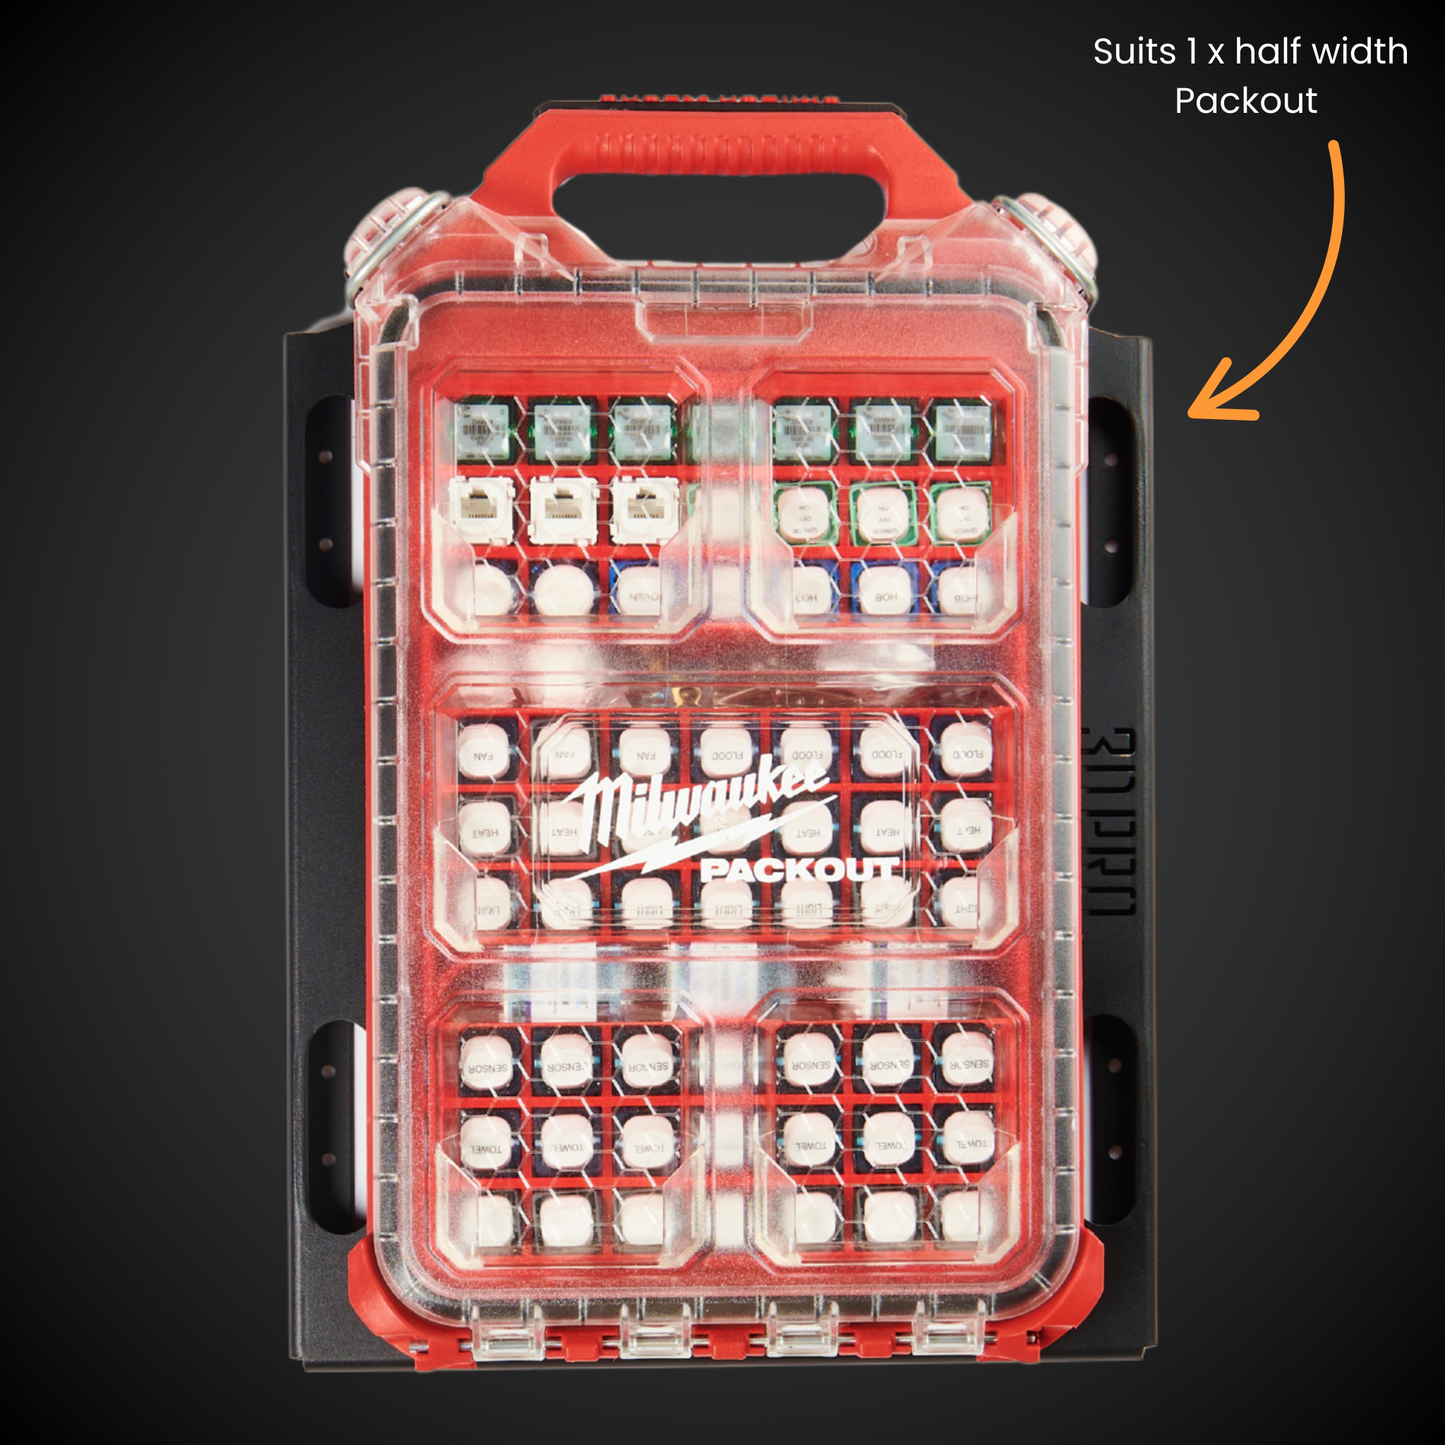
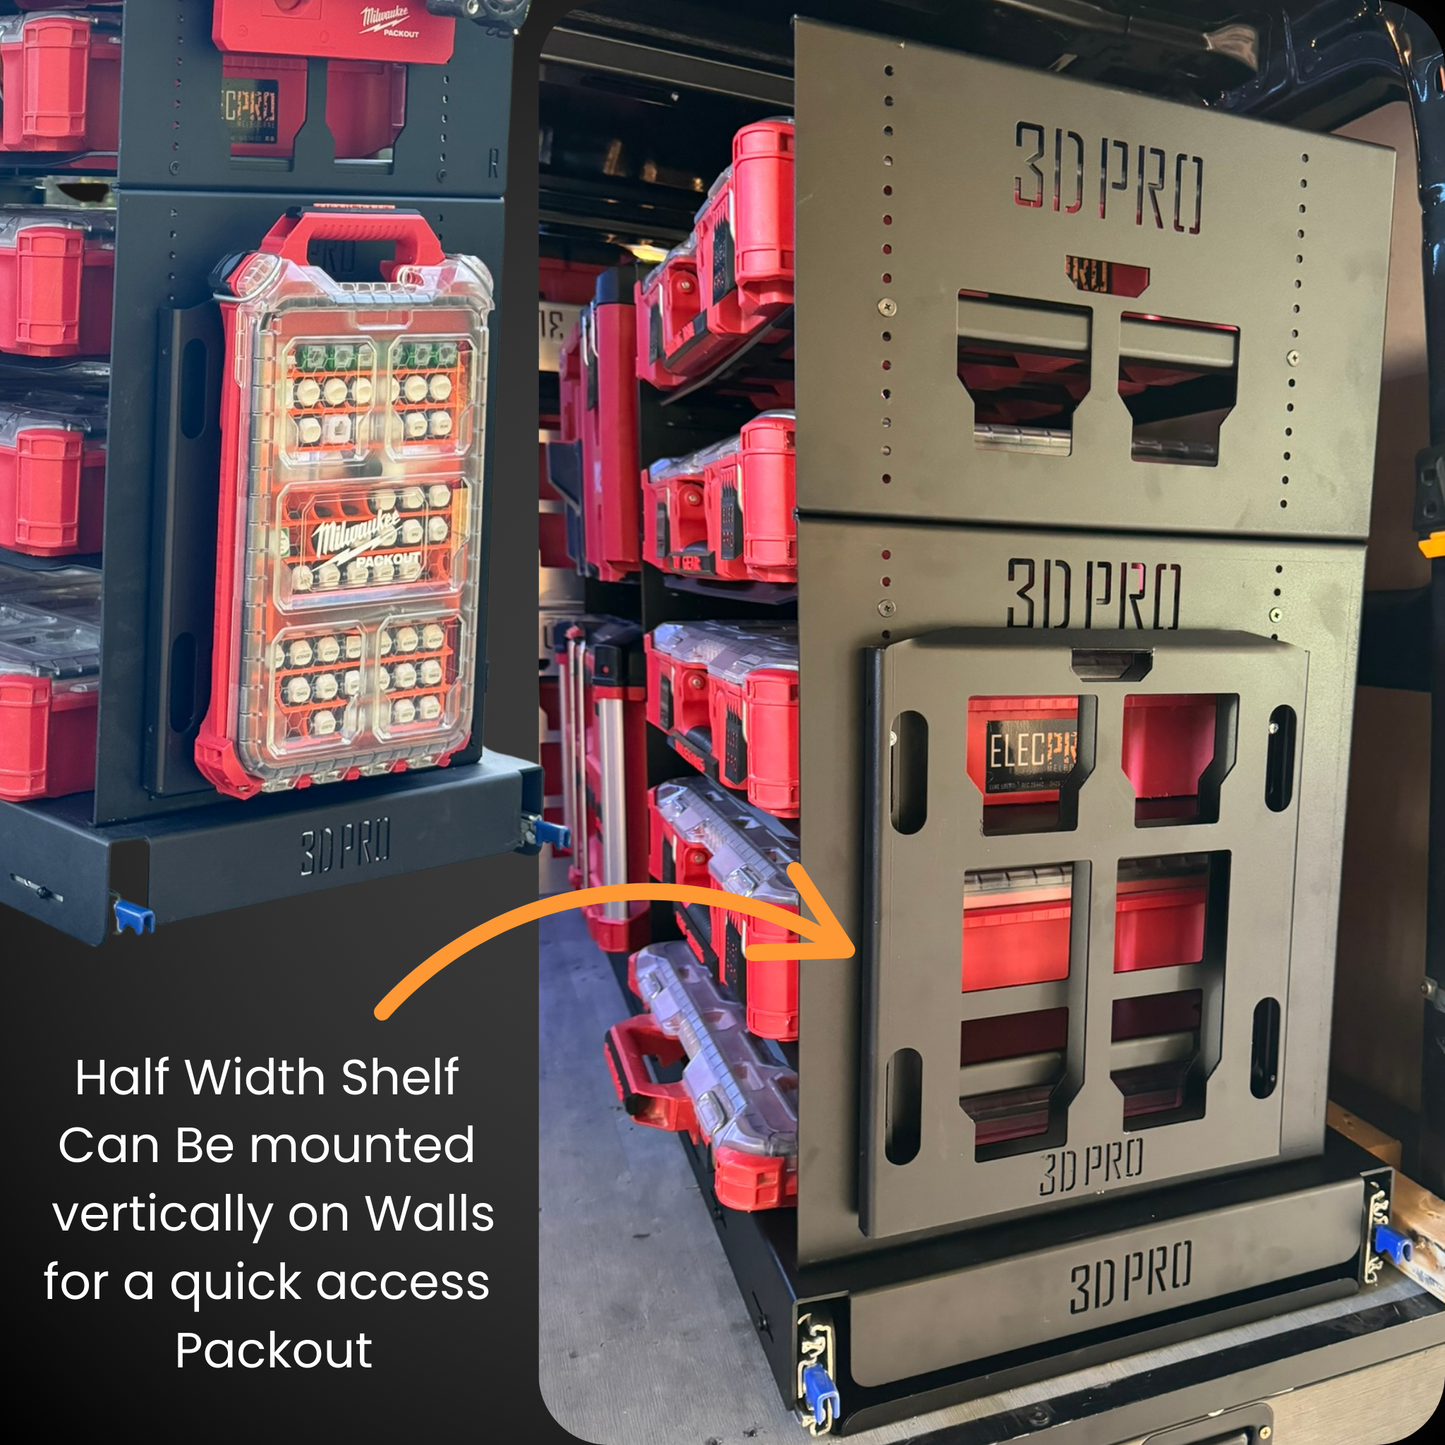
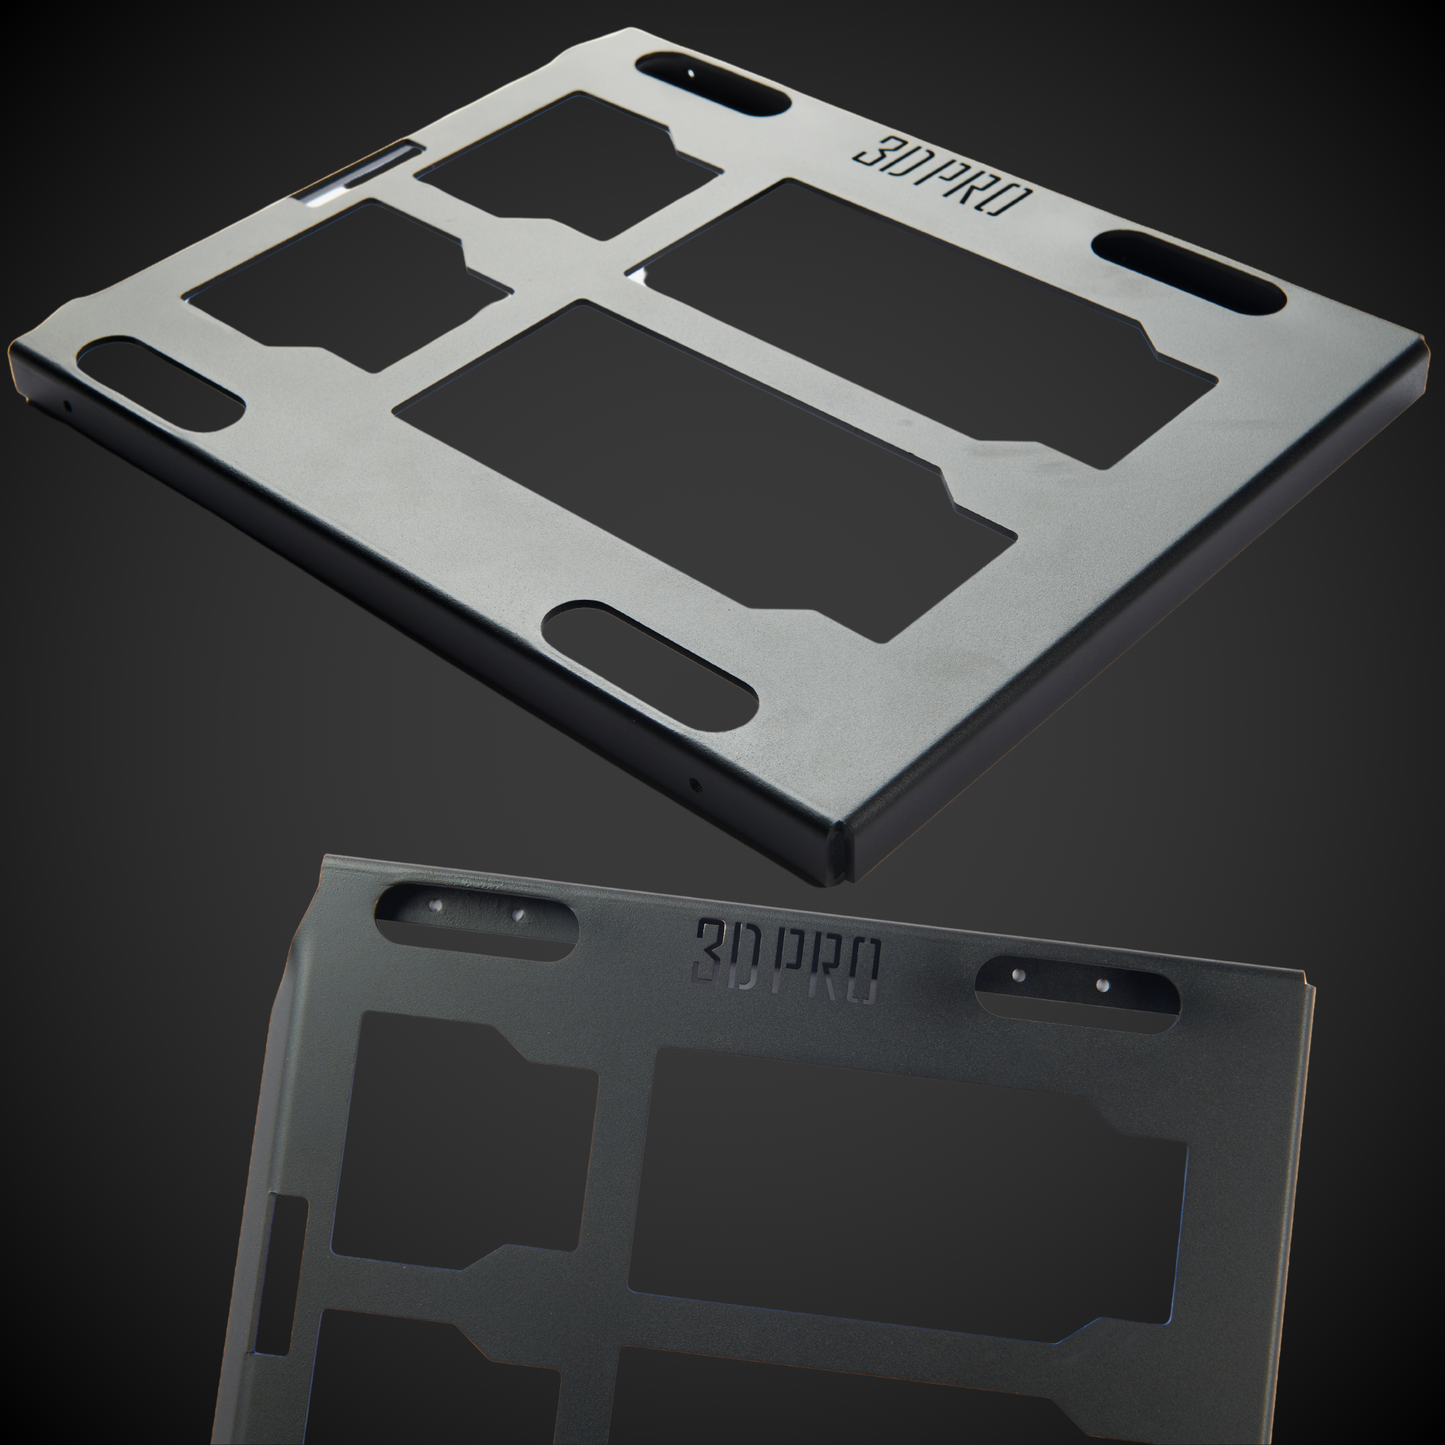
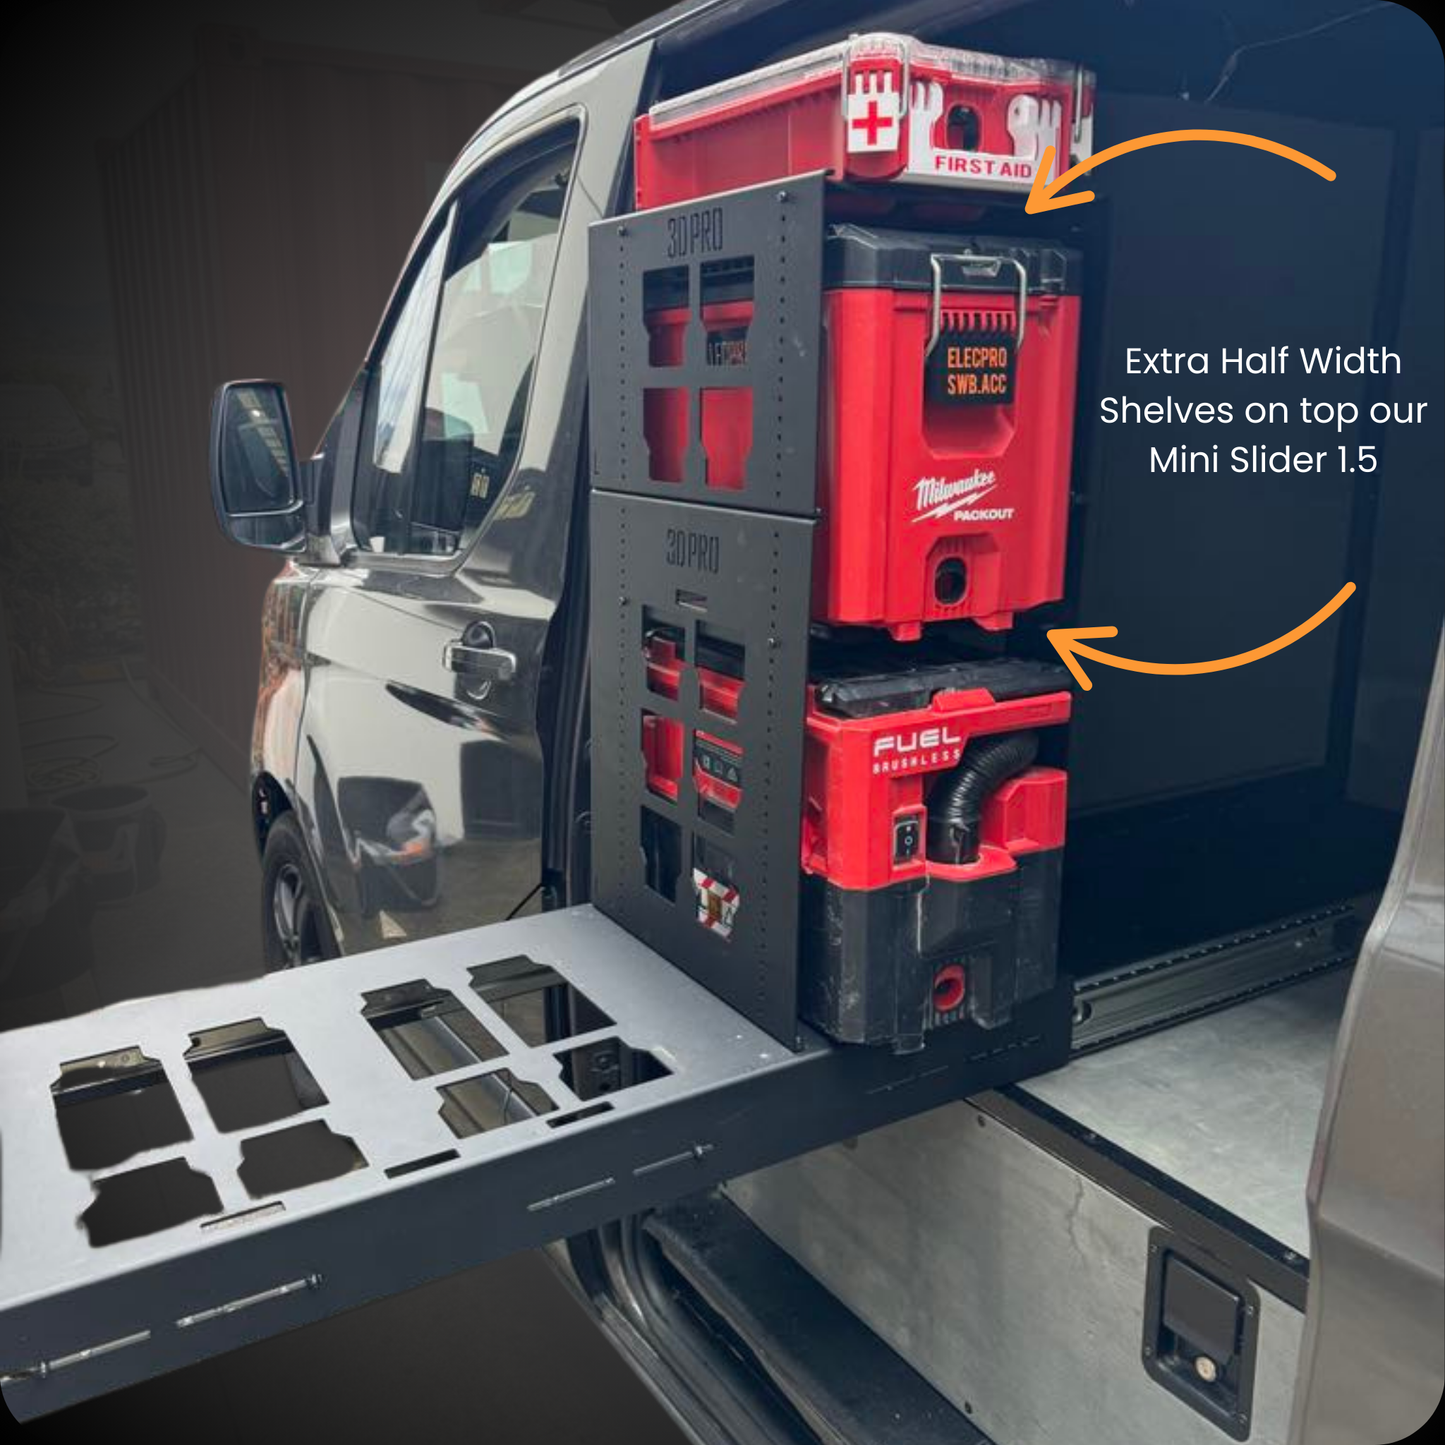
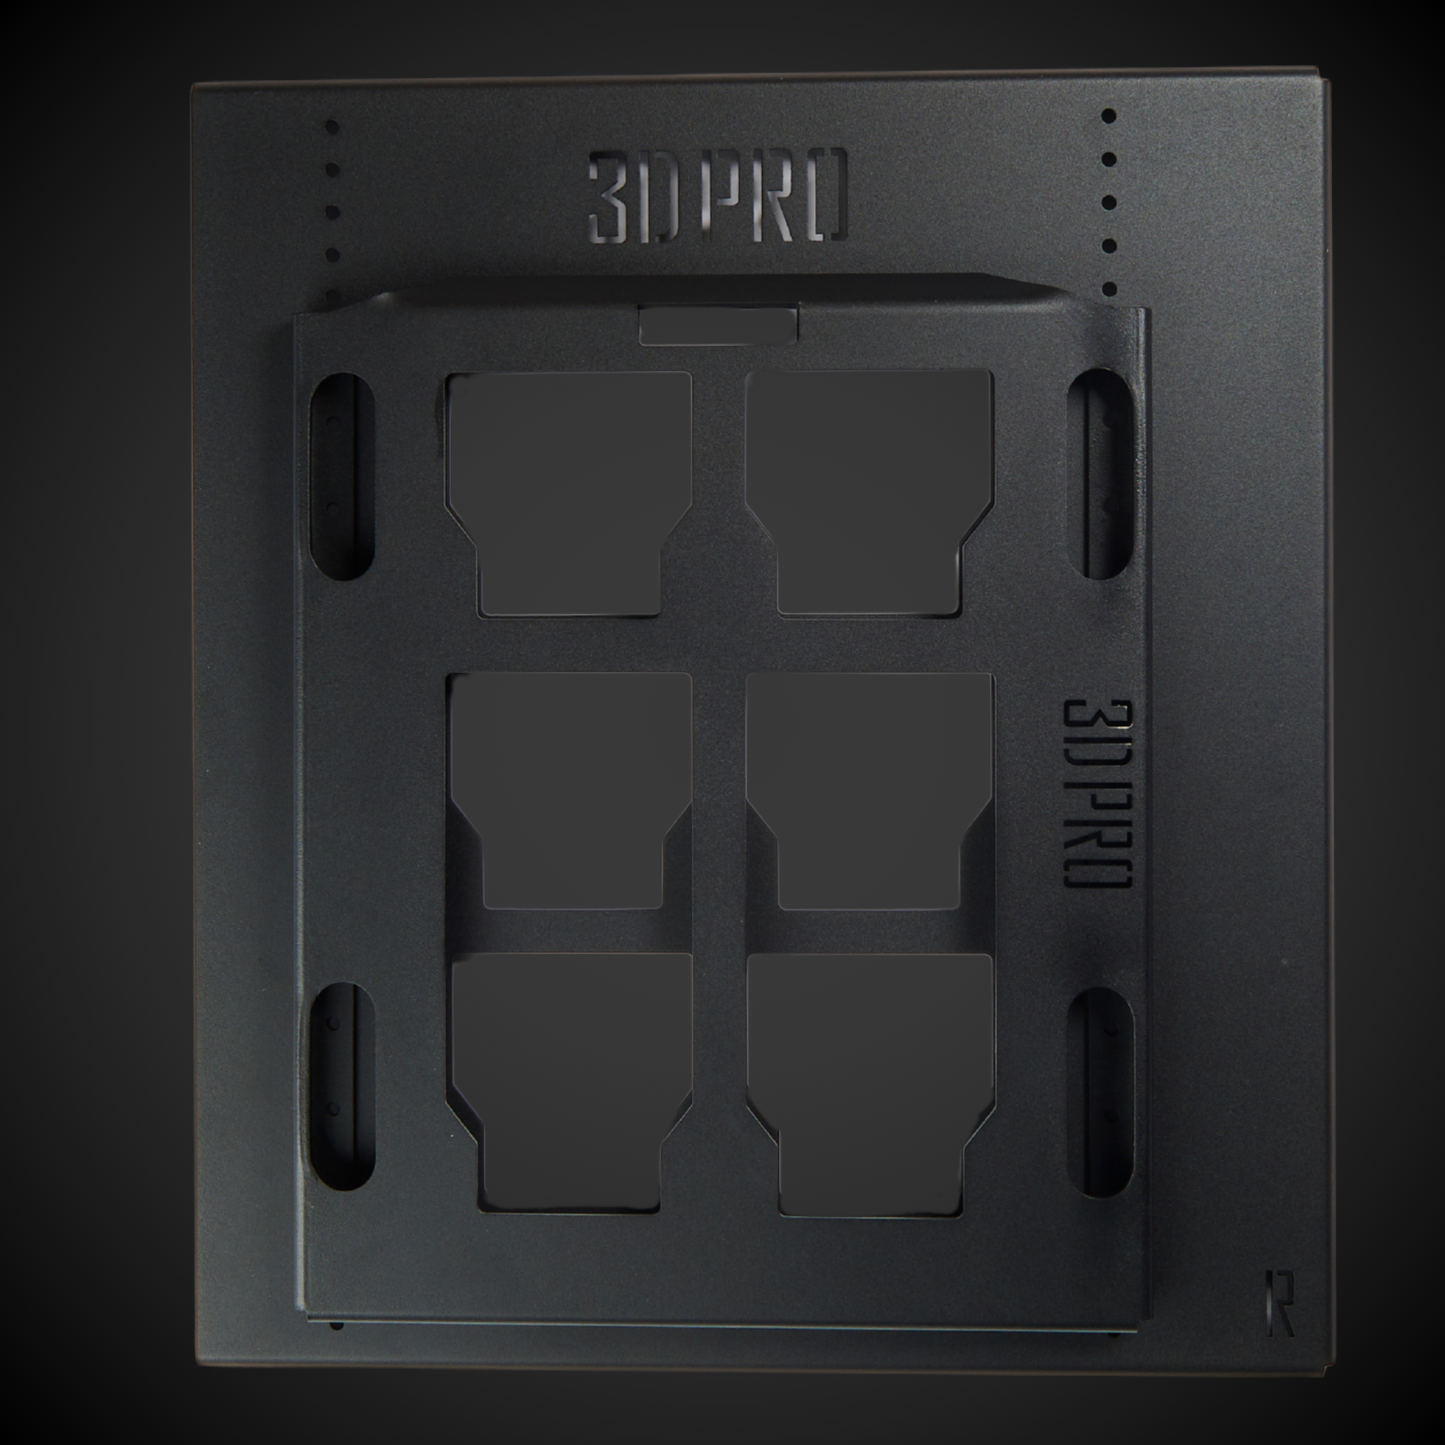
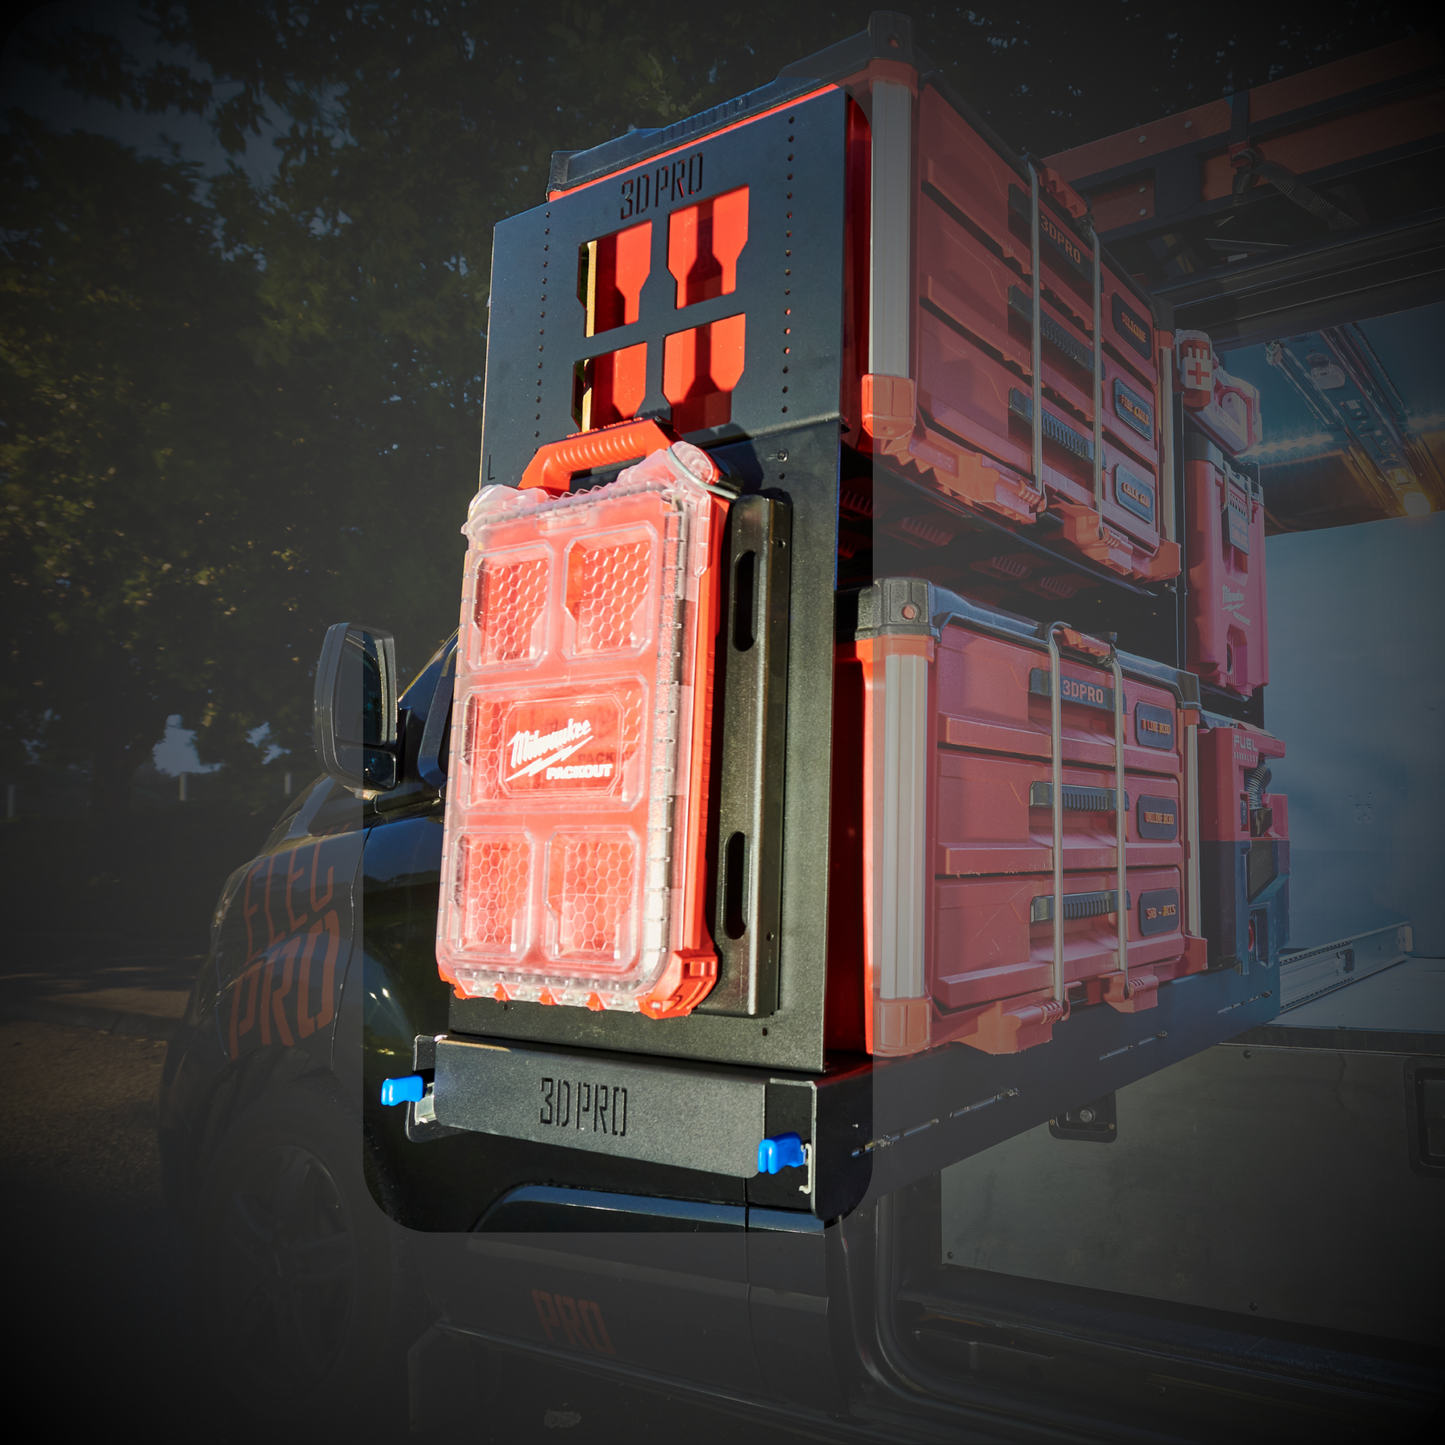
Half Width Shelf (Pack A Shelf)
Quantity
View full details

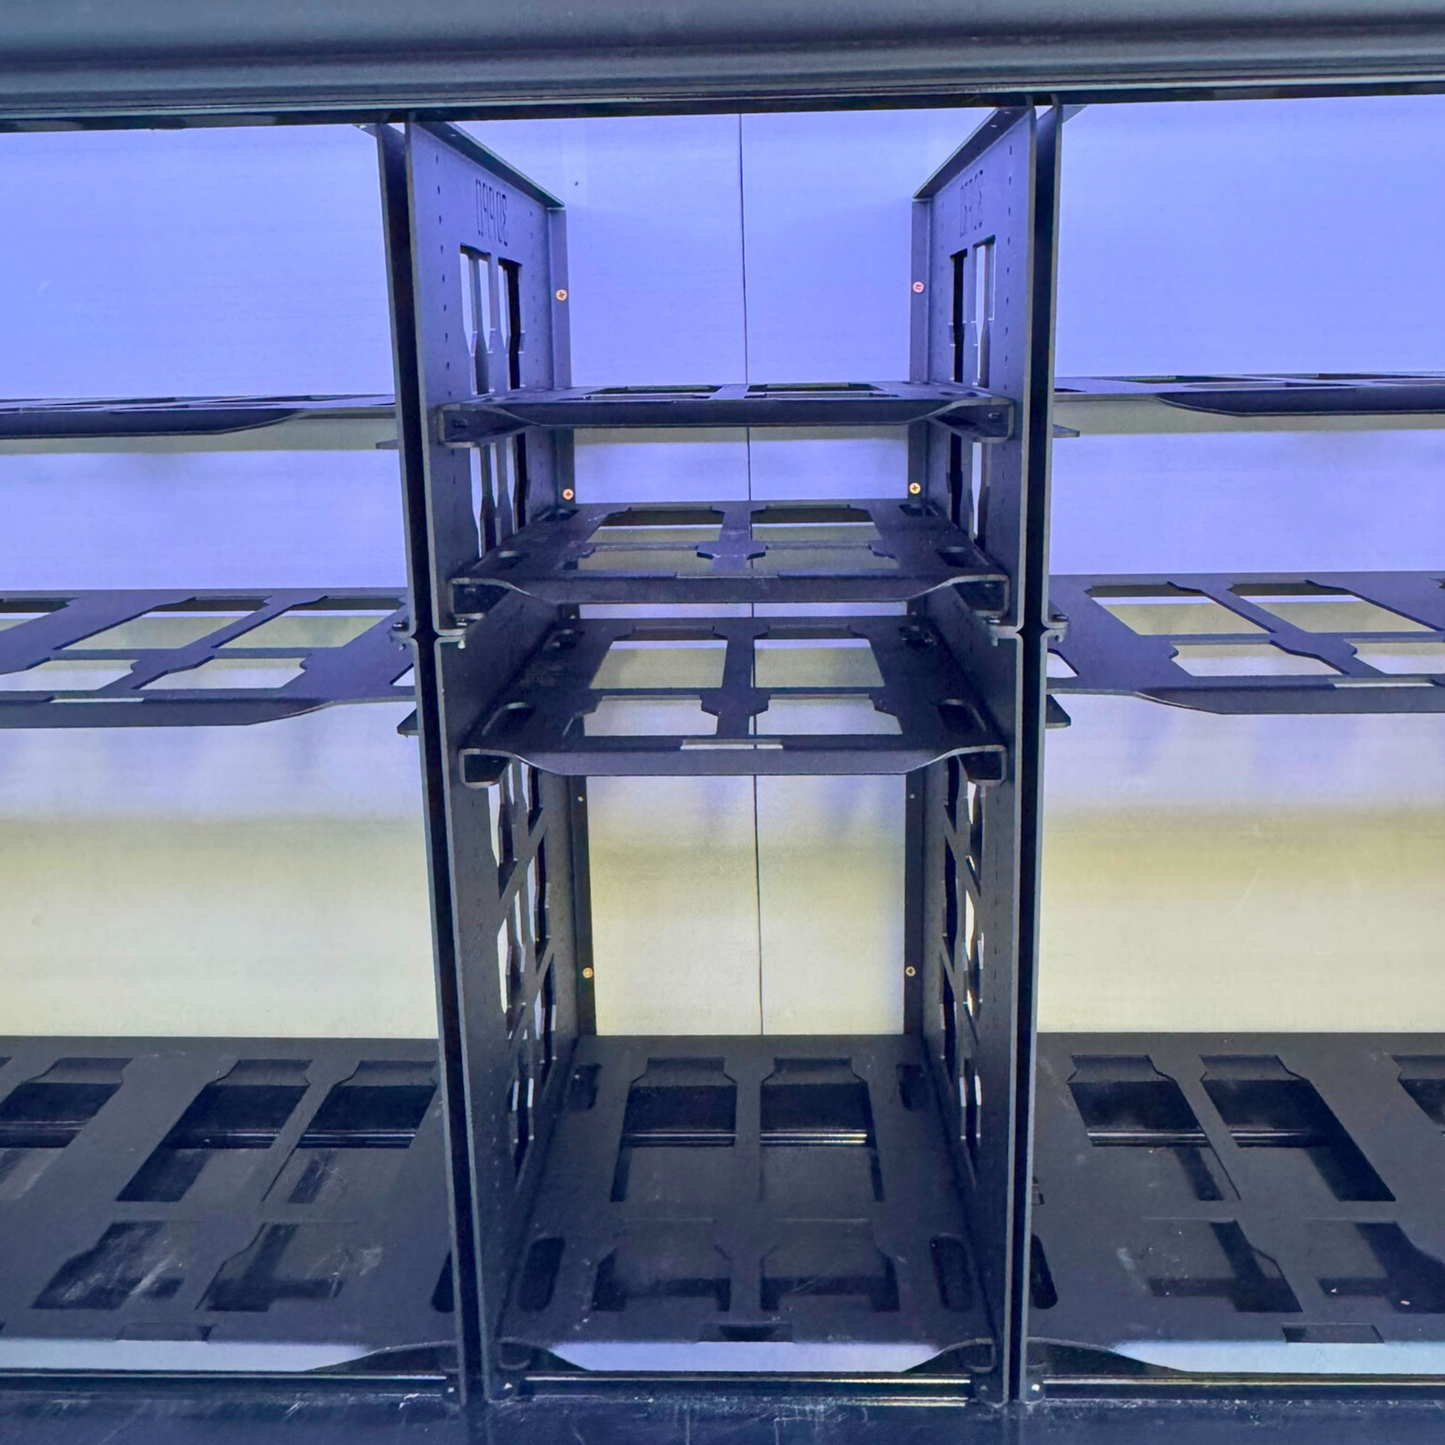

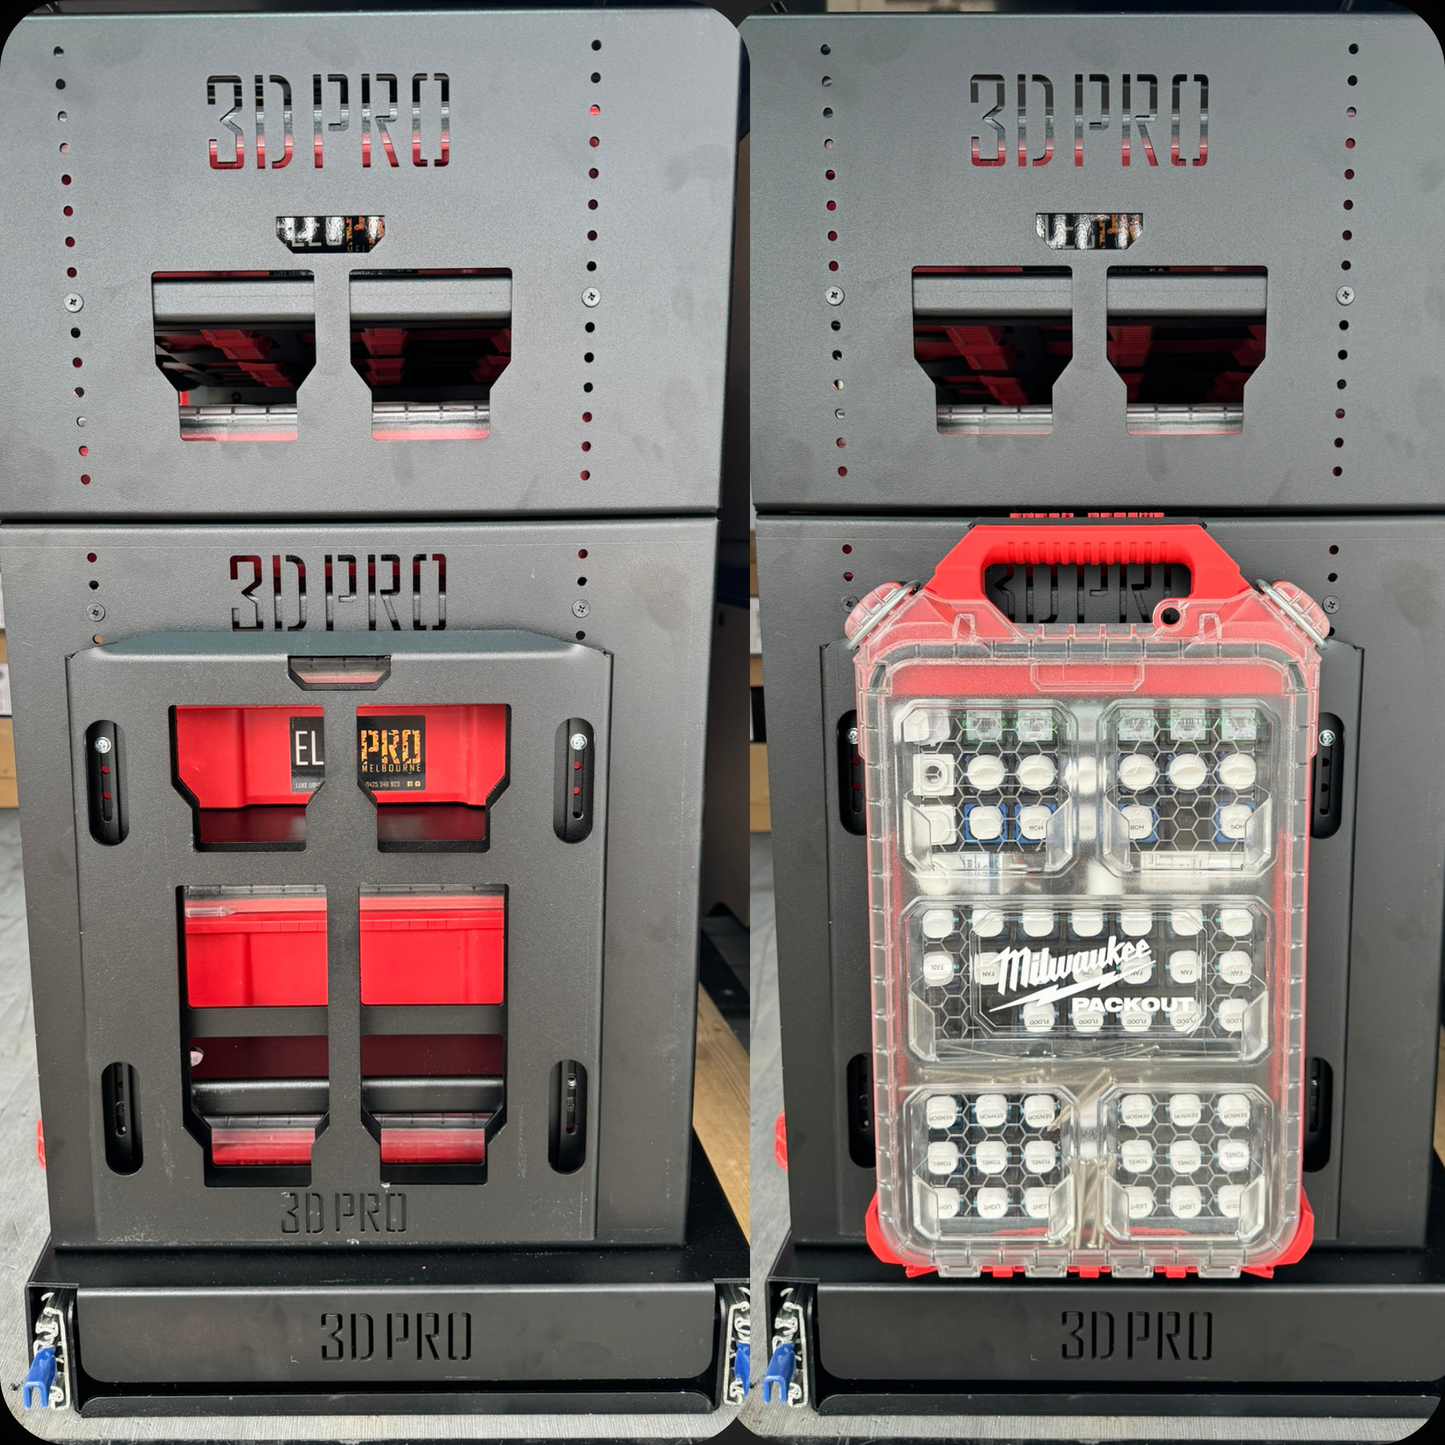


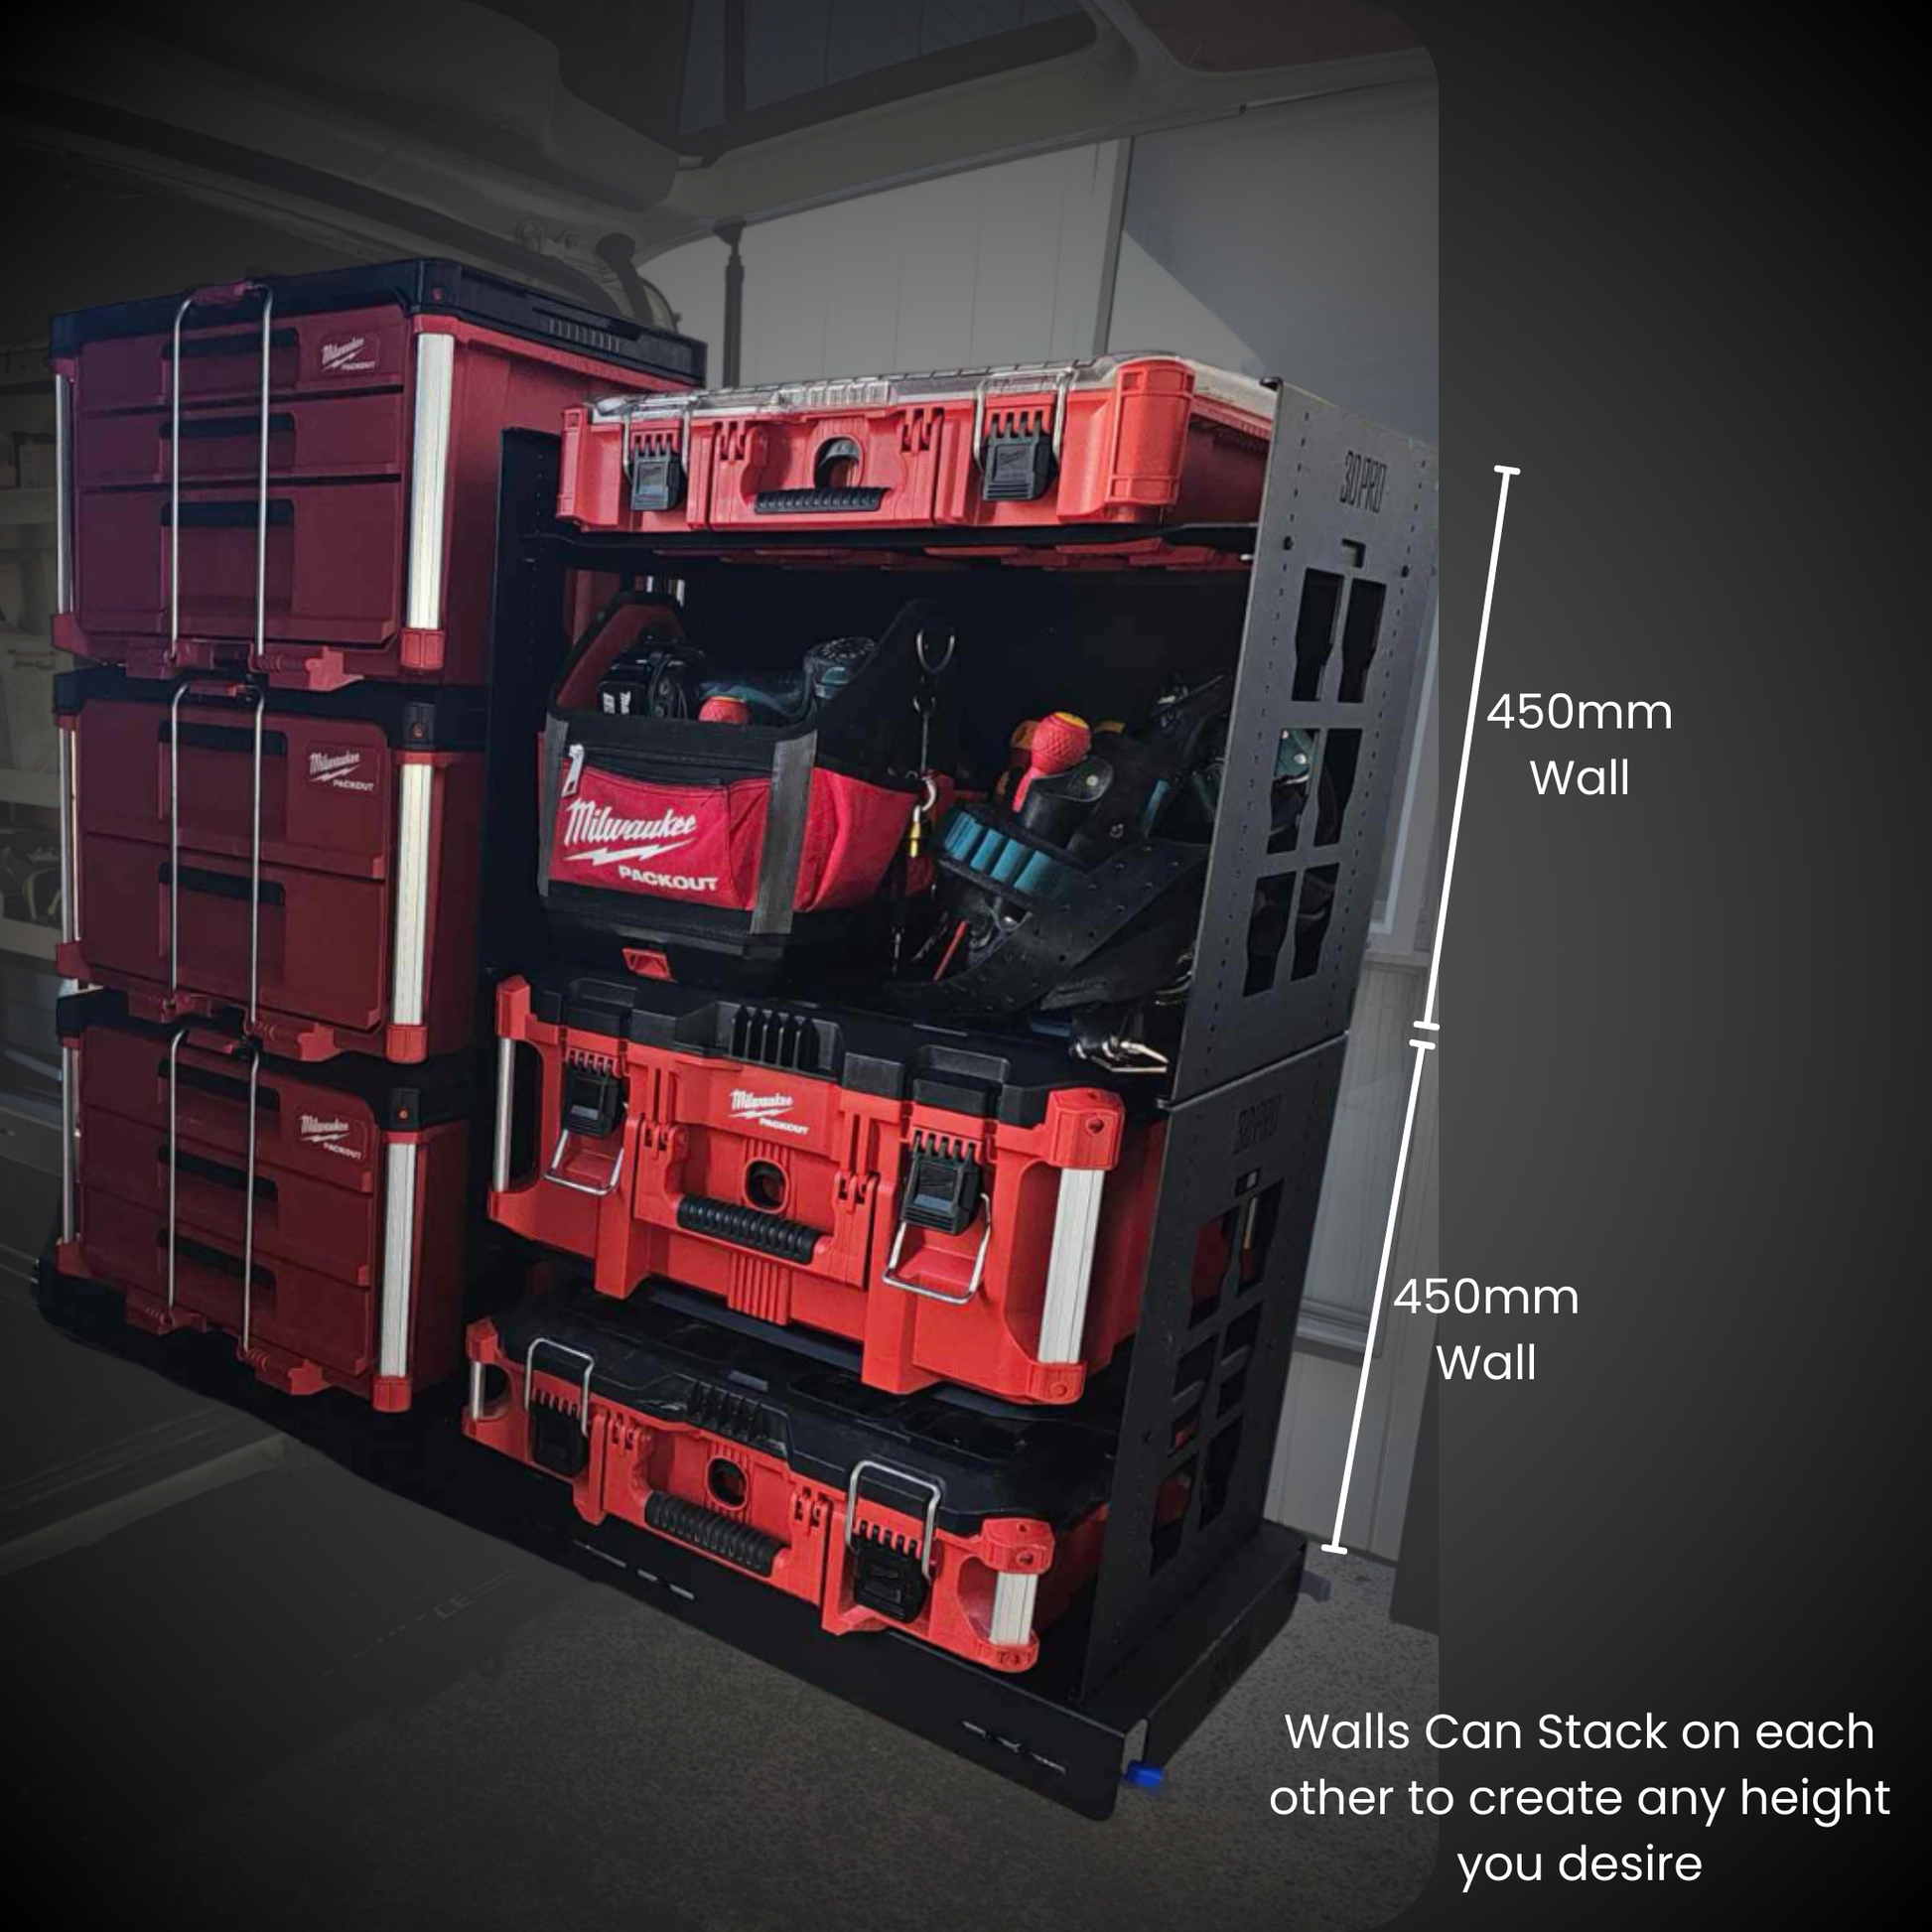
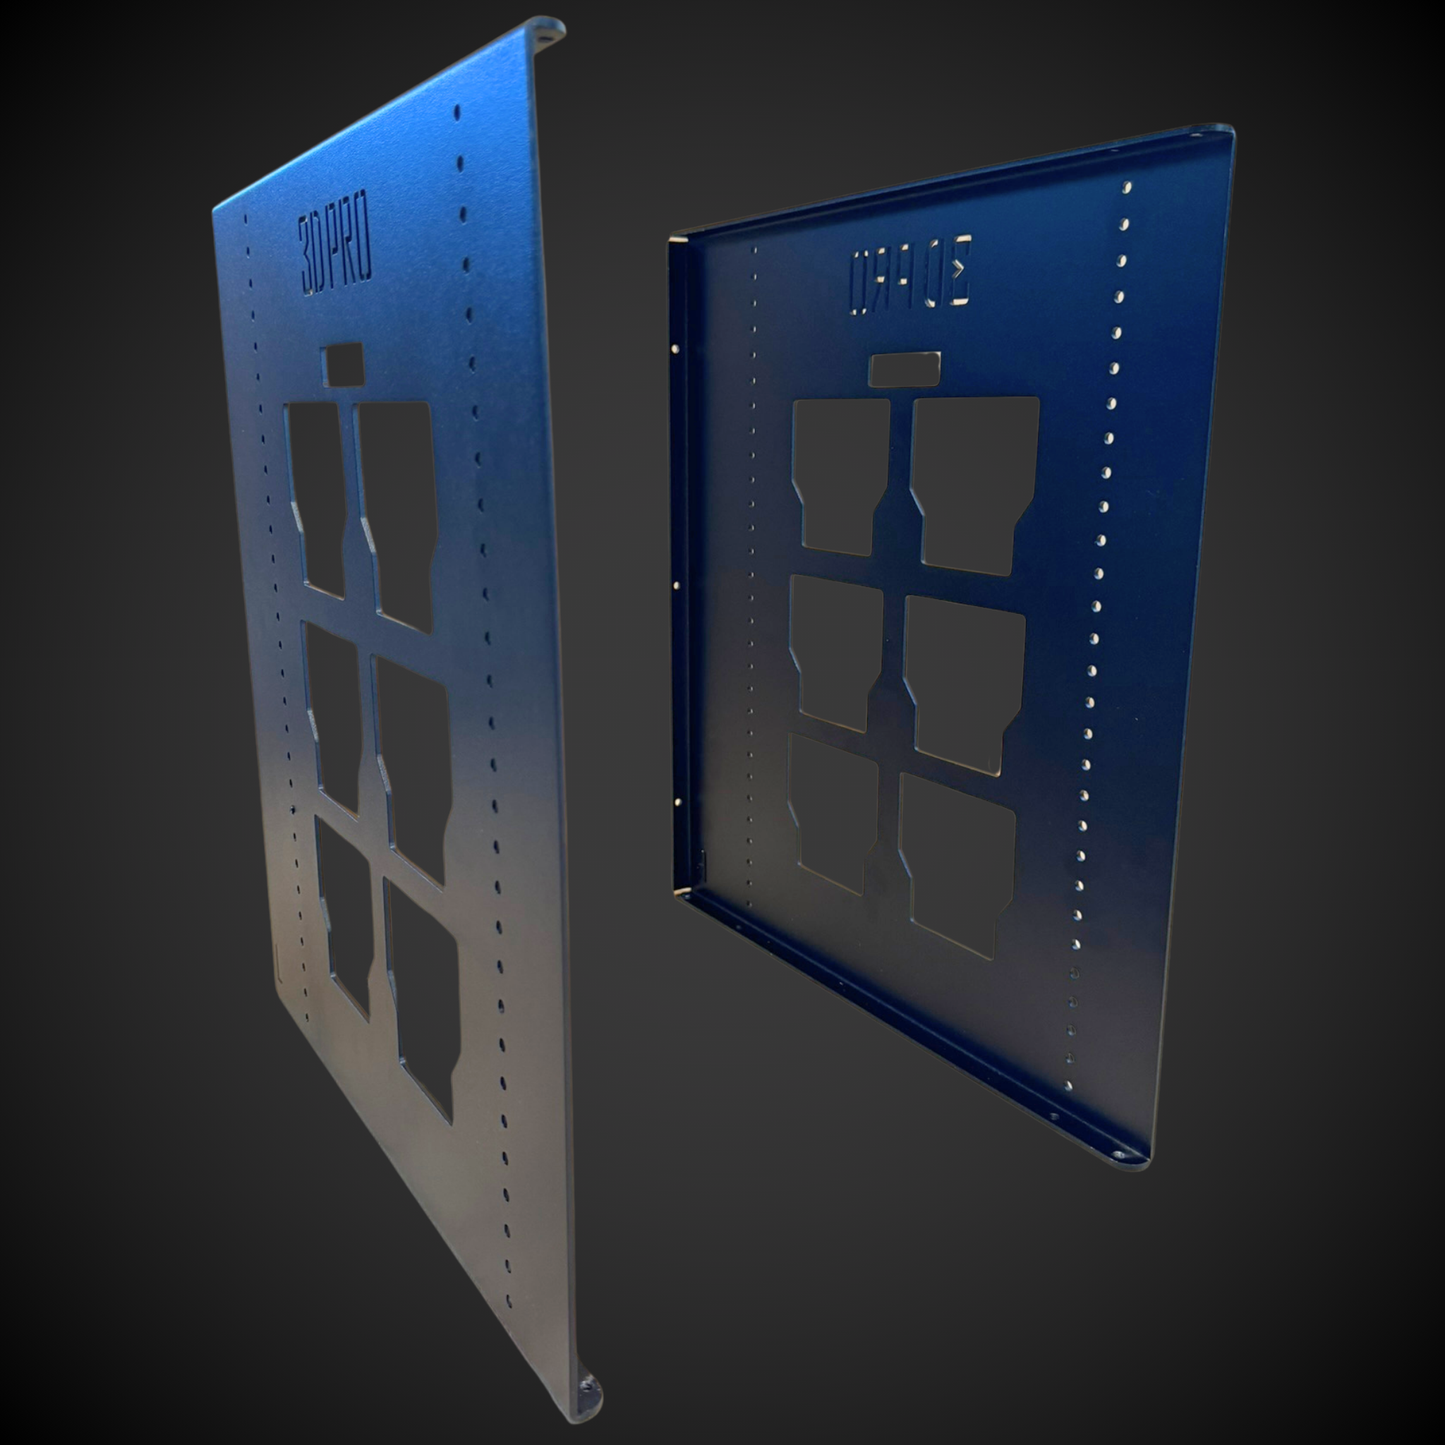
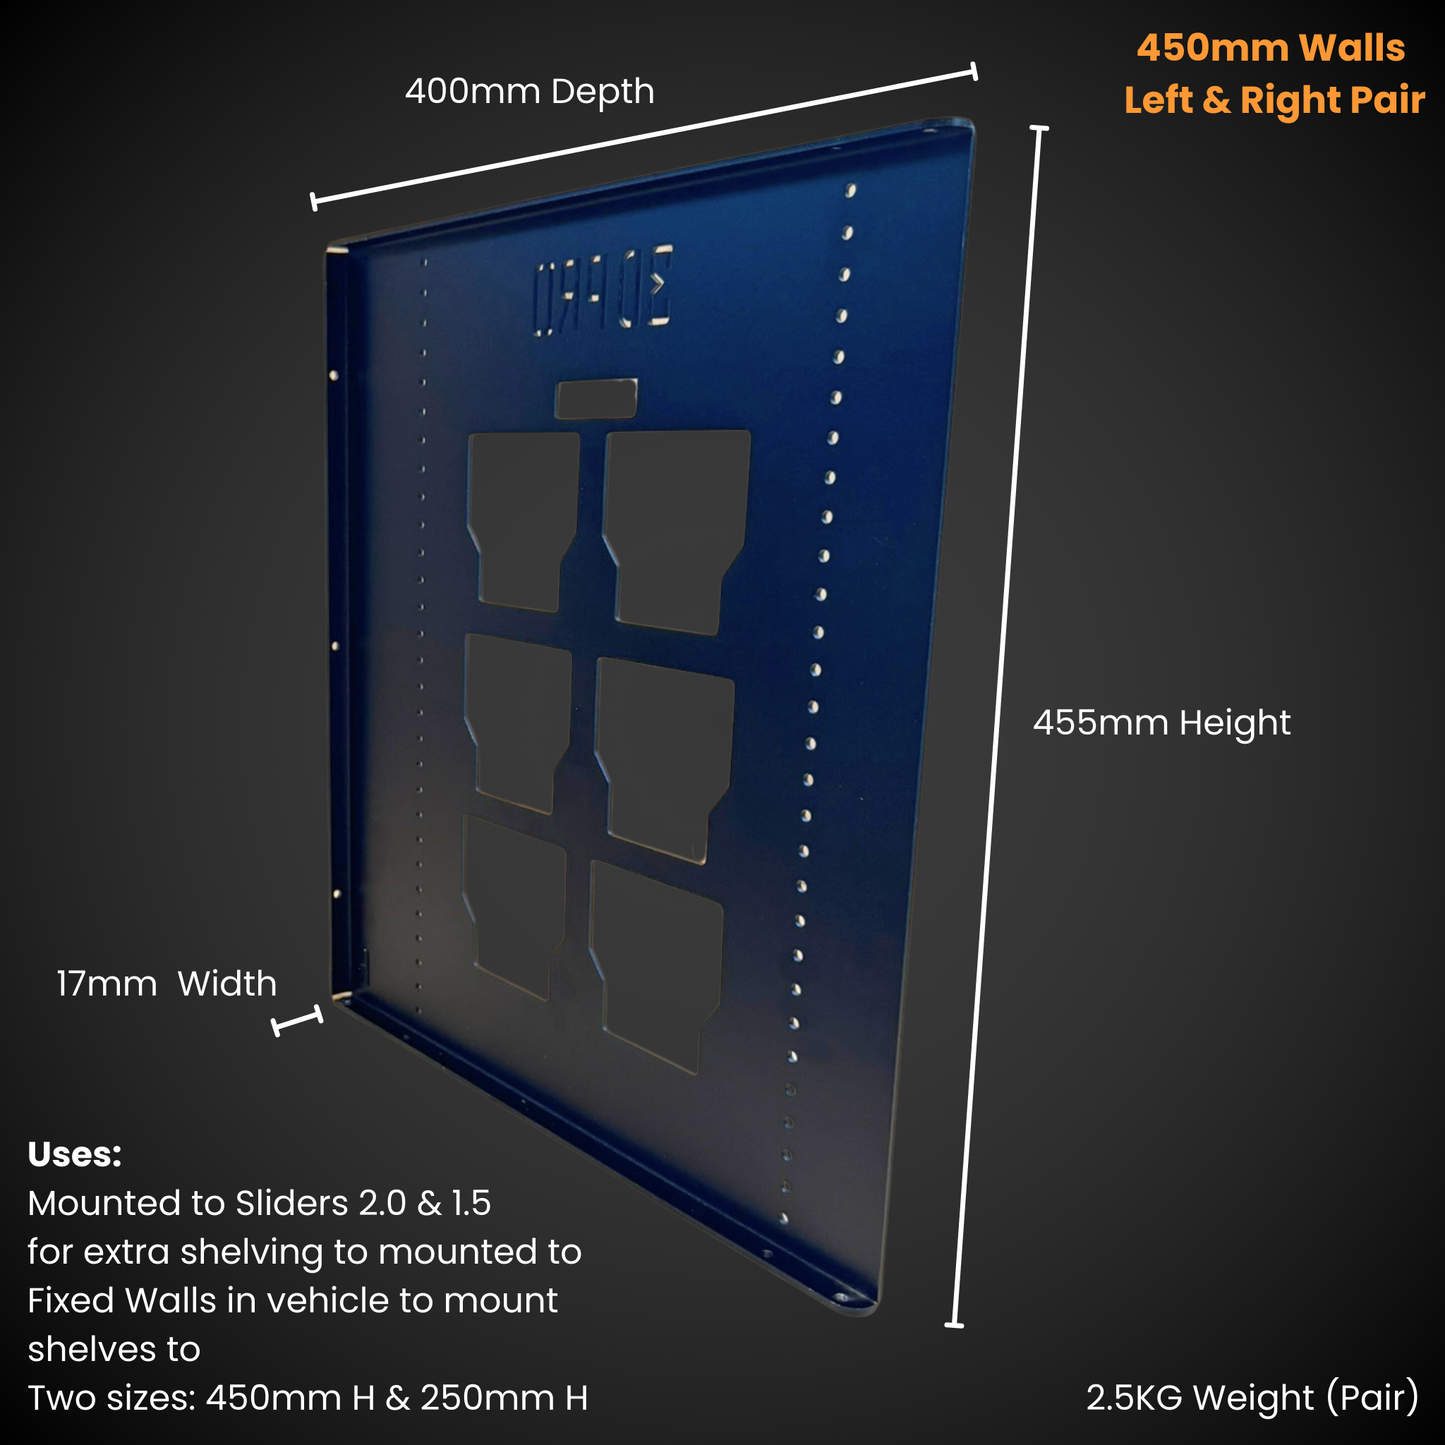
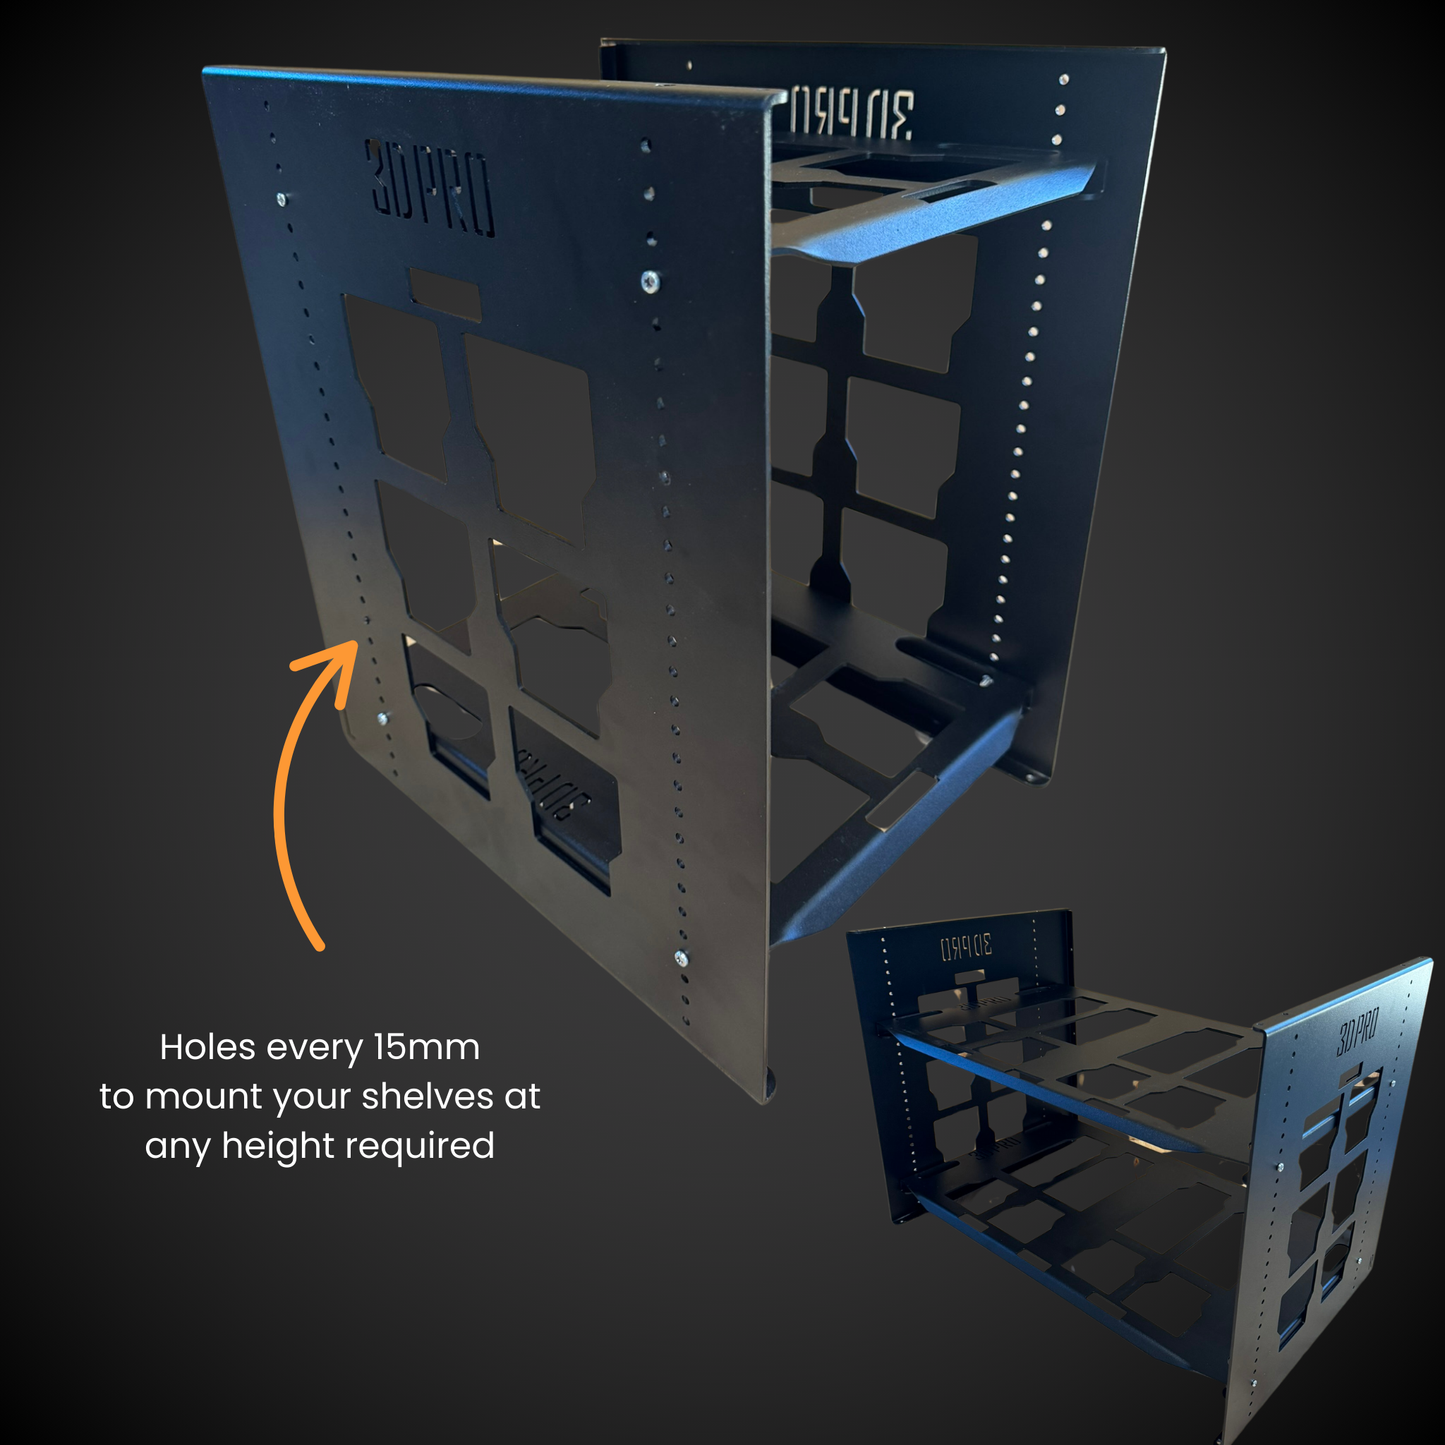
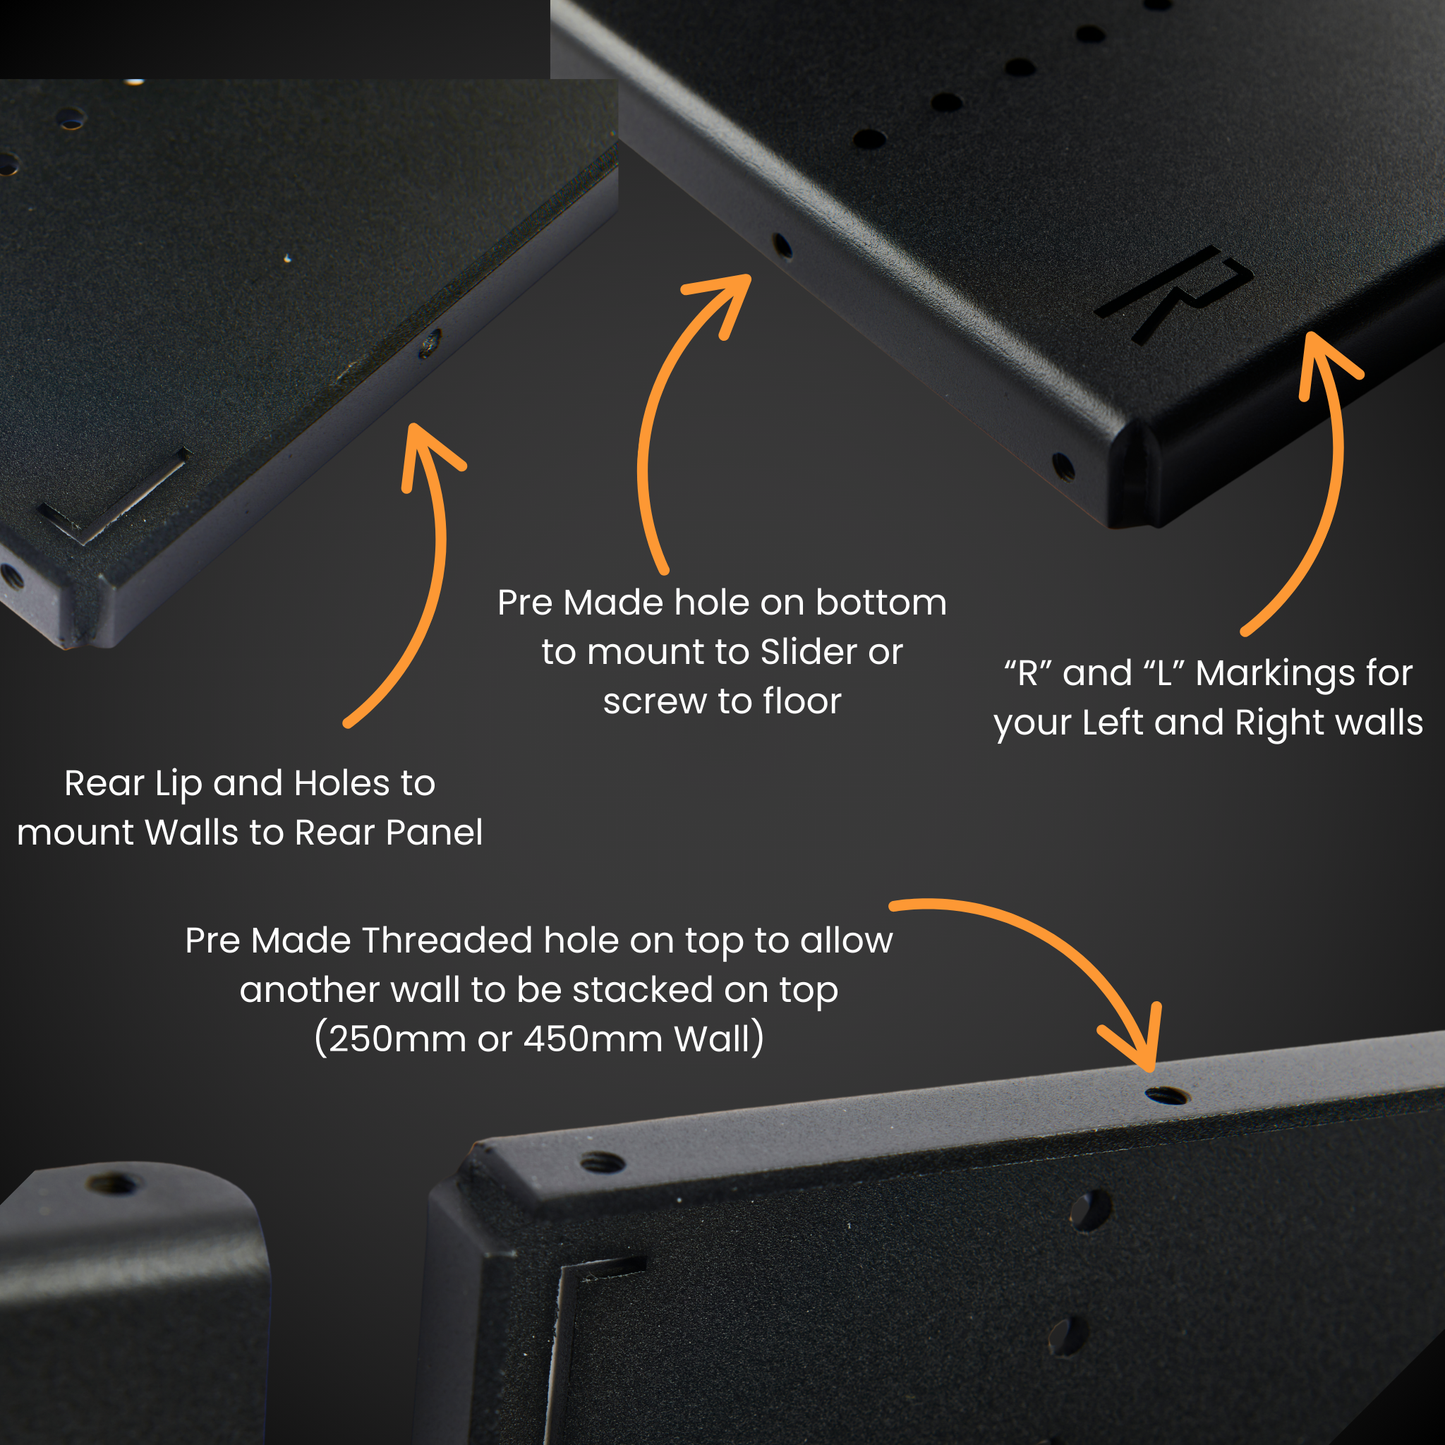
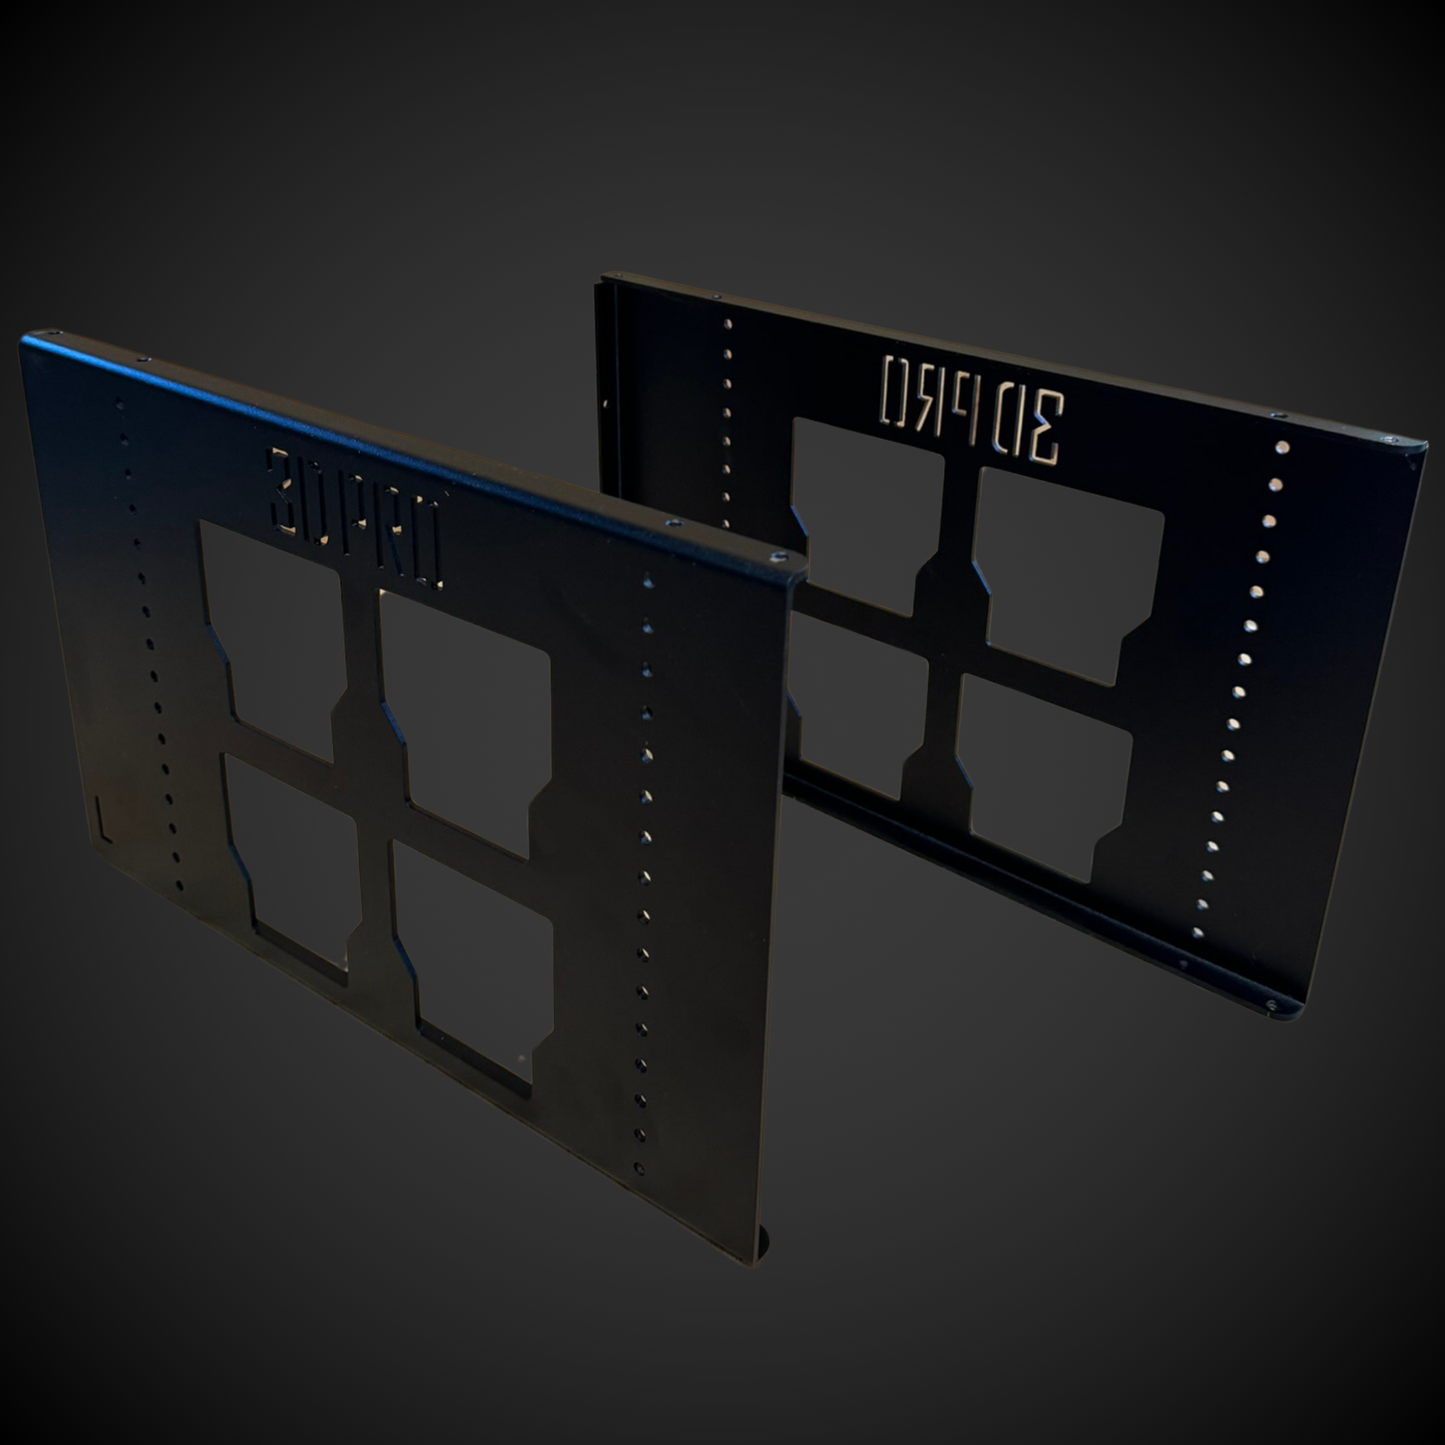
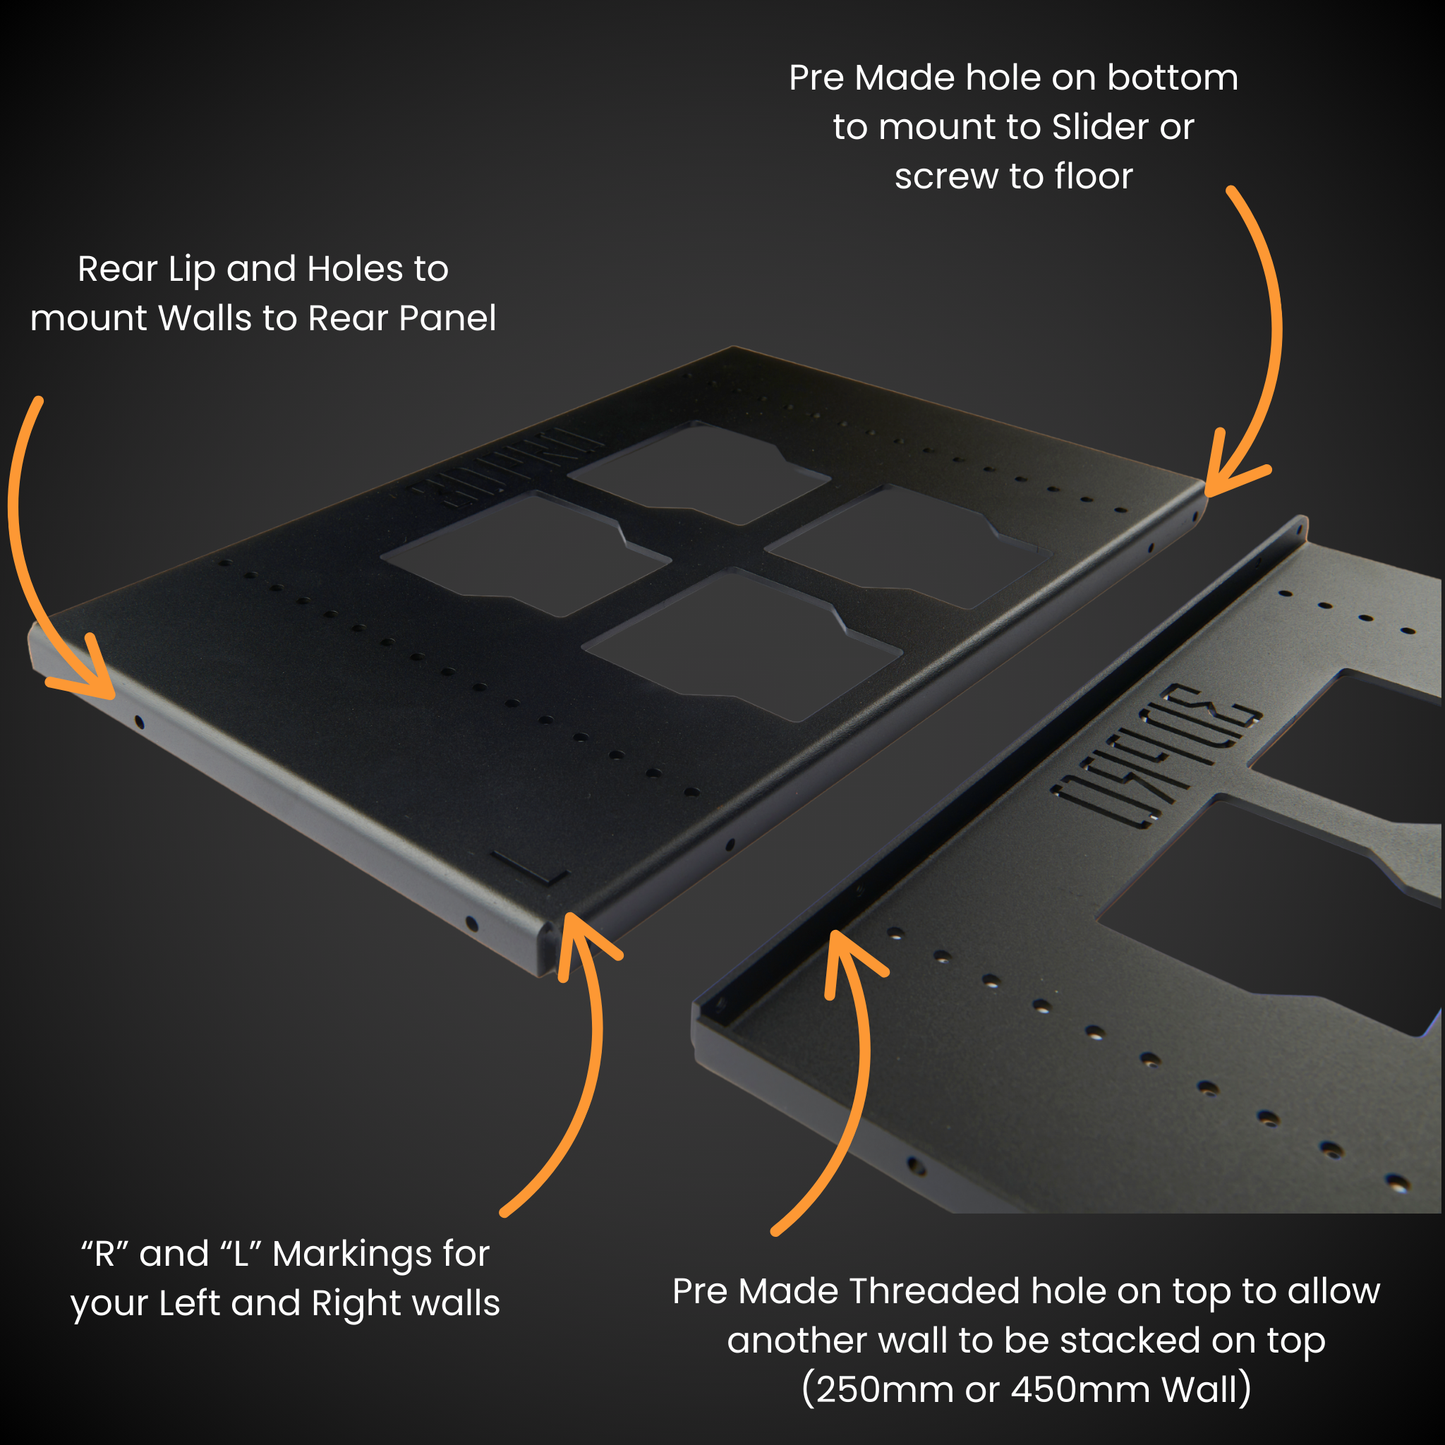
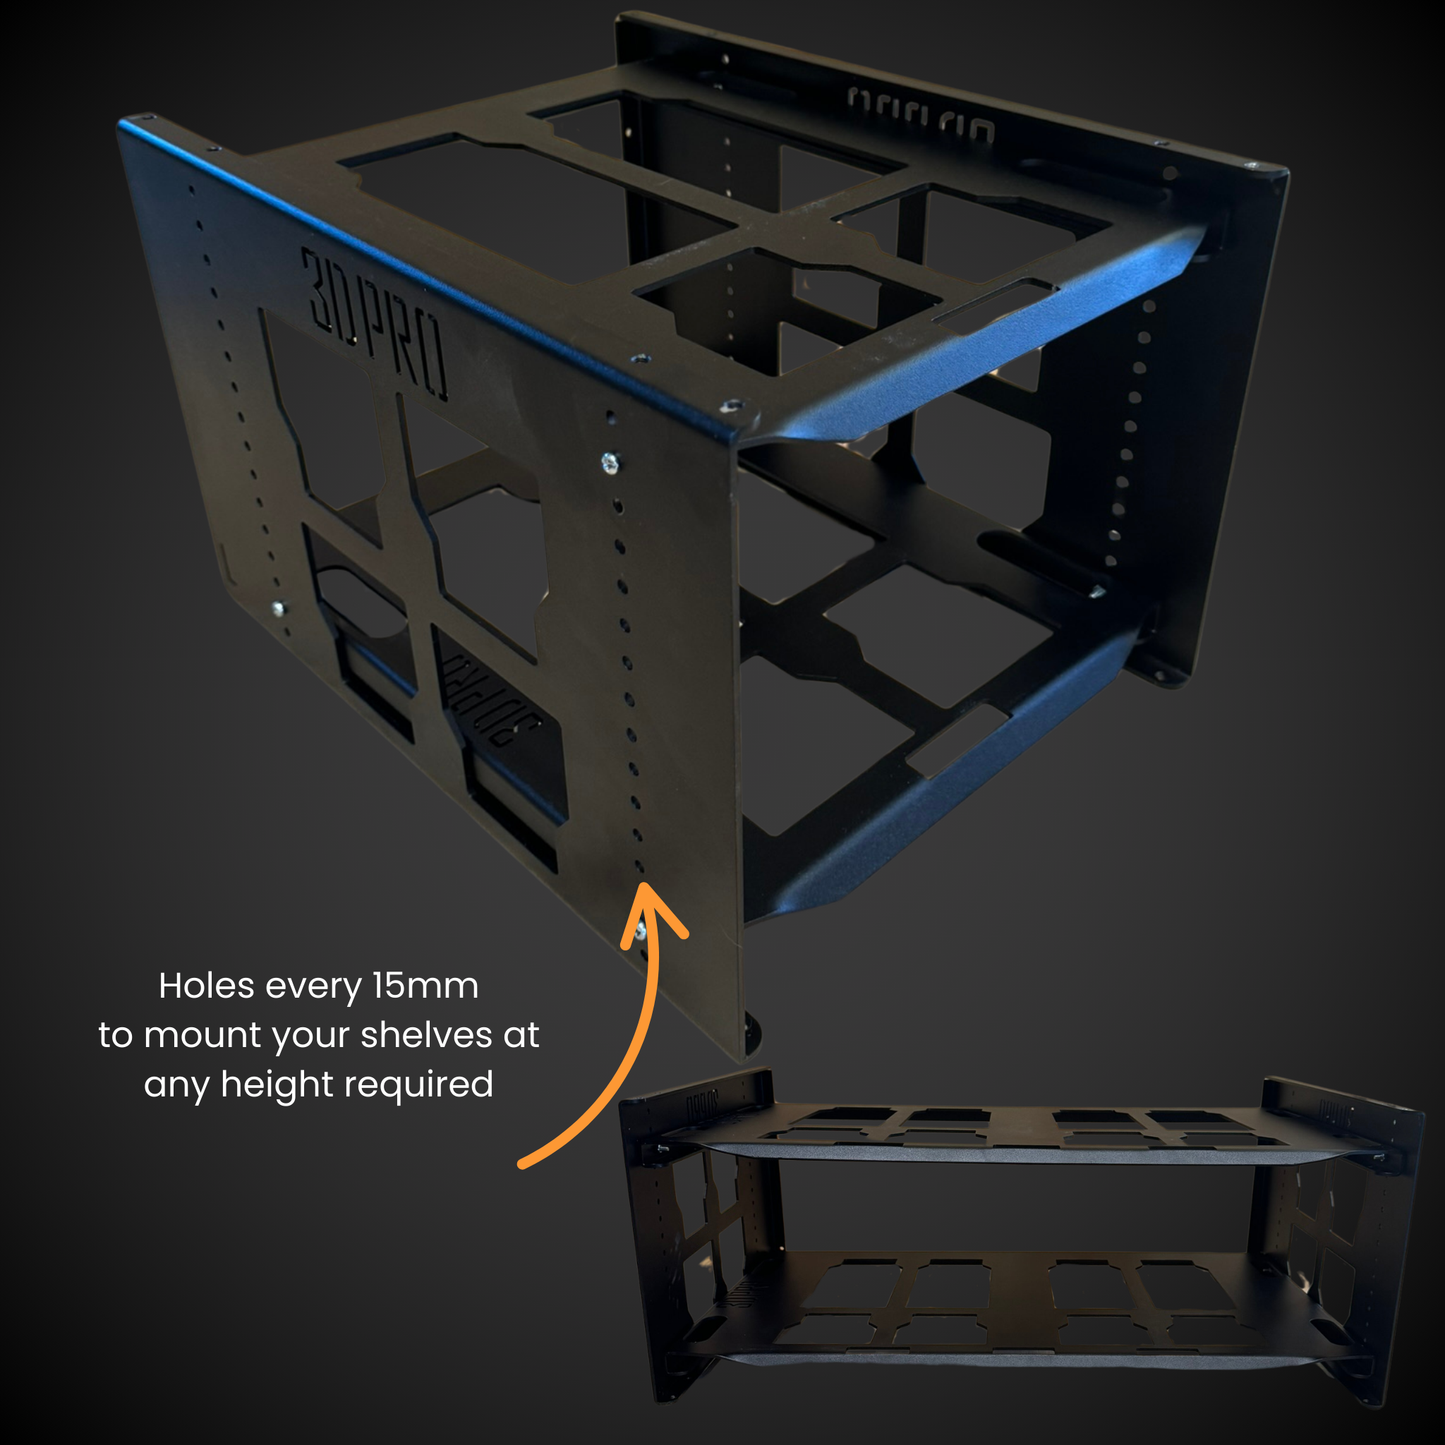
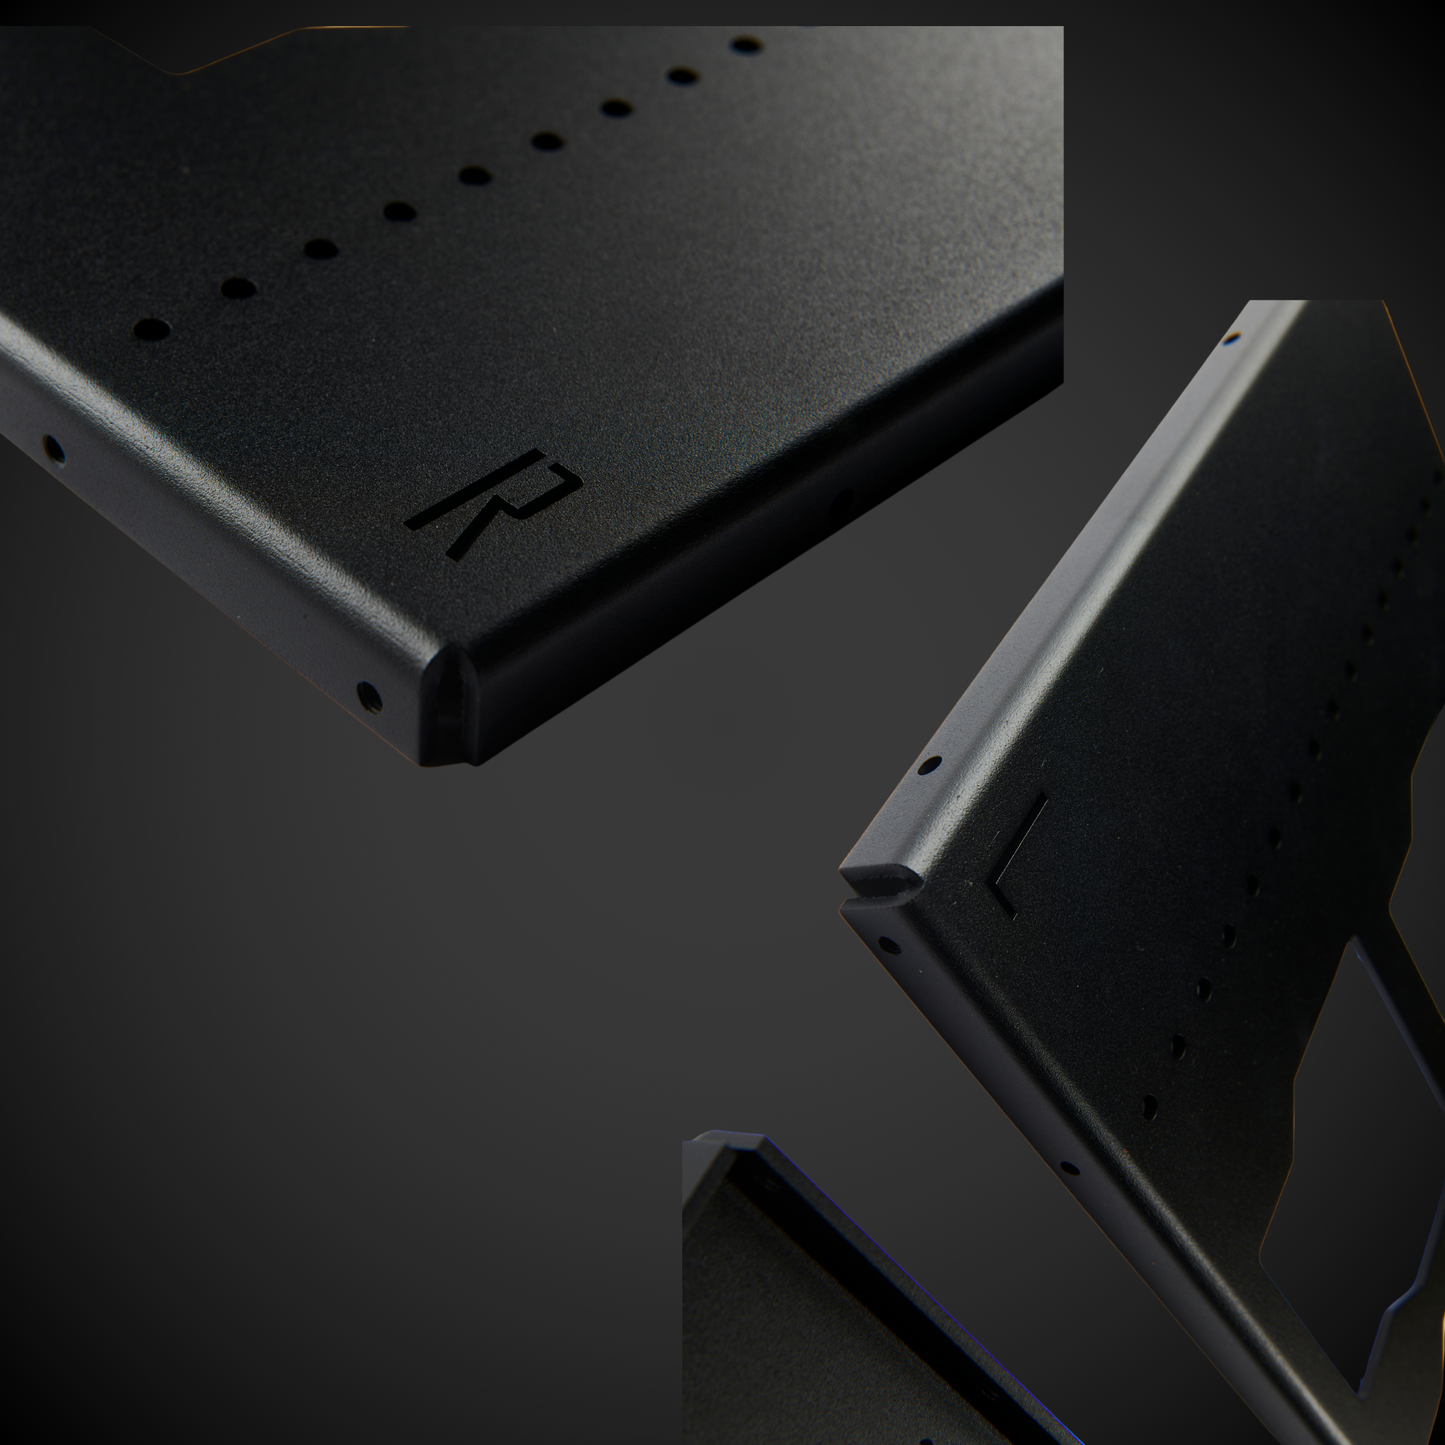
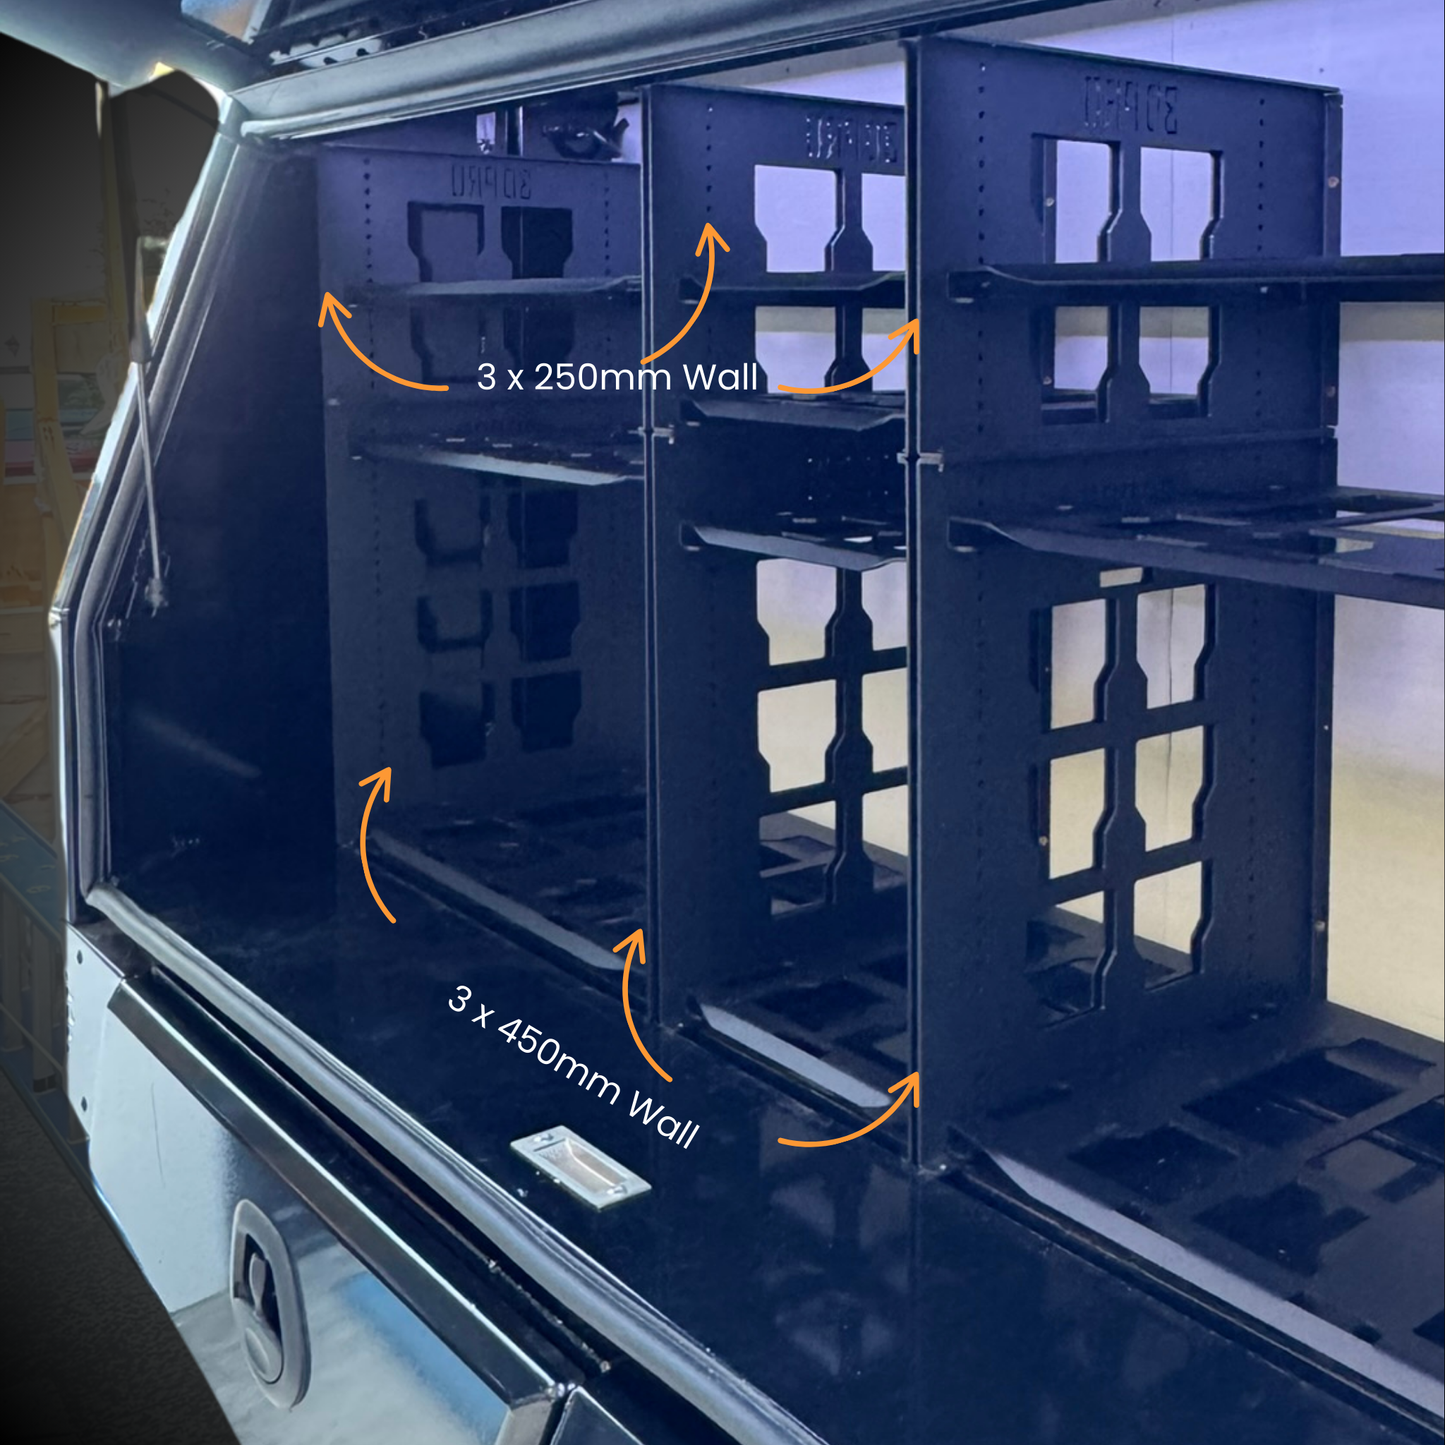
450mm Height Set of Walls (Pack A Shelf)
Quantity
View full details


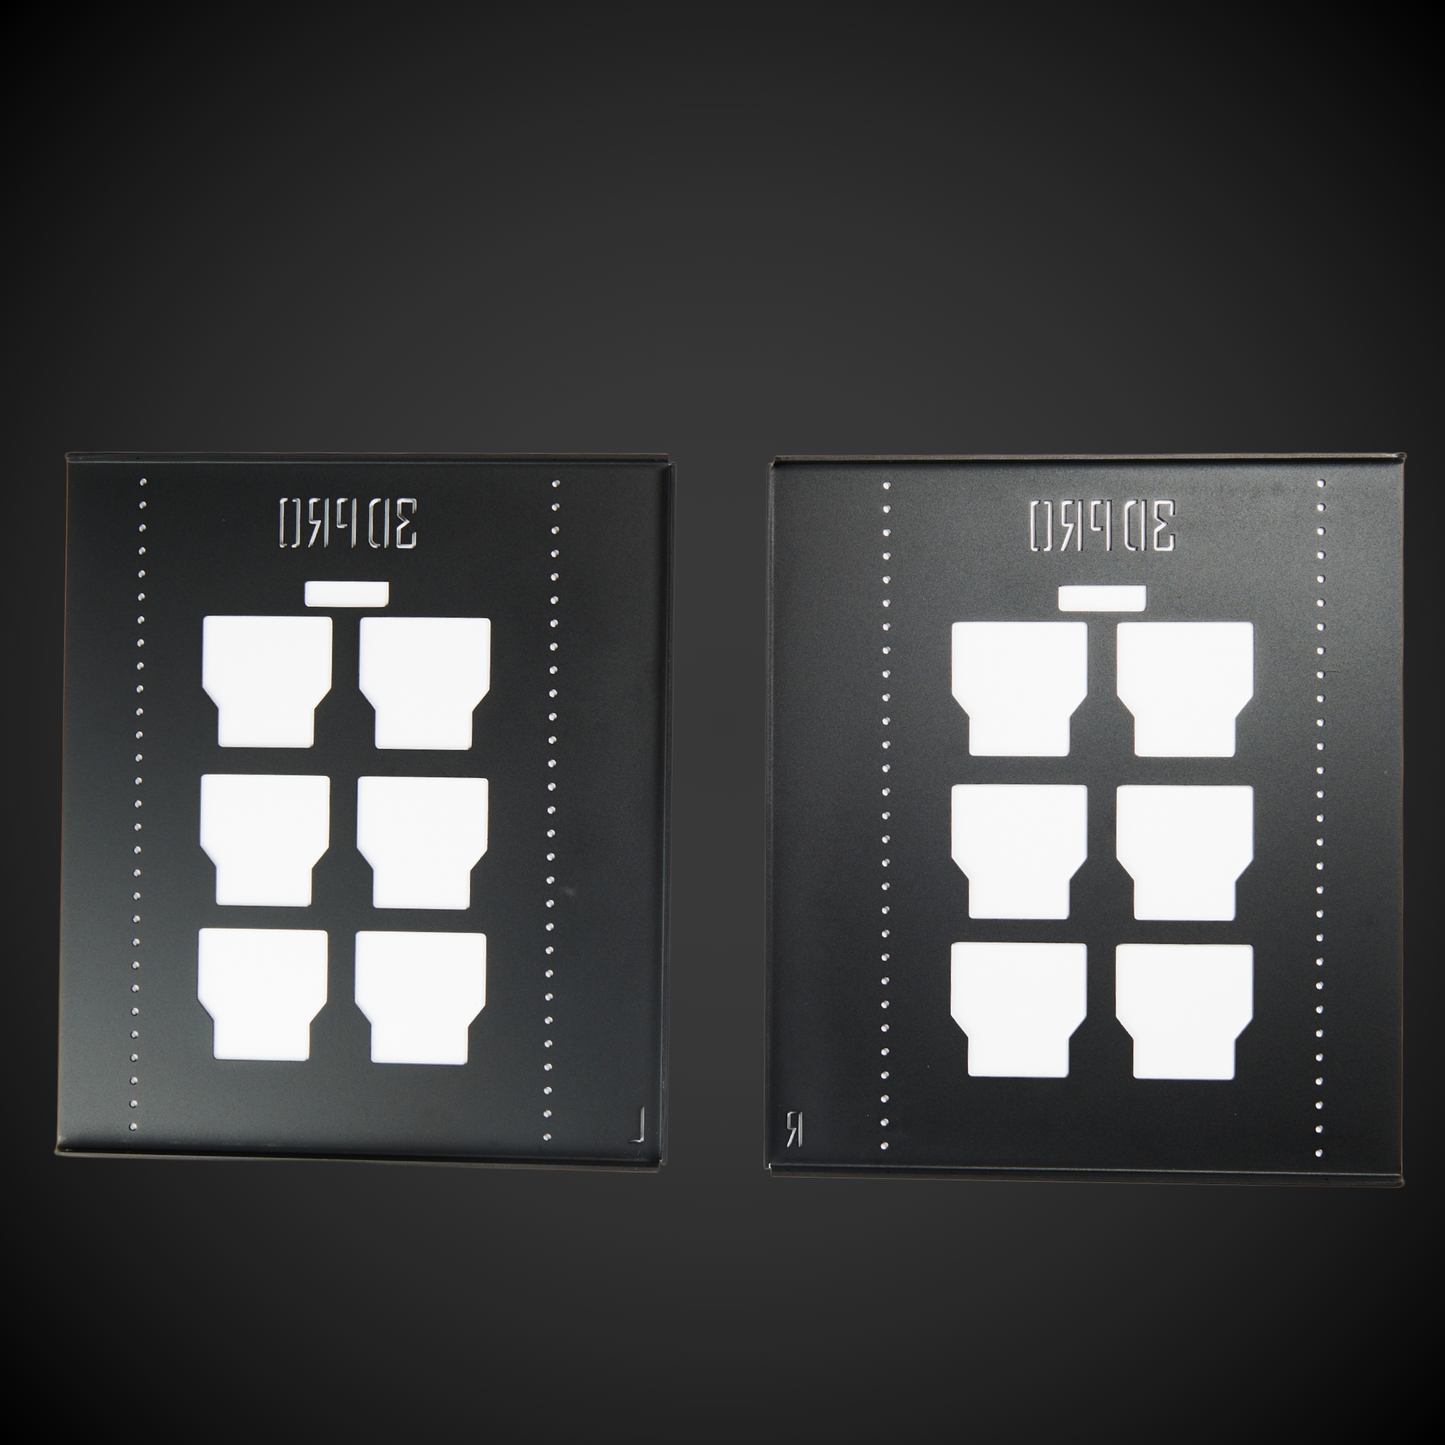

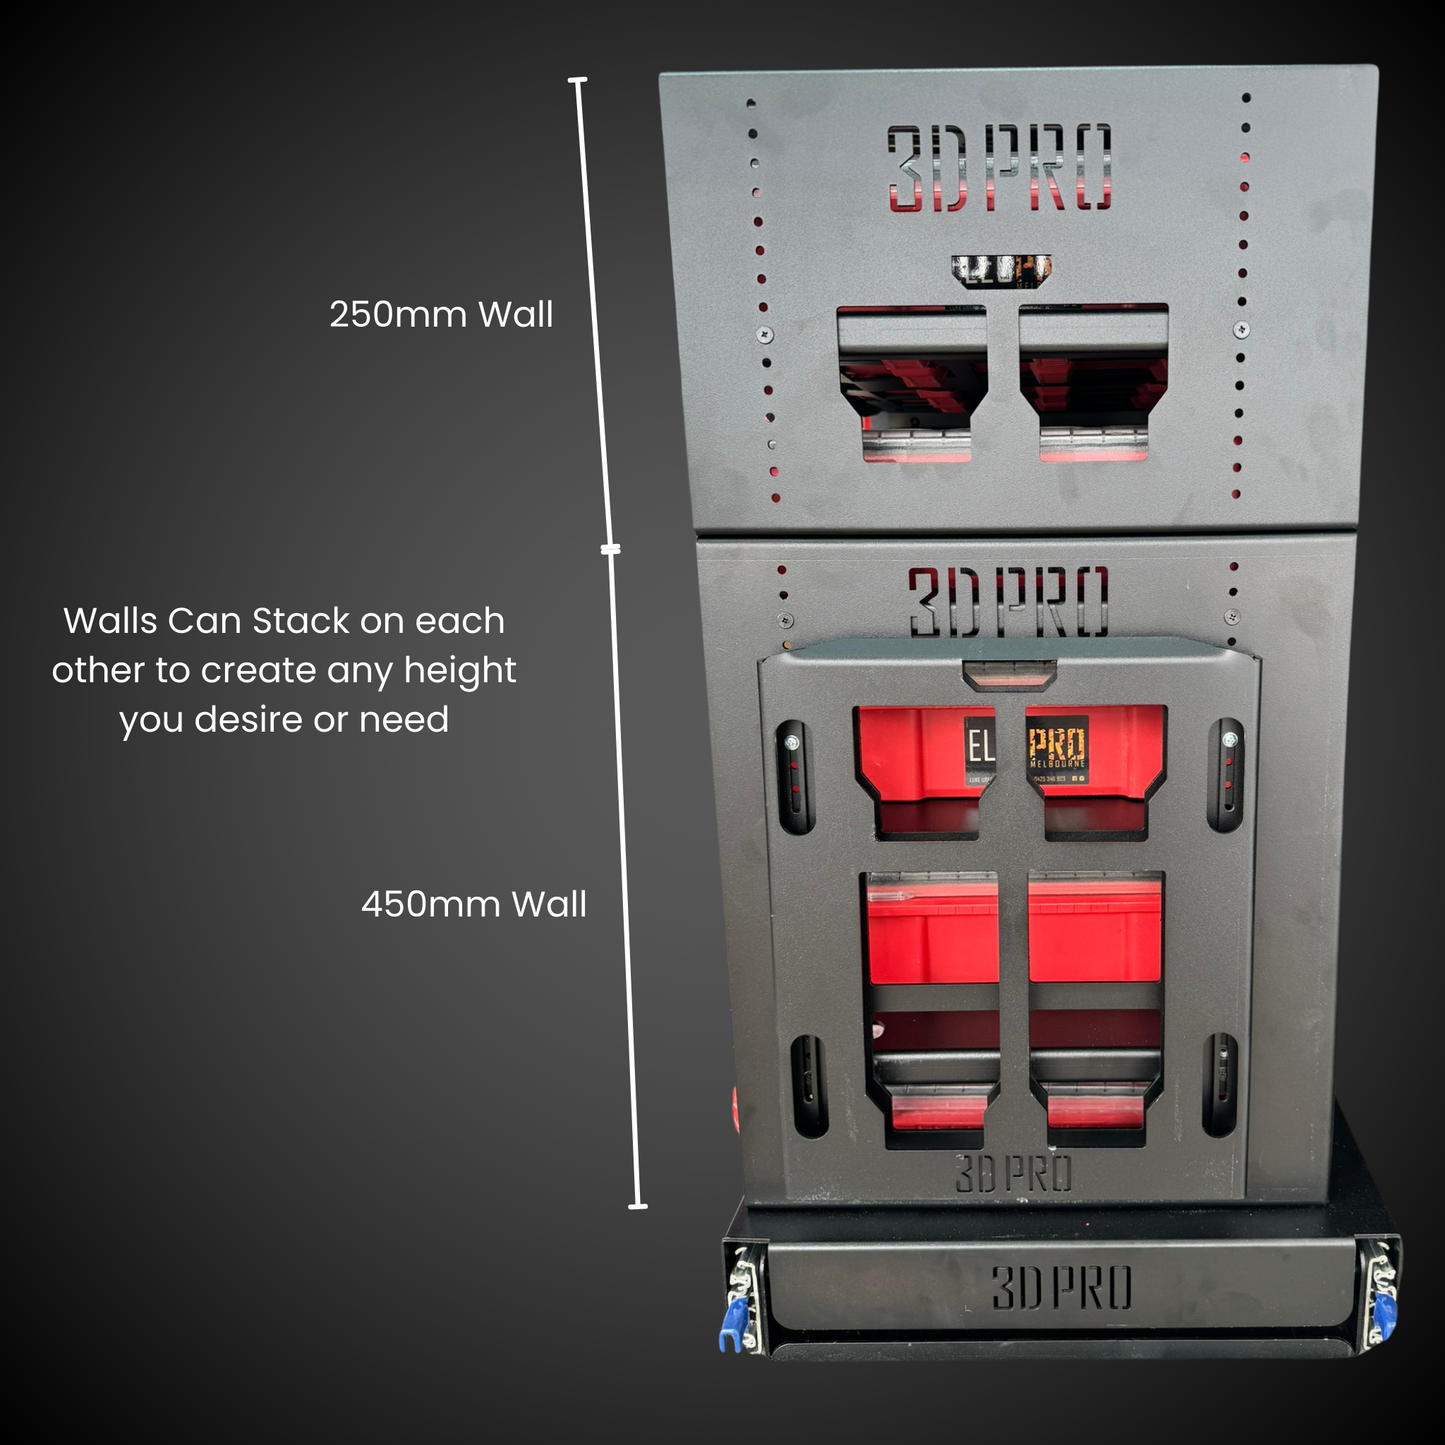


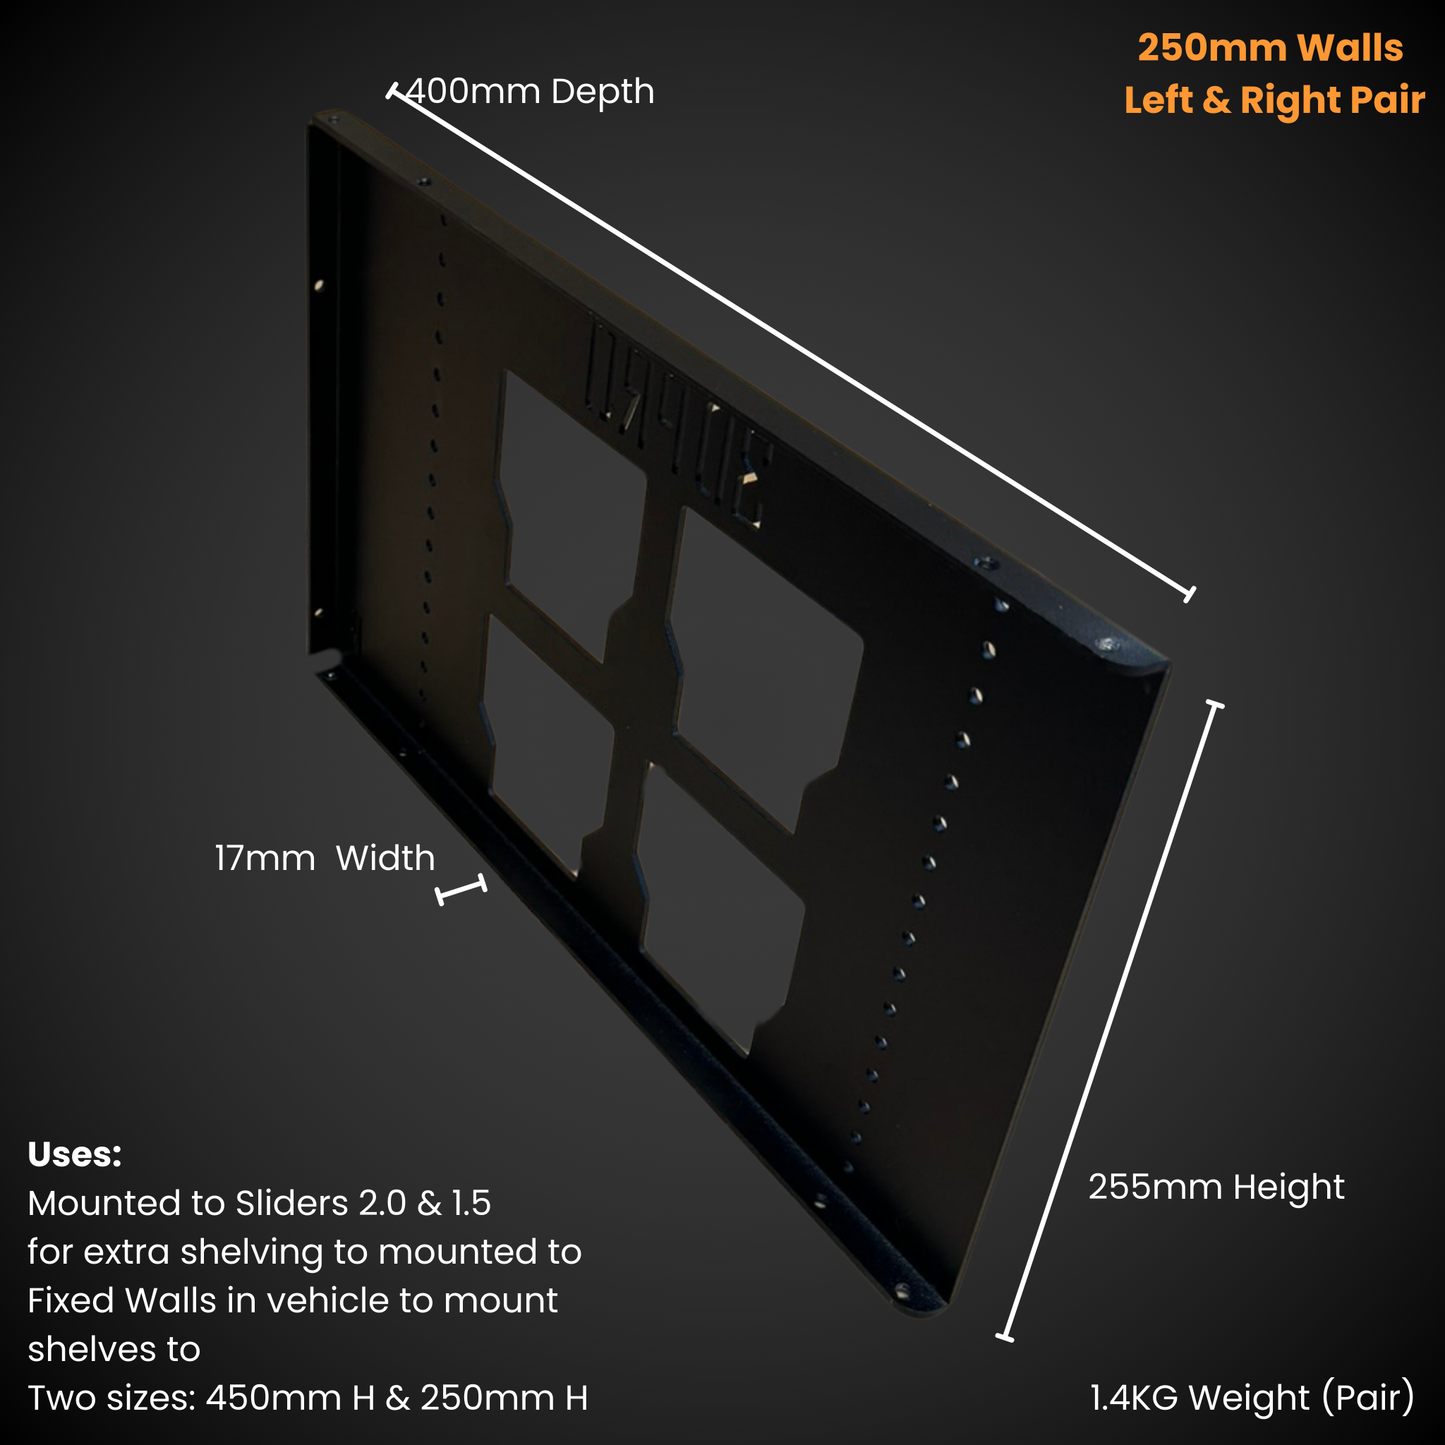
250mm Height Set of Walls (Pack A Shelf)
Quantity
View full details


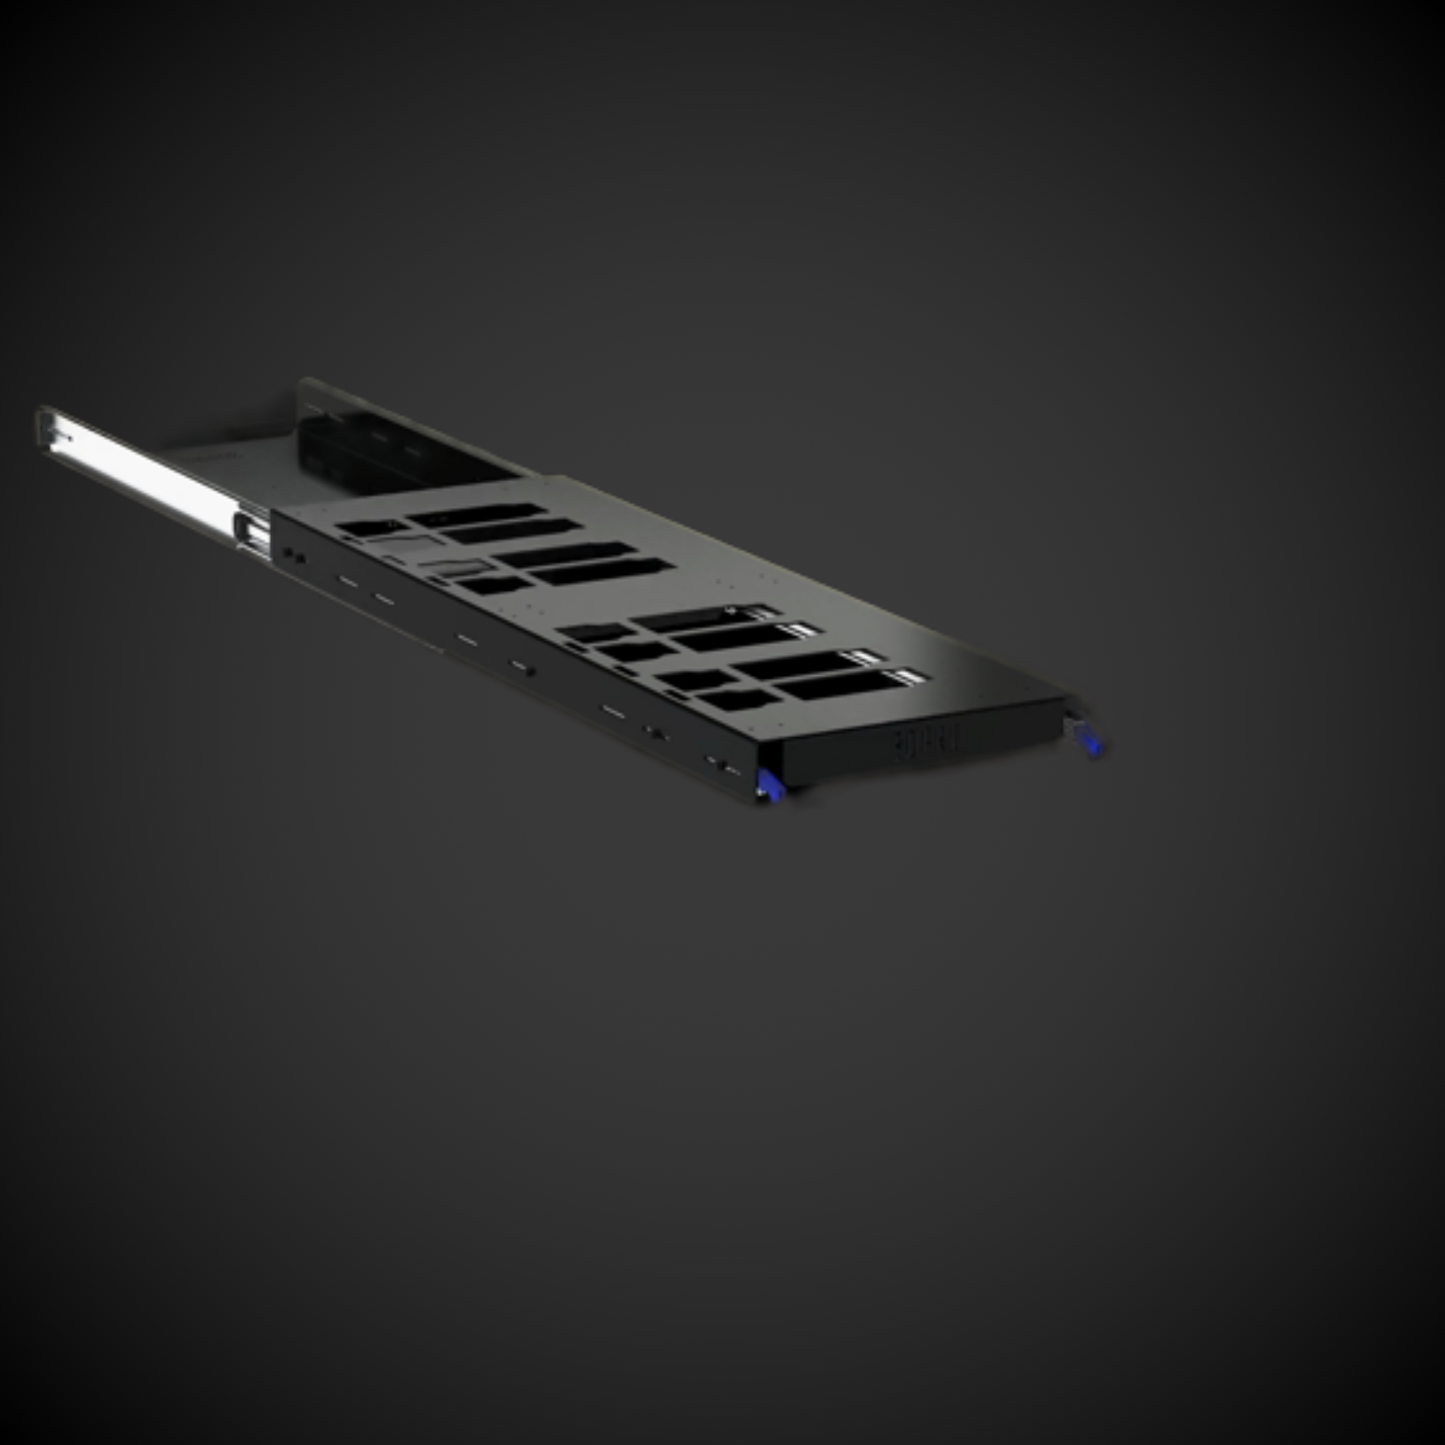
(PRE ORDER) 1.5 Mini Slider (Pack A Shelf)
Quantity
View full details


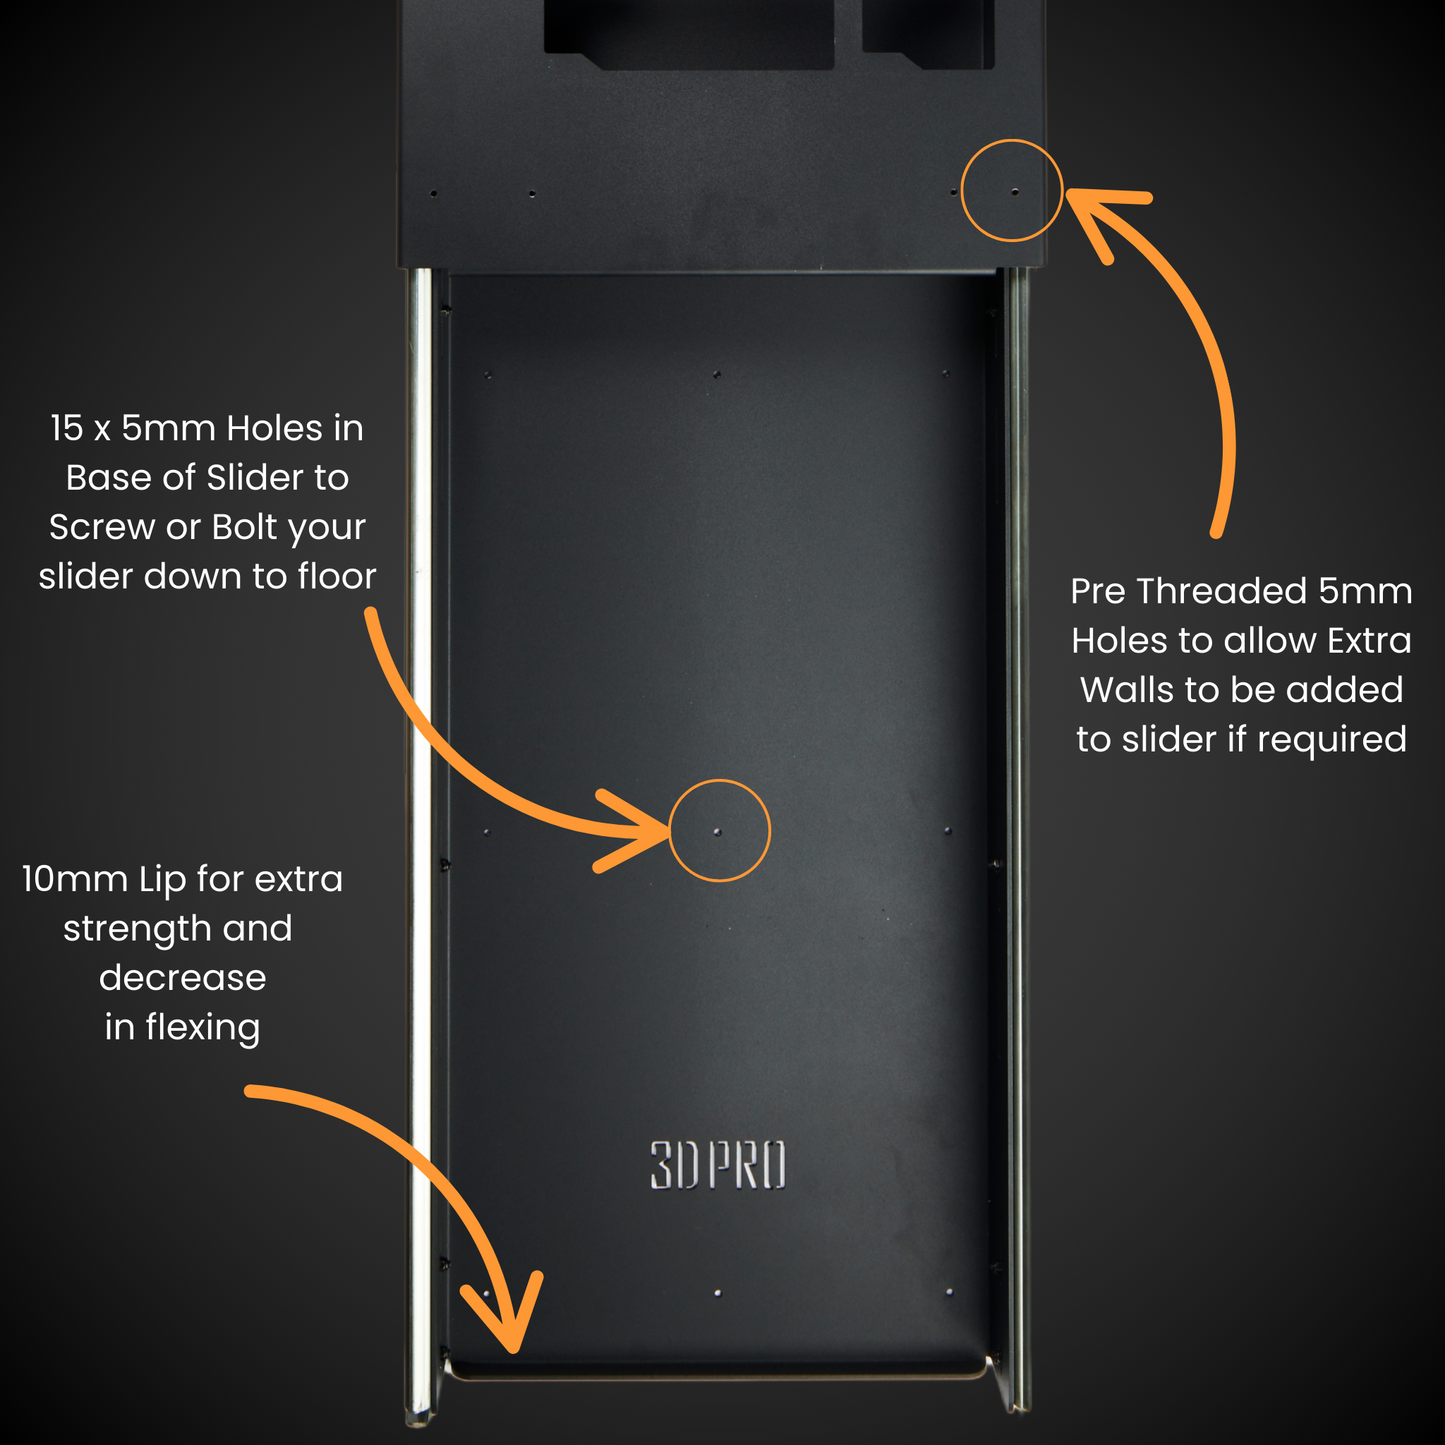


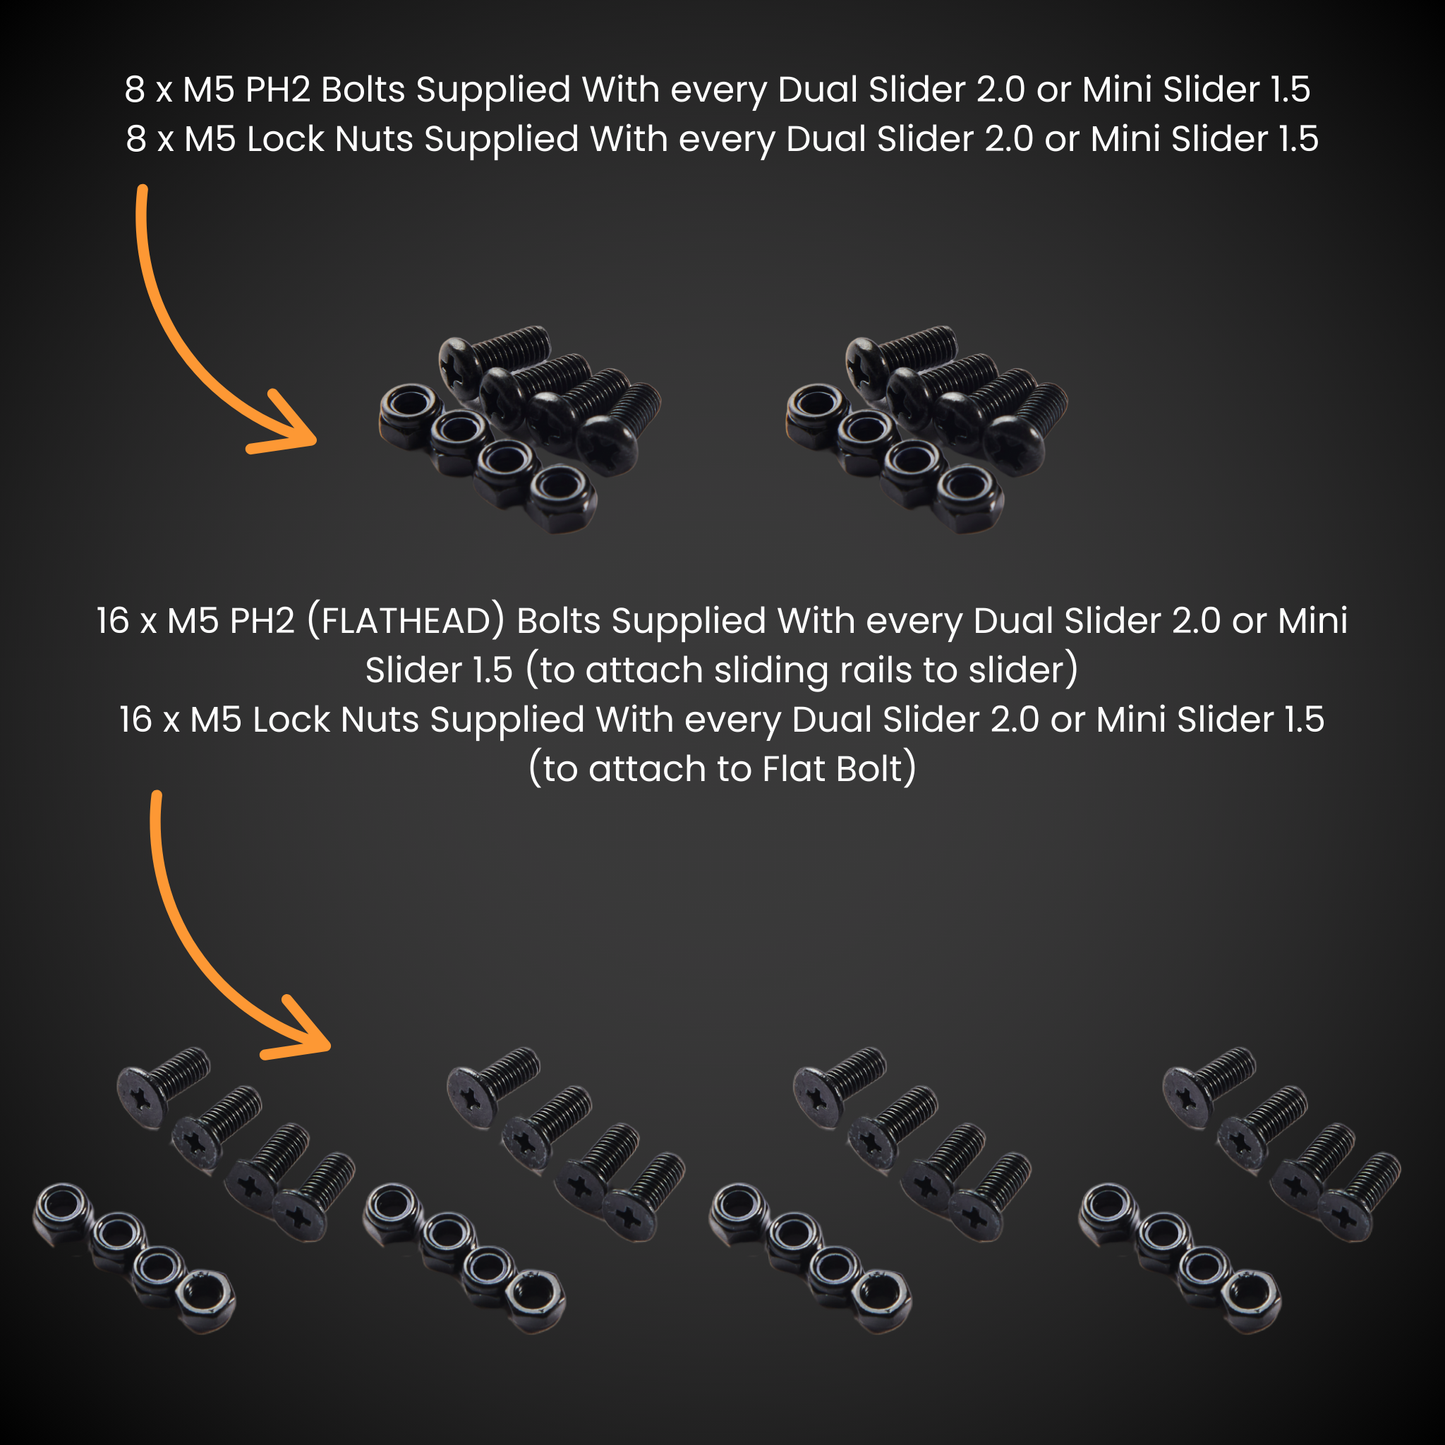


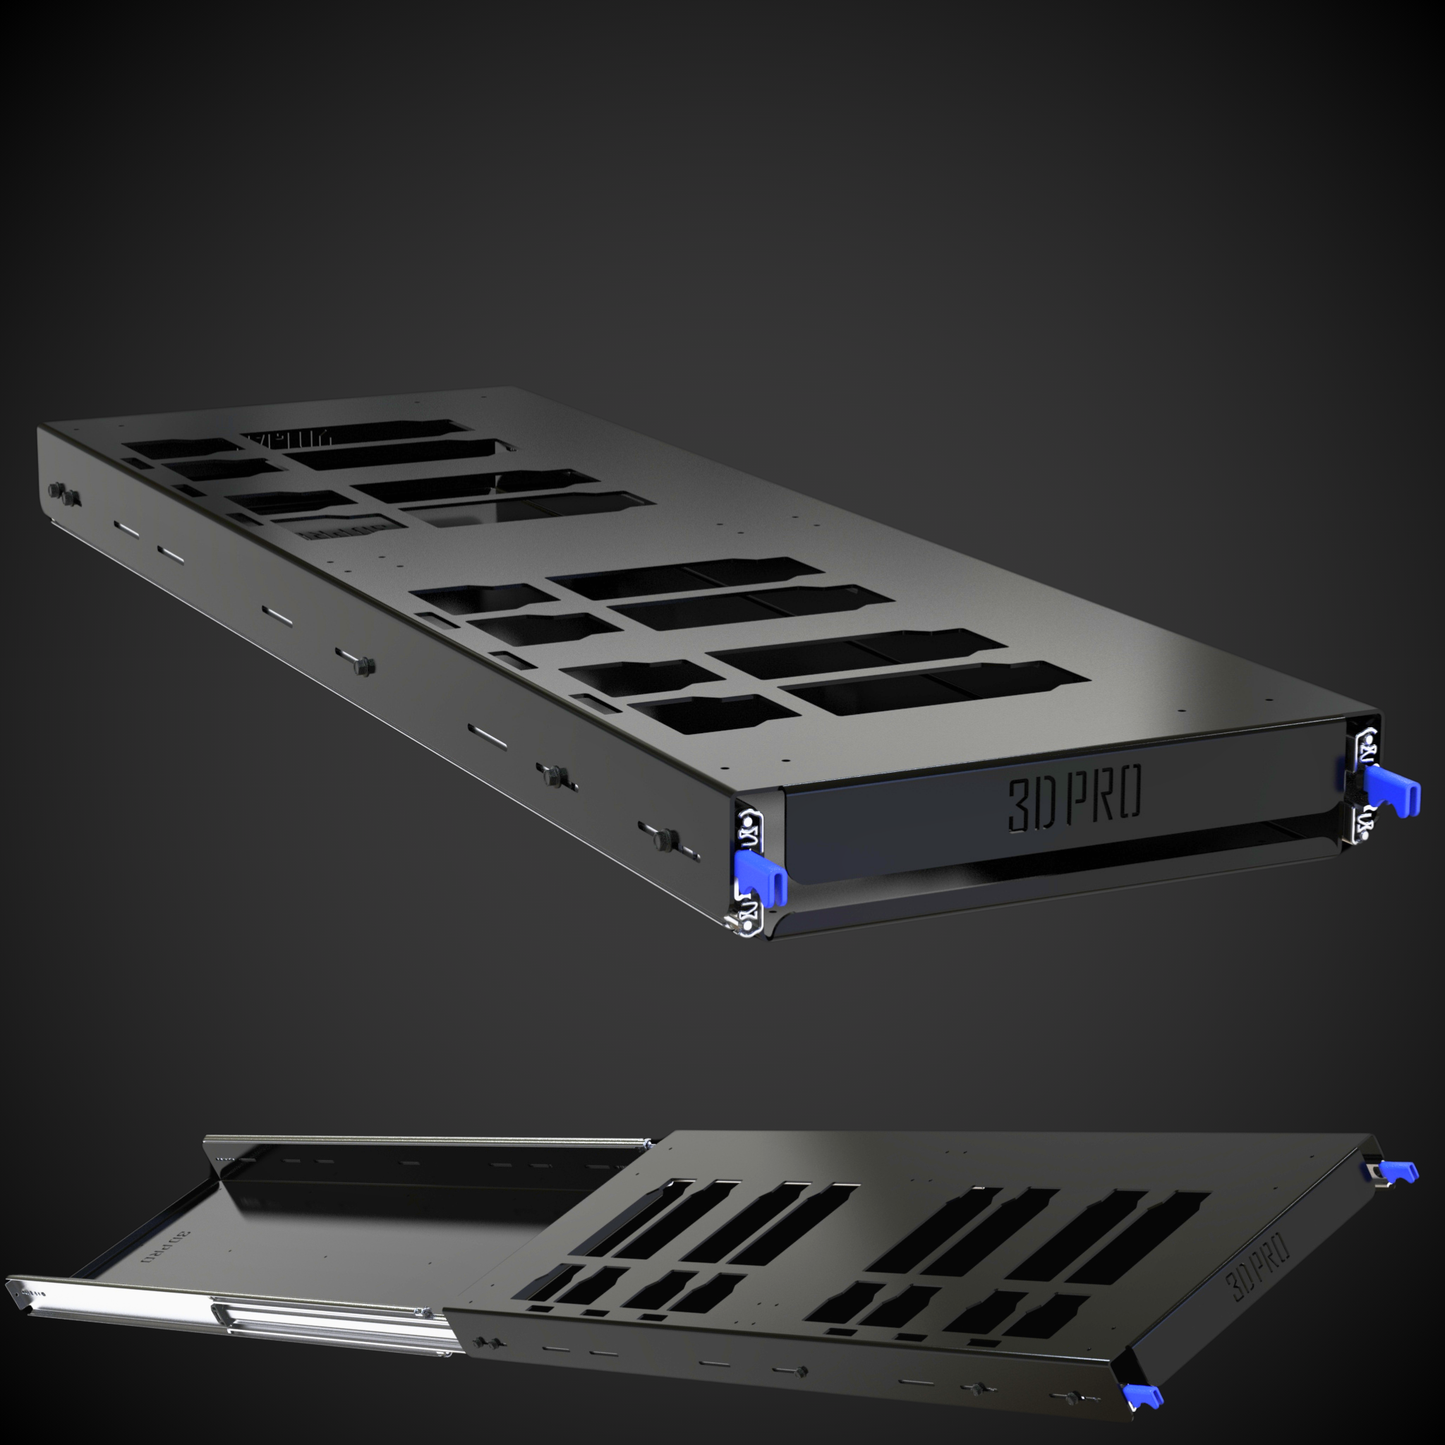
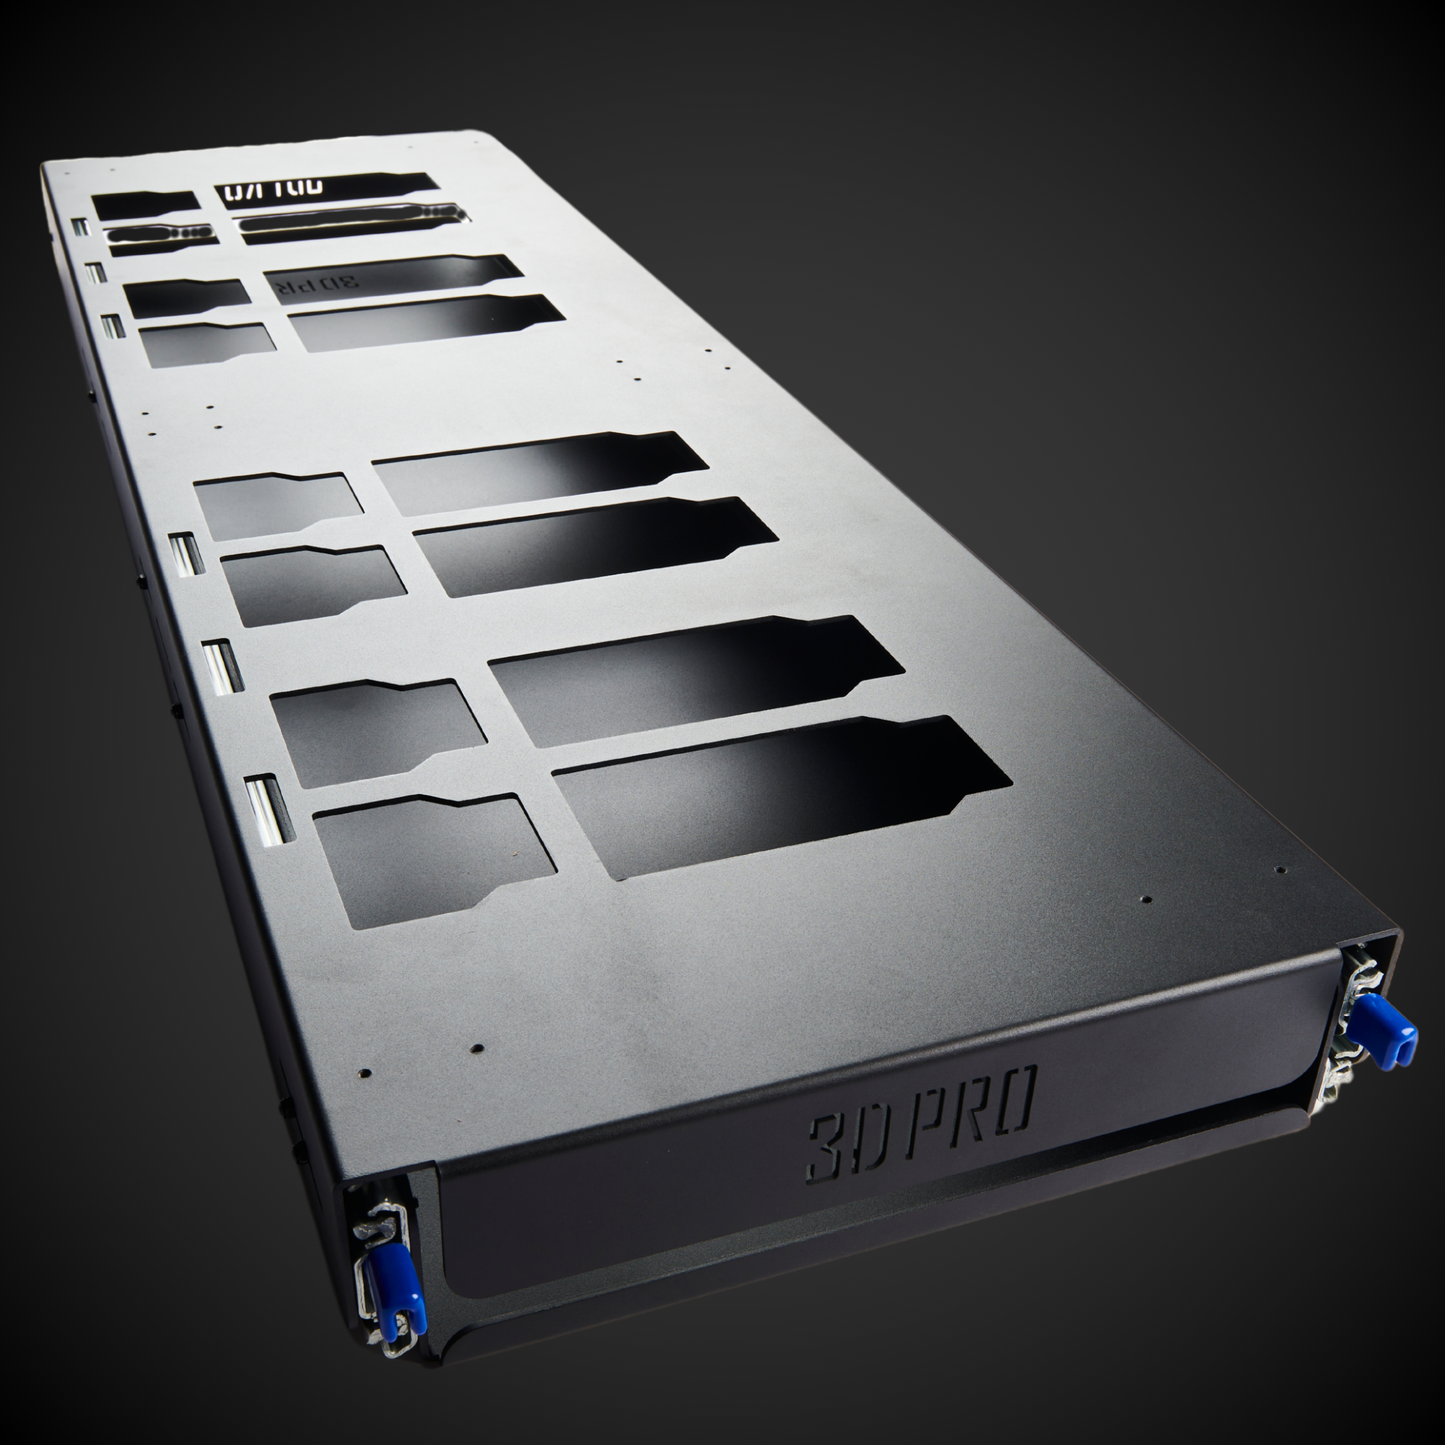
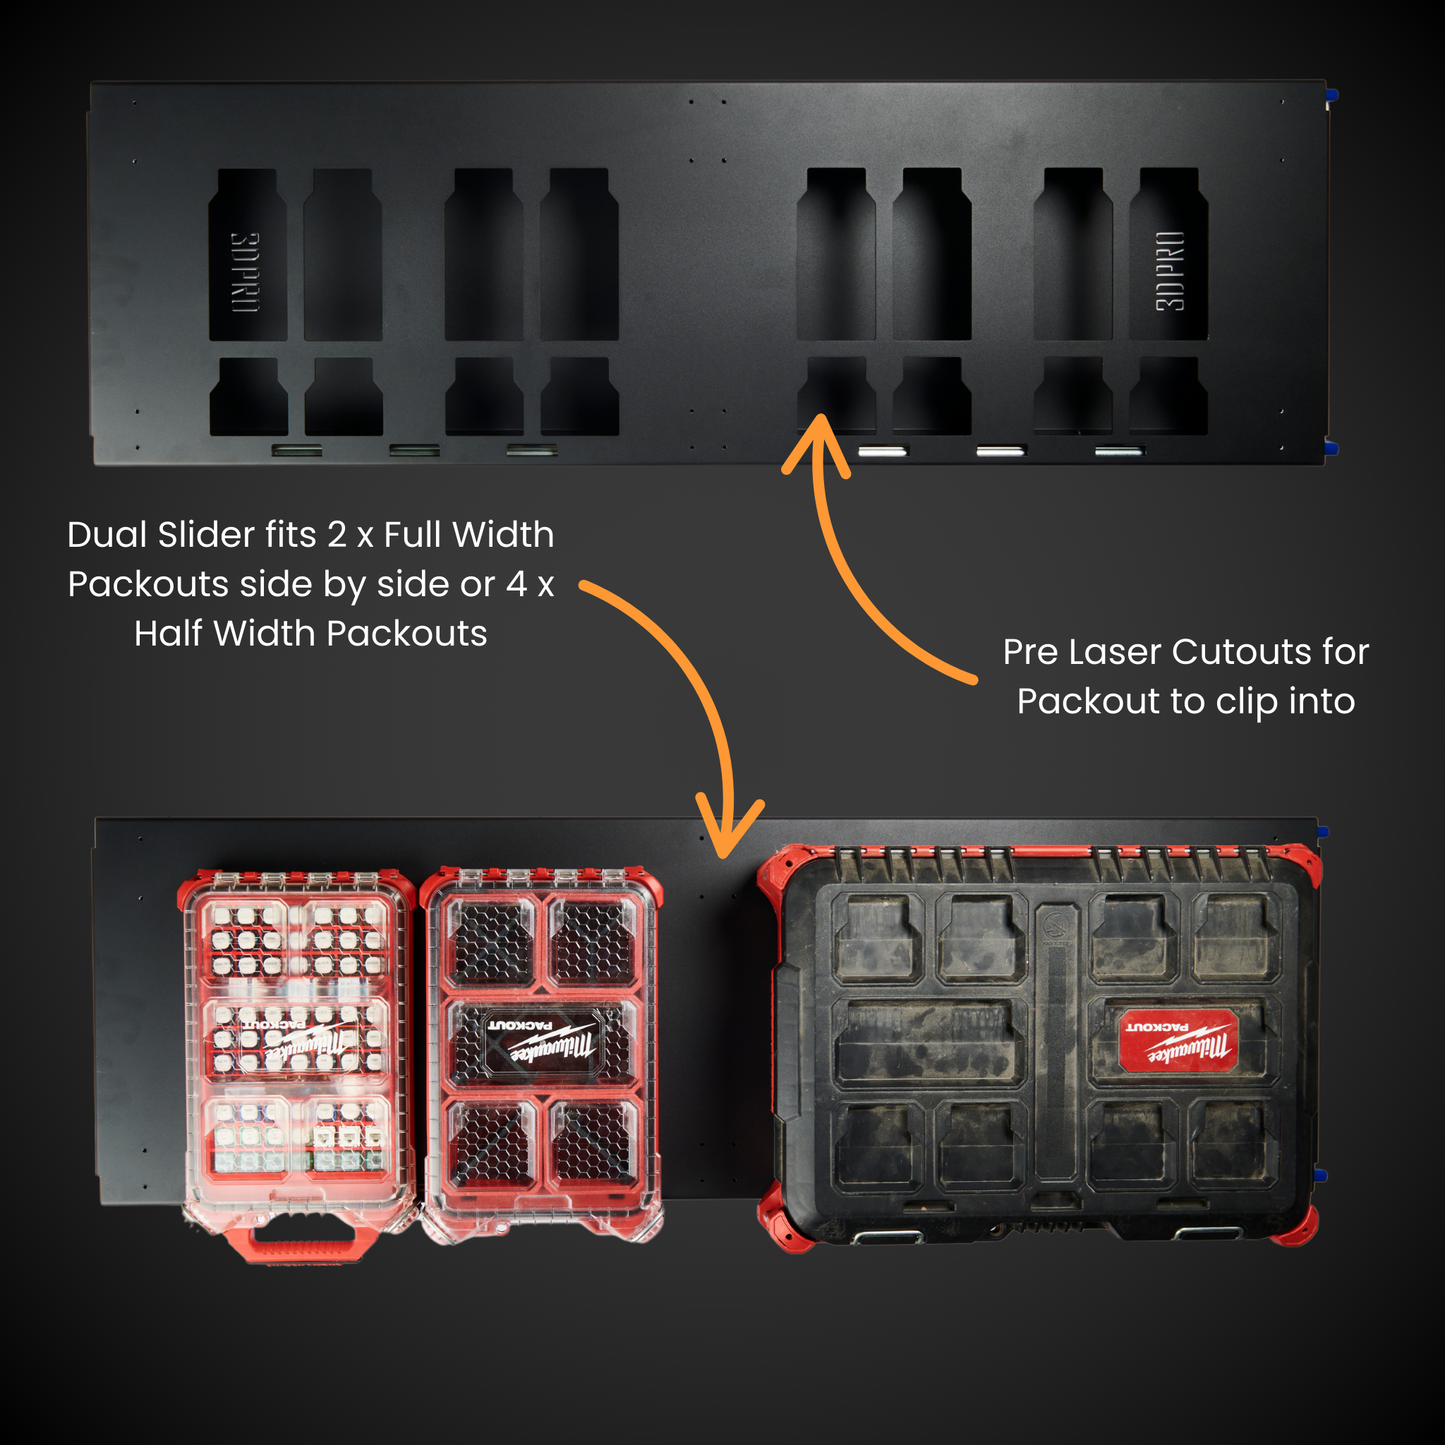
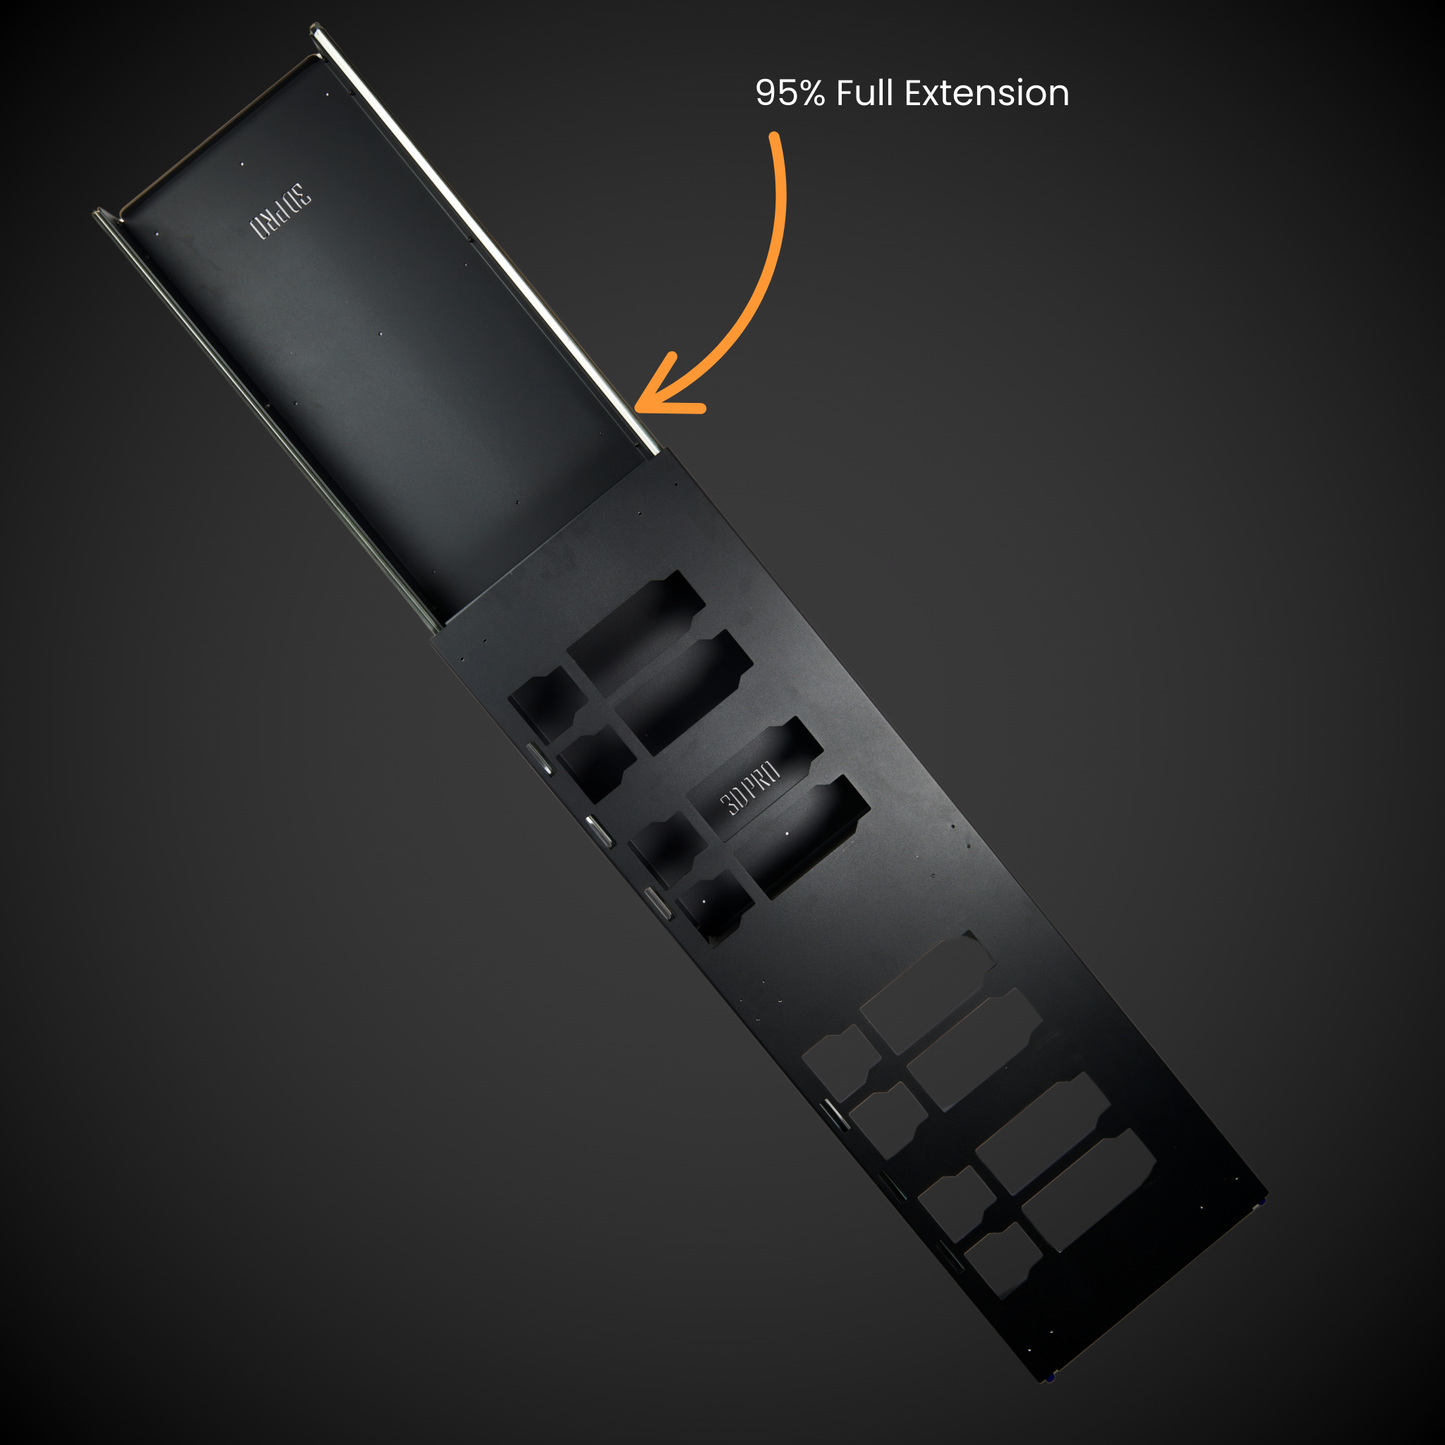
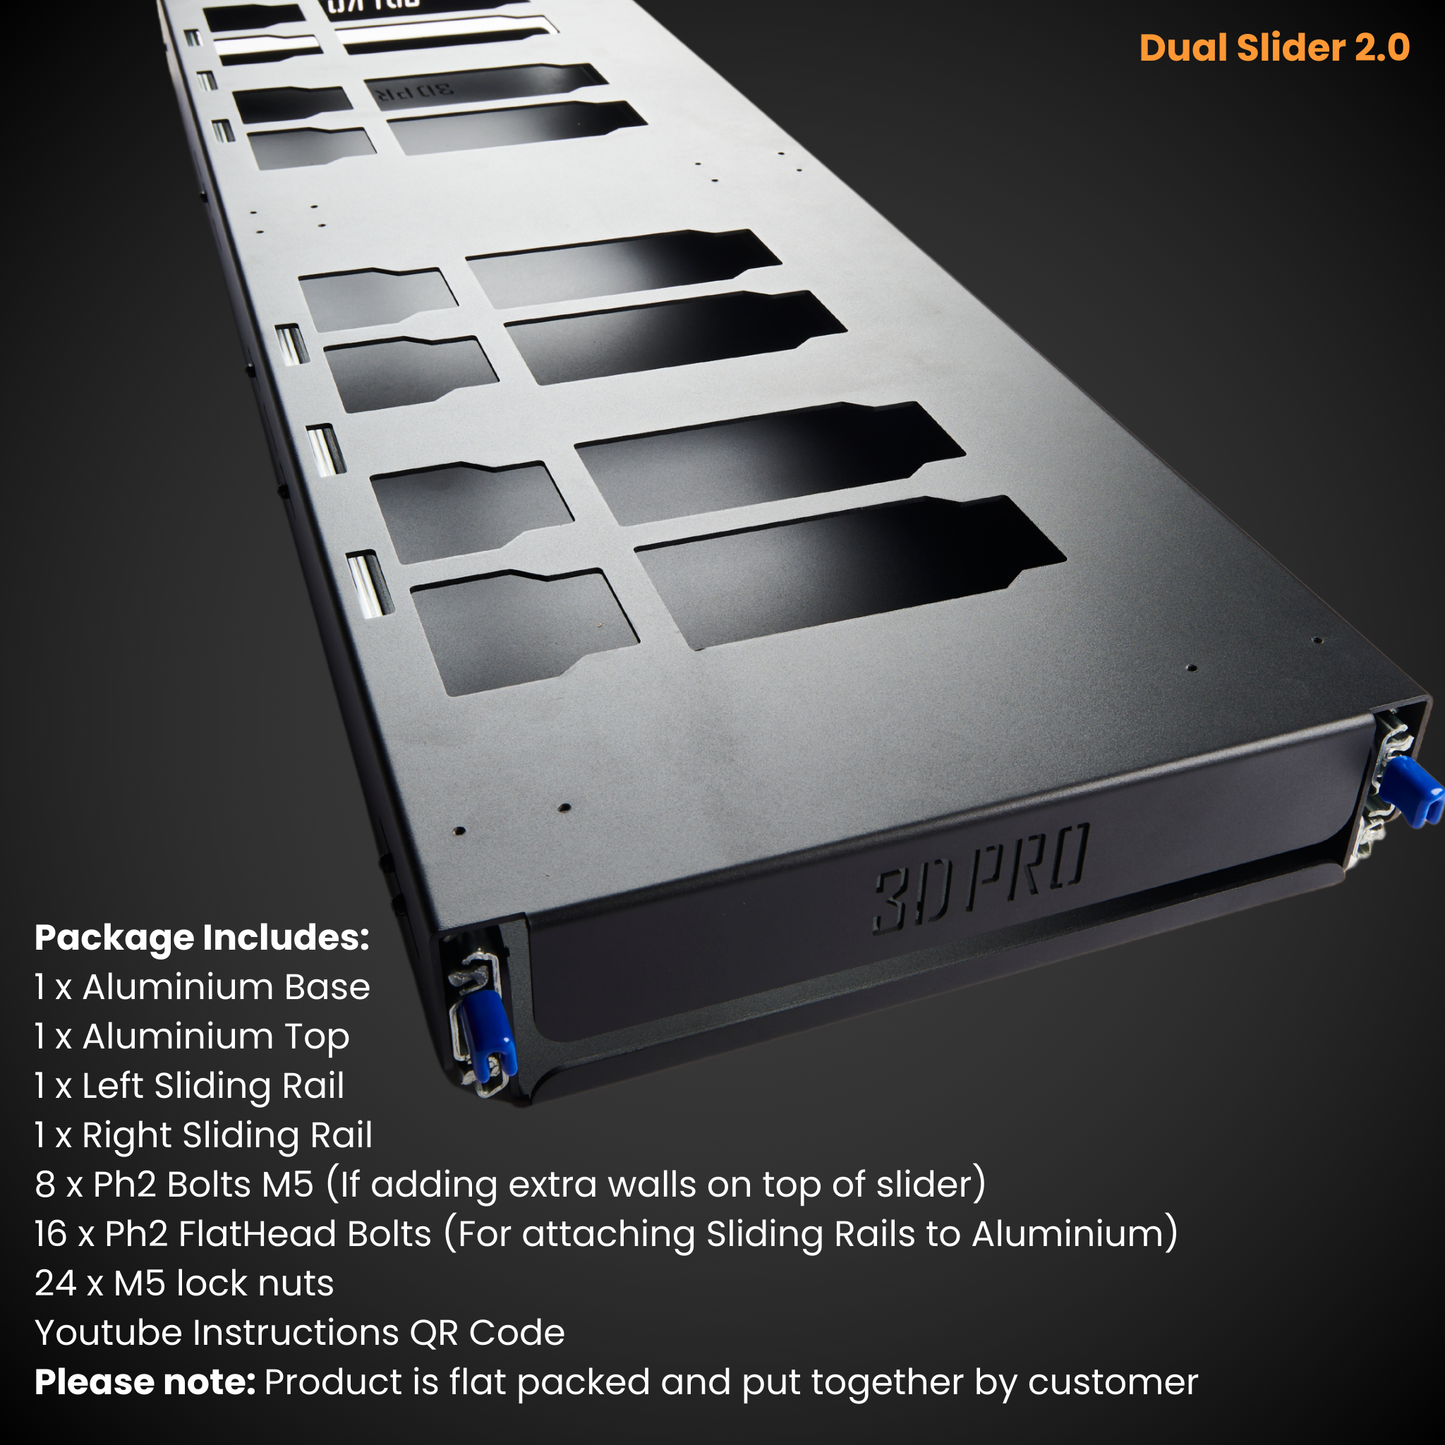
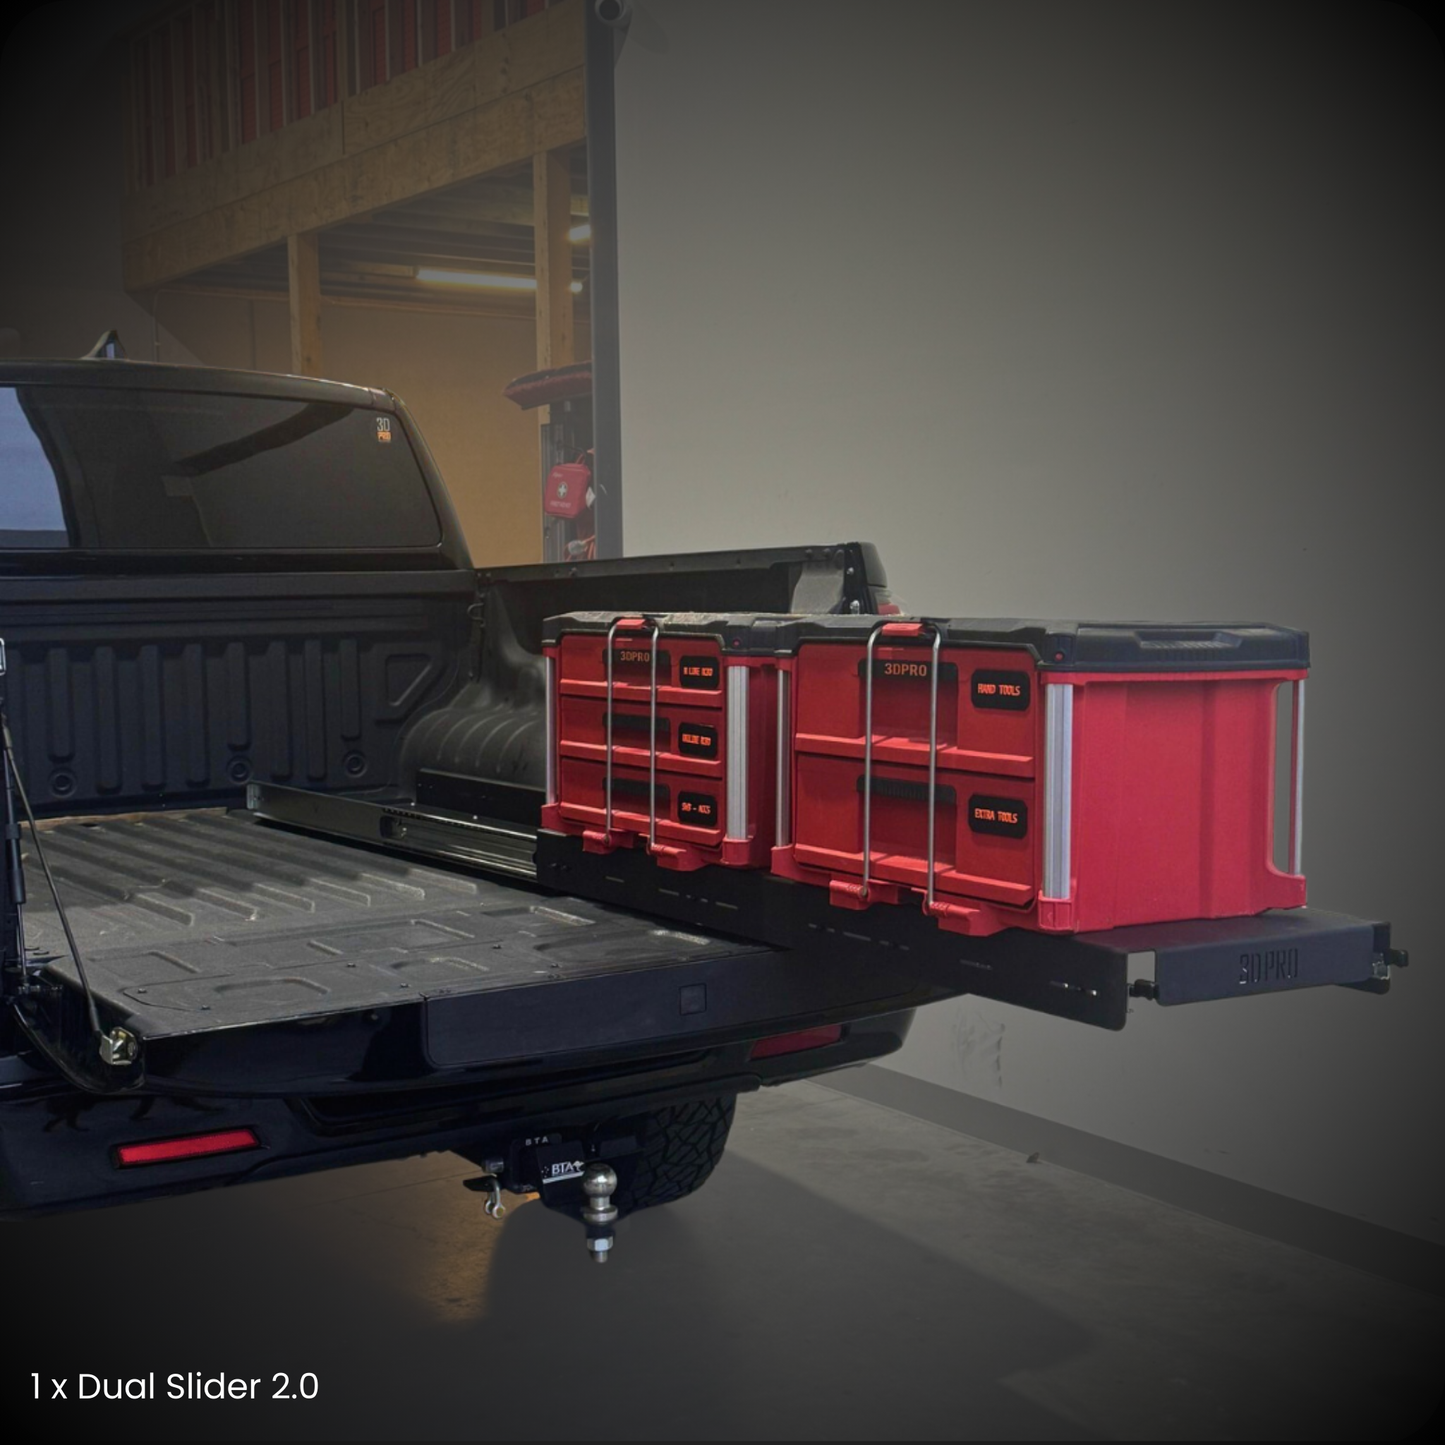
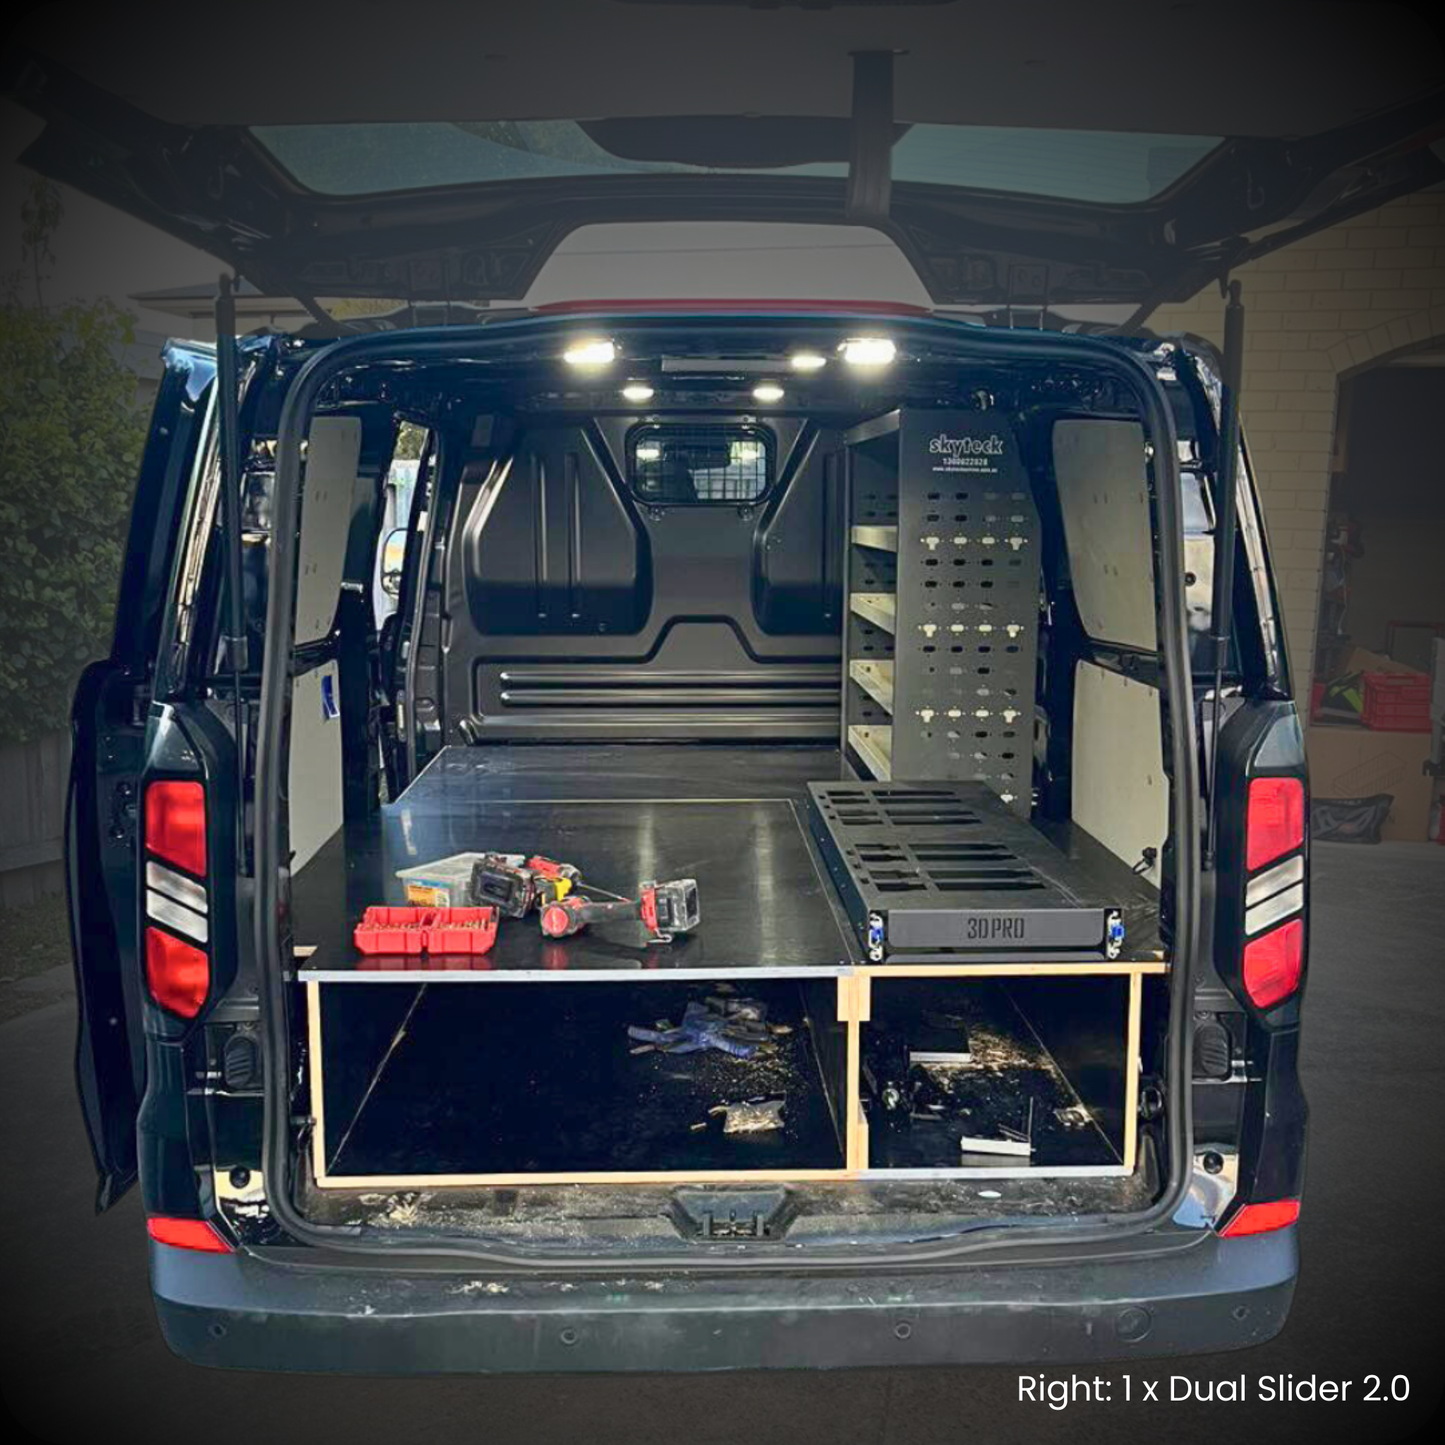
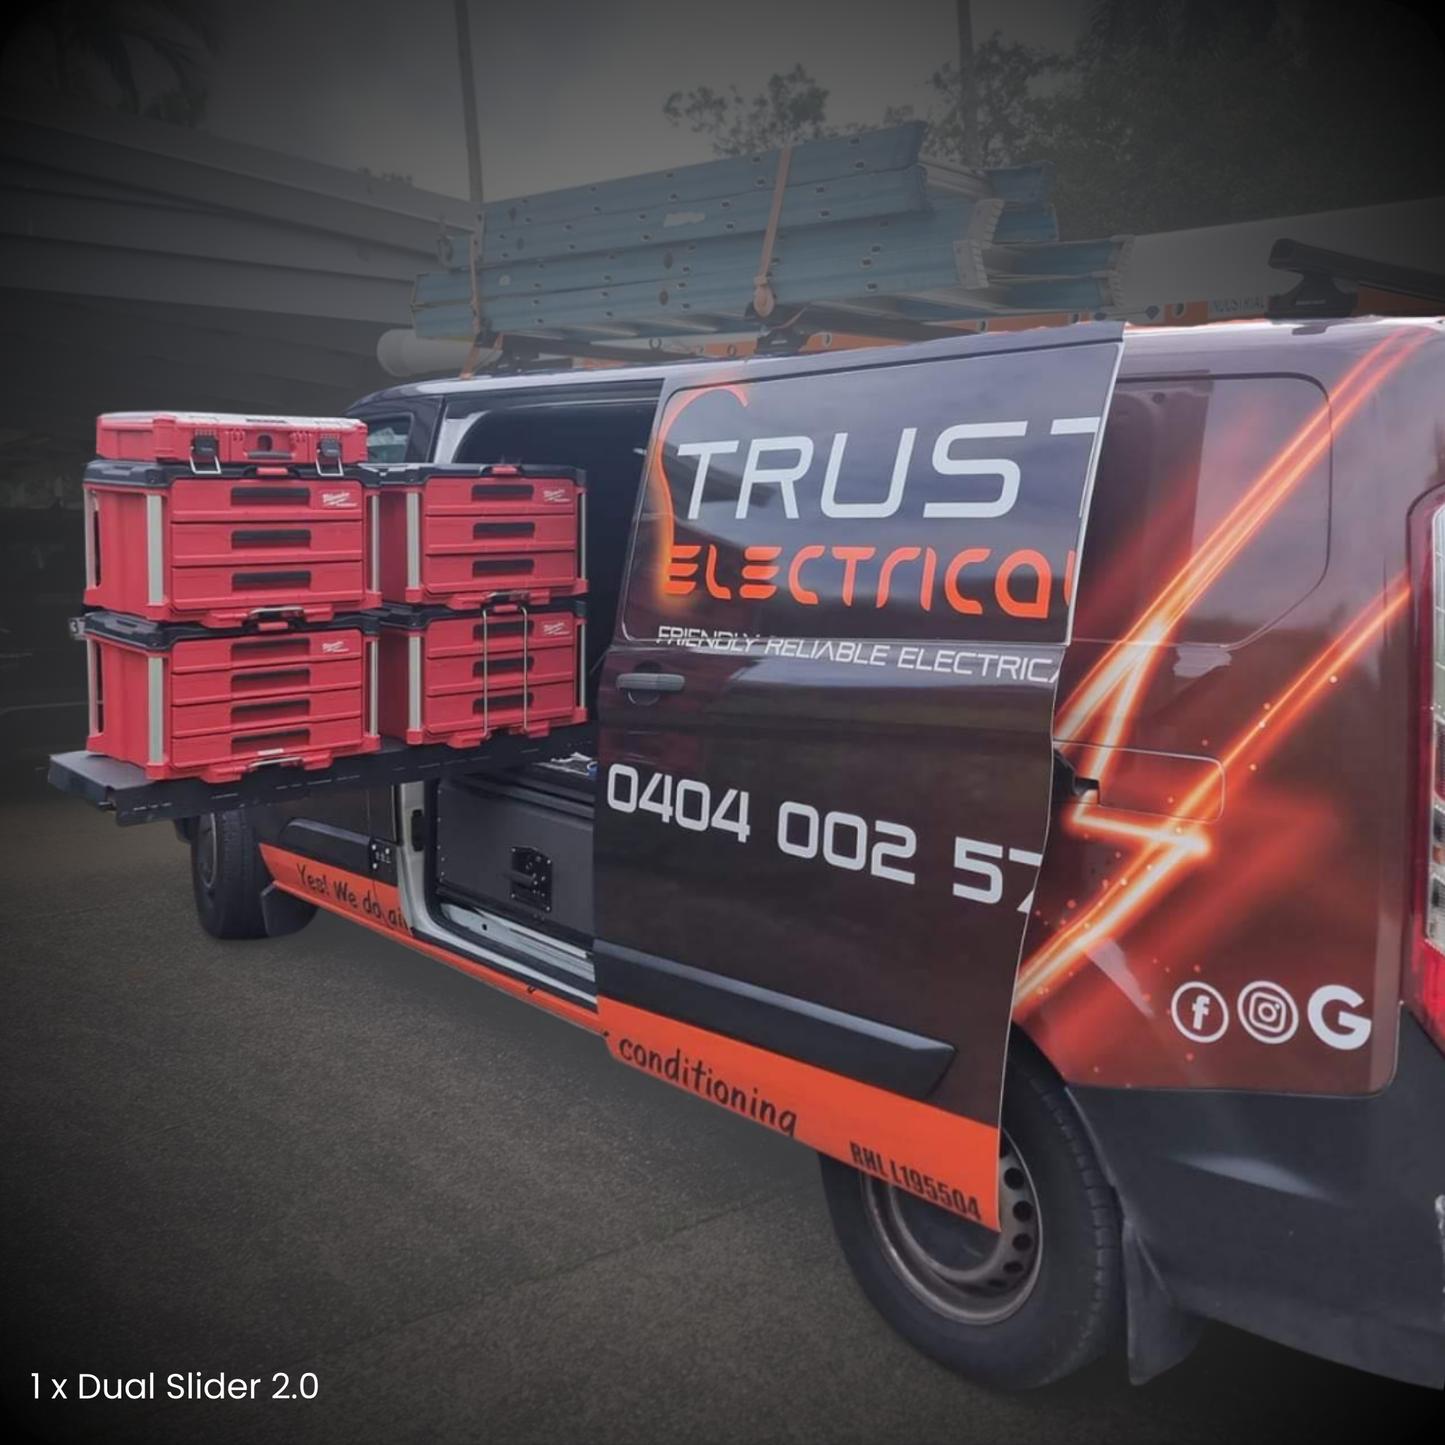
(Pre Order) 2.0 Dual Slider (Pack A Shelf)
Quantity
View full details